Hello, Holograms

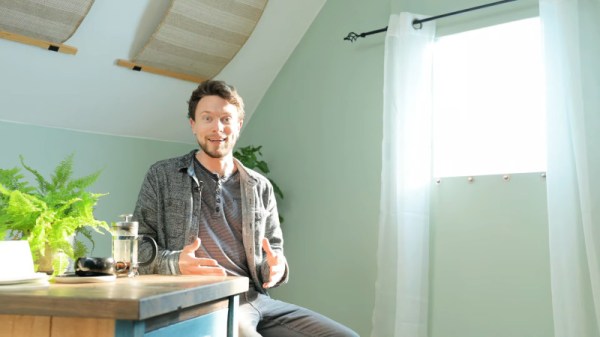
Holograms are tricky to describe because science-fiction gives the name to any three-dimensional image. The science-fact versions are not as flashy, but they are still darn cool. Legitimate holograms are images stored on a photographic medium, and they retain a picture of the subject from certain angles. In other words, when [Justin Atkin] makes a hologram of a model building, (video, embedded below) you can see the east side of the belfry, but when you reorient, you see the west side, or the roof if you point down. Holography is different from stereoscopy, which shows you a 3D image using two cameras. With a stereoscopic image, you cannot tilt it and see a new part of the subject, so there is a niche for each method.

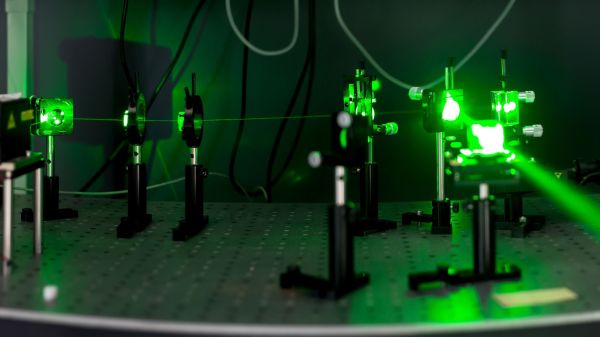
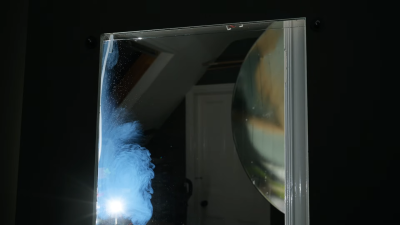
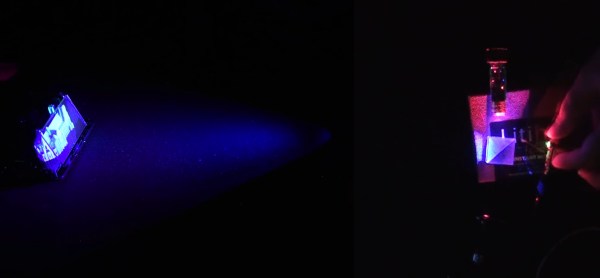
There are a couple of different methods for making a hologram at home. First, you probably want a DIY hologram kit since it will come with the exposure plate and a known-good light source. Far be it for us to tell you you can’t buy plates and a laser pointer to take the path less traveled. Next, you need something that will not move, so we’re afraid you cannot immortalize your rambunctious kitty. The last necessity is a stable platform since you will perform a long-exposure shot, and even breathing on the setup can ruin the image. Different colors come from the coherent light source, so getting the “Rainbow Holograms” advertised in the video is a matter of mixing lights. Since you can buy red, green, and blue laser pointers for a pittance, you can do color remixes to your content.

Another type of hologram appears on things like trading cards as those wildly off-color (chromatic, not distasteful) images of super-heroes or abstract shapes. They’re a different variety, which can be printed en-masse, unlike the one-off [Justin] shows us how to make.

If you’re yearning for volumetric displays, we are happy to point you to this beauty capable of showing a jaw-dropping 3D model or this full-color blocky duck.

Continue reading “Hello, Holograms”

Precision Optics Hack Chat With Jeroen Vleggaar Of Huygens Optics

Join us on Wednesday, December 2nd at noon Pacific for the Precision Optics Hack Chat with Jeroen Vleggaar!

We sometimes take for granted one of the foundational elements of our technological world: optics. There are high-quality lenses, mirrors, filters, and other precision optical components in just about everything these days, from the smartphones in our pockets to the cameras that loom over us from every streetlight and doorway. And even in those few devices that don’t incorporate any optical components directly, you can bet that the ability to refract, reflect, collimate, or otherwise manipulate light was key to creating the electronics inside it.

The ability to control light with precision is by no means a new development in our technological history, though. People have been creating high-quality optics for centuries, and the methods used to make optics these days would look very familiar to them. Precision optical surfaces can be constructed by almost anyone with simple hand tools and a good amount of time and patience, and those components can then be used to construct instruments that can explore the universe wither on the micro or macro scale.

Jeroen Vleggaar, know better as Huygens Optics on YouTube, will drop by the Hack Chat to talk about the world of precision optics. If you haven’t seen his videos, you’re missing out!

When not conducting optical experiments such as variable surface mirrors and precision spirit levels, or explaining the Double Slit Experiment, Jeroen consults on optical processes and designs. In this Hack Chat, we’ll talk about how precision optical surfaces are manufactured, what you can do to get started grinding your own lenses and mirrors, and learn a little about how these components are measured and used.

join-hack-chatOur Hack Chats are live community events in the Hackaday.io Hack Chat group messaging. This week we’ll be sitting down on Wednesday, December 2 at 12:00 PM Pacific time. If time zones baffle you as much as us, we have a handy time zone converter.

Click that speech bubble to the right, and you’ll be taken directly to the Hack Chat group on Hackaday.io. You don’t have to wait until Wednesday; join whenever you want and you can see what the community is talking about.

Continue reading “Precision Optics Hack Chat With Jeroen Vleggaar Of Huygens Optics”

“Artificial Sun” Lighting Via Old Satellite Dishes

Real sunlight is a beautiful thing, but due to the vagaries of Earth’s orbit and local weather systems, it’s not available all the time. [Matt] decided this wasn’t good enough, and set about building a rig to replicate the sun’s rays as closely as possible.

Rayleigh scattering is emulated by passing the light through a glass chamber filled with soapy water – taking advantage of the Tyndall effect.

The great distance between the Sun and the Earth means that the sun’s rays are essentially parallel from our local vantage point. Replicating this, and the soothing nature of a blue sky, were [Matt]’s primary goals with the project. To achieve this, an old satellite dish was pressed into service as a parabolic reflector, coated with mirror-finish vinyl strips. A 500W white LED with a good color rendering index was fitted at the focal point, outfitted with a water cooling system to shed heat. With a point source at its focal point, the parabolic reflector bounces the light such that it the rays are parallel, giving the sense that the light source is coming from an effectivelyl infinite distance away. To then achieve the blue sky effect, the light was then passed through a glass chamber filled with soapy water, which scatters the light using the Tyndall effect. This mimics the Rayleigh scattering in Earth’s atmosphere.

The final result is amazing, with [Matt] shooting footage that appears to be filmed in genuine daylight – despite being shot at night or on rainy days. He also features a cutdown build that can be achieved in a far cheaper and compact form, using Fresnel lenses and blue film. We’ve featured [Matt]’s daylight experiments before, though we’re amazed at the new level reached. Video after the break.

Continue reading ““Artificial Sun” Lighting Via Old Satellite Dishes”

Into The Belly Of The Beast With Placemon

No, no, at first we thought it was a Pokemon too, but Placemon monitors your place, your home, your domicile. Instead of a purpose-built device, like a CO detector or a burglar alarm, this is a generalized monitor that streams data to a central processor where machine learning algorithms notify you if something is awry. In a way, it is like a guard dog who texts you if your place is unusually cold, on fire, unlawfully occupied, or underwater.

[anfractuosity] is trying to make a hacker-friendly version based on inspiration from a scientific paper about general-purpose sensing, which will have less expensive components but will lose accuracy. For example, the article suggests thermopile arrays, like low-resolution heat-vision, but Placemon will have a thermometer, which seems like a prudent starting place.

The PCB is ready to start collecting sound, temperature, humidity, barometric pressure, illumination, and passive IR then report that telemetry via an onboard ESP32 using Wifi. A box utilizing Tensorflow receives the data from any number of locations and is training to recognize a few everyday household events’ sensor signatures. Training starts with events that are easy to repeat, like kitchen sounds and appliance operations. From there, [anfractuosity] hopes that he will be versed enough to teach it new sounds, so if a pet gets added to the mix, it doesn’t assume there is an avalanche every time Fluffy needs to go to the bathroom.

We have another outstanding example of sensing household events without directly interfacing with an appliance, and bringing a sensor suite to your car might be up your alley.

How Constant Is Your Choice Of Lights?

The move from incandescent filament lamps to fluorescent, and then LED lighting over the last couple of decades has delivered immense benefits in terms of energy saving, but had brought with it problems for people sensitive to flicker or to too much of a particular set of wavelengths. It’s not always easy to quantify the propensity of a particular light for flickering. So [kk99] has produced an instrument returning a visual indication of its quality.

At its heart is an M5Stick ESP32 development platform, and a TSL250R light sensor hooked up to one of the ESP’s internal ADCs. The flicker waveform is displayed on the screen as a simple oscillograph, and a Fourier transform is performed to extract its frequency. The result is an extremely accessible and compact instrument, showing the suitability of the M5Stick form factor for such designs. So far we’ve only brought you an M5Stick in a password keeper, but we look forward to seeing more projects featuring it.

You can see the light flicker meter in action in the video below the break.

Continue reading “How Constant Is Your Choice Of Lights?”

Diurnal Reef Control Realistically Insolates Your Aquarium

[Phillip]’s project is not just great for learning new words, it also shows just how complex natural systems can be. 

As we know from news around the word, reefs are delicate systems prone to damage from just about any imaginable threat. Escaped aquarium fish, sunscreen, and the wayward feet of well meaning tourists to name a few. So it’s no wonder that aquarium hobbyists sometimes go to incredible lengths to simulate the natural environments these creatures live in.

While [Phillip] is still tinkering with his designs for this project, we found the data he included really interesting. His goal is to be able to plug in any coordinate on the earth and have the lights replicate the location. That includes not just the sun, but also the light from the moon as many corals seem to only spawn during certain tides. Of course no LED is perfect so he’s even experimenting with putting light sensors under the water to provide a feedback loop to make it perfect.

We really like the ambition of this project and we hope he continues.

Making Your Own Caving Headlamp

An important distinction between equipment used for caving, climbing, biking, and other outdoor activities is the level of stress that’s generally applied. For instance, while climbing helmets are built to withstand the impact of sharp rocks, they’re not made to protect a biker’s head from suddenly hitting the ground. Likewise, while camping headlamps may be able to survive a light rainfall, they’re probably not made to shine at the 800 lumens after being submerged underwater.

[LukeM] built himself a caving headlight, after being “fed up with what was available on the market”. While his project is a bit older, it’s still pretty helpful for any newer hobbyists looking to try their hand at building a custom headlamp. Many cavers have to carry around a few primary – one main light for general visibility and a secondary light for focusing on specific objects. These are typically worn on the helmet, attached somehow to prevent the light source from falling off mid-climb. From tricky operations, varying distances, cost, and ease of battery replacement, there are a number of reasons why a caver might want to build their own customizable head lamp.

The result is rugged, waterproof, reliable, bright enough to supplement flashes in caving photos and also dim enough for general use (30-700 lumens). It has options for wide and narrow beams, displays a neutral to warm color, and is relatively upgradeable without too much trouble. At the same time, it’s also fairly compact, with all of the components packed inside of a short section of 3″x2″ aluminum tubing, protected at the back and front by aluminum and acrylic backings. The LEDs used are four Cree XP-E R2 bin LEDs and a hipFlex driver from TaskLED with programmable settings for max output, thermal protection temperature, warning voltage, and lighting modes. I’m personally already smitten with the level of customizability of this build.

On top of all of that, it’s been cave tested and approved!