Displays We Love Hacking: SPI And I2C

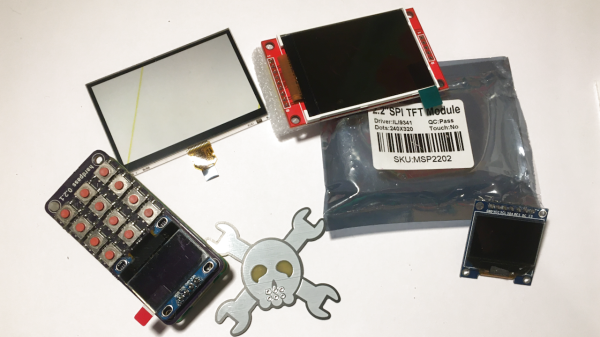
I’ve talked about HD44780 displays before – they’ve been a mainstay of microcontroller projects for literal decades. In the modern hobbyist world, there’s an elephant in the room – the sheer variety of I2C and SPI displays you can buy. They’re all so different, some are LCD and some are OLED, some have a touchscreen layer and some don’t, some come on breakouts and some are a bare panel. No matter which one you pick, there are things you deserve to know.

These displays are exceptionally microcontroller-friendly, they require hardly any GPIOs, or none extra if you already use I2C. They’re also unbelievably cheap, and so tiny that you can comfortably add one even if you’re hurting for space. Sure, they require more RAM and a more sophisticated software library than HD44780, but with modern microcontrollers, this is no problem at all. As a result, you will see them in almost every project under the sun.

What do you need for those? What are the requirements to operate one? What kind of tricks can you use with them? Let’s go through the main aspects.

Continue reading “Displays We Love Hacking: SPI And I2C”

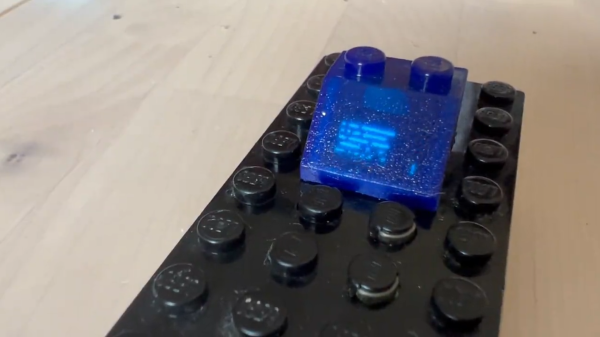
The blue LEGO brick described, with the OLED inside shining through the 3D-printed and subsequently cast brick body. The picture on the small OLED imitates the lines of text shown on the brick that this is an imitation of.

Computer-Shaped LEGO Brick Brought To Life

In childhood, many of us wondered — wouldn’t it be cool if our miniature toys had “real” functions? Say, that our toy cars actually were able to drive, or at least, that the headlights could light up. [James Brown] captures some of this childhood expectation of magic, recreating the 2×2 45°-sloped Lego bricks with computer screens and panels drawn on them by building a LEGO brick (thread, nitter) with an actual display inside of it.

This is possible thanks to an exceptionally small OLED display and a microcontroller board that’s not much larger. It’s designed to plug onto a LEGO platform that has an internal 9V battery, with power exposed on the brick’s studs. [James] has taken care building this — the brick was built with help of a tiny 3D-printed form, and then, further given shape by casting in what appears to be silicone or resin.

We’ve yet to hear more details like the microcontroller used — at least, the displays look similar to the ones used in a different project of [James]’, a keyboard where every keycap has a display in it (thread, nitter). Nevertheless, it is lovely to witness this feat of micro-engineering and fabrication. It reminds us of an another impressive build we covered recently — a 1/87 scale miniature Smart Car that’s as functional as you can get!

Continue reading “Computer-Shaped LEGO Brick Brought To Life”

Mindblowing Graphics From An ATtiny85

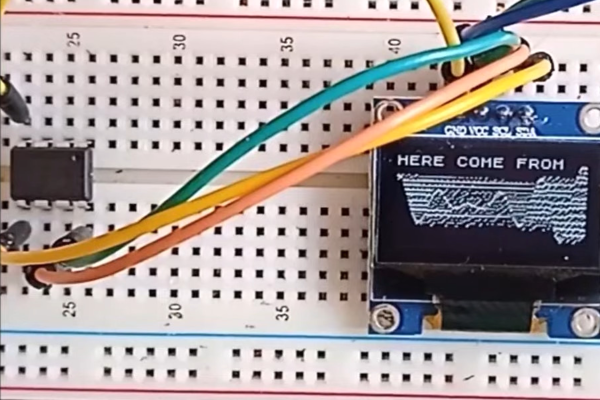
[Görg Pflug] wrote in with his really nice graphics library. It’s got multiple layers, two text consoles, greyscale, internal halftoning, and sprites. It can pull off a number of classic graphics tricks and demos. Oh yeah, and did we mention it runs on a freaking ATtiny85 and an I2C OLED screen?!

This is an amazing piece of work — if you’d asked us if this was possible, we would have probably said “no”. And now it’s yours to use in your own projects. The GitHub repo is full of demos showing off everything from switching between multiple layers, extremely rapid text scrolls, animations, boing balls, and even a Wolfenstein-style raycaster. On an ATtiny85.

There’s a demo video, embedded below, that shows it all off, but honestly you have to think about what’s going to to be suitably wowed. The first demo just seems to have a graphic wave over static text, for instance. No big deal? It’s blending the greyscale layers together and dithering them out to black and white for the OLED in real time! On an ATtiny85.

While the library is written in straight C++, there are even a couple examples of how you’d integrate this with Arduino’s Wire library if you so wished. We don’t know about you, but this makes us want to whip together an ATtiny85 and SSD1306 OLED demo board just to start playing around. This isn’t just an amazing hack, but it would also be a useful way to add graphics and a nice console to any project you’re working on.

Did we mention it’s all done on an ATtiny85?  Over I2C? Kudos!

Continue reading “Mindblowing Graphics From An ATtiny85”

Tiny pomodoro timer starts as soon as you plug it in.

Cherry Pomodoro Timer Forces You To Follow

If you have trouble staying focused and getting work done, the Pomodoro Technique of working in 25-minute intervals with 5-minute breaks is pretty hard to beat. The only problem is that it requires a lot of input from the user, and all that timer-setting can get in the way of actually getting down to business. The absolute worst is when you find yourself working hard, but see that forgot to set the damn timer (ask us how we know). In essence, the tomato itself can only do so much — you have to actually use it and honor the timer, put in the work, and believe in the system.

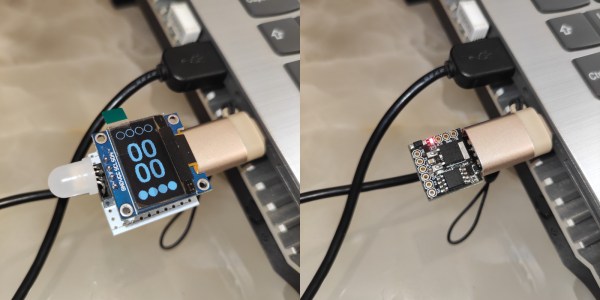
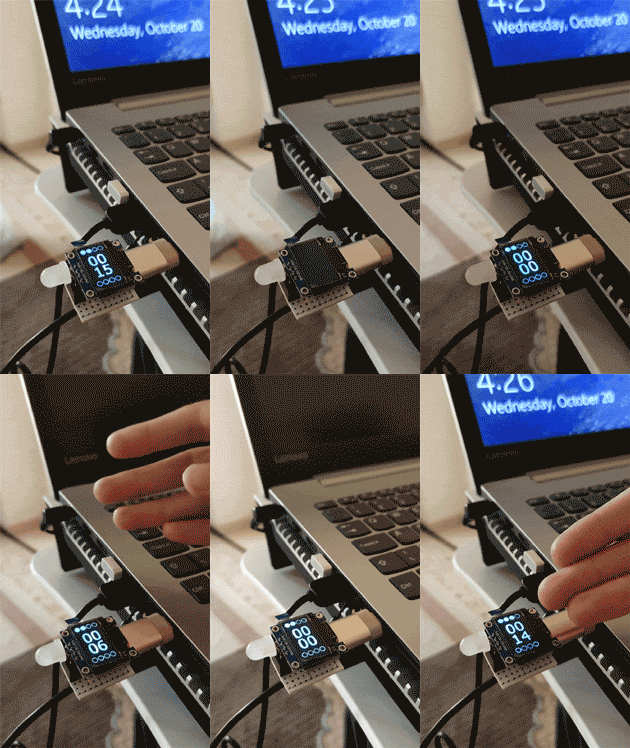
A tiny Pomodor Timer that starts automatically when plugged into a USB port.But what if you didn’t have to do as much? With [Erfan Sn]’s design, all you have to do is plug it in to a USB port and the countdown starts automatically. Not only does this Pomodoro timer force you to get with the program, it also makes you take breaks from the screen by putting the computer into sleep mode when the 25 minutes (or whatever time you set in the software) are up. This thing even keeps track of your Pomodoro count.

At the heart of this build is the Digispark ATtiny85 dev board, which has a handy onboard USB plug. It can be built with or without the OLED screen, which is good if you are easily distracted by the timer itself. This cherry tomato only costs about $10 to make, it’s tiny, and you can take it anywhere.

As you will see in the gifs on GitHub, [Erfan Sn] has it plugged into a female USB-A to male USB-C, which is probably better for the computer long-term, what with all the plugging and unplugging. When we make ours, we’ll probably plug it into a hub that has power switches for each port.

If all of this sounds like too much work, check out this build that senses whether or not you’re in the chair.

Make Your Own Smart Watch

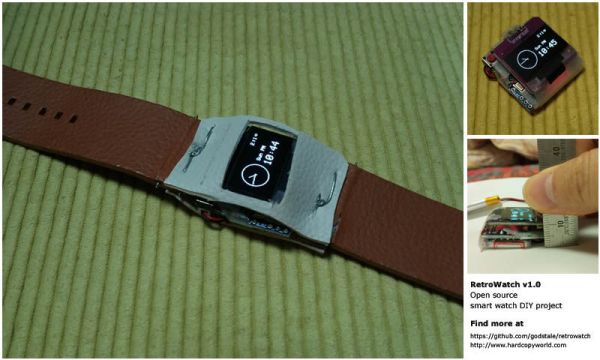
Wearables are all the rage lately. Have you been eyeing the Pebble or one of the new smart watches lately but are not sure if it’s for you? With [GodsTale’s] “Retro Watch” you can now build your own, allowing you to try out a smart watch without making a huge investment.

This smart watch uses very common and easy to obtain parts: Arduino Pro Mini, HC-06 Bluetooth module, Adafruit’s 0.96’’ OLED display, and a lithium battery. It is amazing how few parts can be used to make such a functional project. While the example packaging shown is a bit rugged around the edges, it gets the job done. Having such simple hardware allows [GodsTale] to focus on the software. One of the coolest aspects of this project is the Android app [GodsTale] provides. The app provides basic functionality, such as viewing RSS feeds and Android notifications. Check out the GitHub and a more detailed write-up for more information.

It would be great to see this project evolve in the future, it has so much potential. We would love to see a custom circuit board, or a model for a 3D printed case for this awesome smart watch. See a video of the Retro Watch in action after the break. If you thought this was cool, check out a few of these recent hacks.

Continue reading “Make Your Own Smart Watch”

QtLedTest – Software To Evaluate OLED Displays

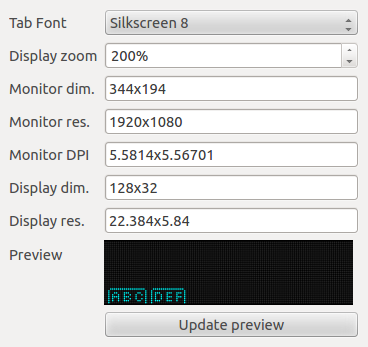
A few days ago we featured the USBPass, an offline password keeper made with very few components. At the end of our write-up we mentioned that [Josh] was already working on another version of his hardware, which involved adding an OLED screen to the platform. To help him pick one he created QtLedTest, a Qt-based tool that simulates different OLED displays and GUI layouts for them. Internally QtLedTest is composed of QLedMatrix (a widget that simulates LED matrices), an SSD1306 OLED controller simulator, a simple graphics drawing library and some functions to draw text on the simulated screen. [Josh] used Fontbuilder together with a program he made in order to convert fonts he had found on the internet to C files. All the source code [Josh] made can be found on Github and should be updated in coming weeks as the final program is a bit slow to render the simulated screens.