Eric Strebel peeks through his Pfaff 463 industrial sewing machine.

Simple Upgrades Make An Old Industrial Sewing Machine New Again

Well, this is a pleasant surprise: it seems that industrial designer [Eric Strebel] recently got a hold of an industrial sewing machine to tackle the softer side of prototyping. What doesn’t surprise us is that he did some upgrades to make it more user-friendly. Check them out in the video embedded below.

So, what’s the difference between a machine like this and what you might have around the house? Domestic sewing machines have a motor about the size of your fist, and it’s inside the machine’s body. Modern domestics can do light-duty work, but they can’t handle making bags and upholstery or sewing a bunch of layers of any material together. Industrial machines have either clutch or servo motors that are easily five times the size of a domestic’s motor, and are built into the table along with the machine.
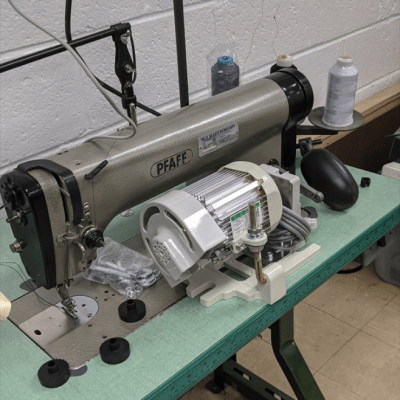
Pfaff 463 industrial sewing machine with its new brushless DC servo motor.[Eric] found this Pfaff 463 on Craigslist. It was built somewhere around 1950, and it only does one thing — a single-needle, straight stitch, forward or reverse — but it will do it through damn near anything you want (unlike those computerized hunks of plastic made for home use nowadays). Again, these machines are always built into a table, and they come with a lamp.  While the machine itself may be a workhorse, the light is wimpy, so [Eric] replaced it with a goose-neck LED light that has a magnet for sticking it anywhere light is required around the machine.

No matter the size, electric sewing machines are driven with a foot pedal. On a domestic, the pedal is loose and you just put it on the floor wherever you want, but industrial foot pedals are built into the table frame. [Eric] drilled a bunch of new holes in the side of the pedal so he can move the connecting rod closer to the pivot point. This gives him better control with less footwork.

The biggest, baddest upgrade [Eric] did was to the motor. Although there was nothing wrong with the original  clutch motor, it makes the machine go very fast so that garment workers can fulfill their quotas. Because of this, it’s difficult to control. He upgraded to a brushless DC servo motor for greater precision and easier prototyping. He got really lucky, too, because it mounted directly into the old holes.

We agree wholeheartedly with [Eric]’s sentiment about old sewing machines, or any old machine for that matter. They tend to be overbuilt because planned obsolescence wasn’t a thing yet. If you can’t afford or find an industrial, an old Singer or something similar will likely serve your purpose, as long as you use the right needle.

If you already have an old domestic machine sitting around, you might be able to breathe new life into it with a 3D printer.

Continue reading “Simple Upgrades Make An Old Industrial Sewing Machine New Again”

Automate Your Xbox

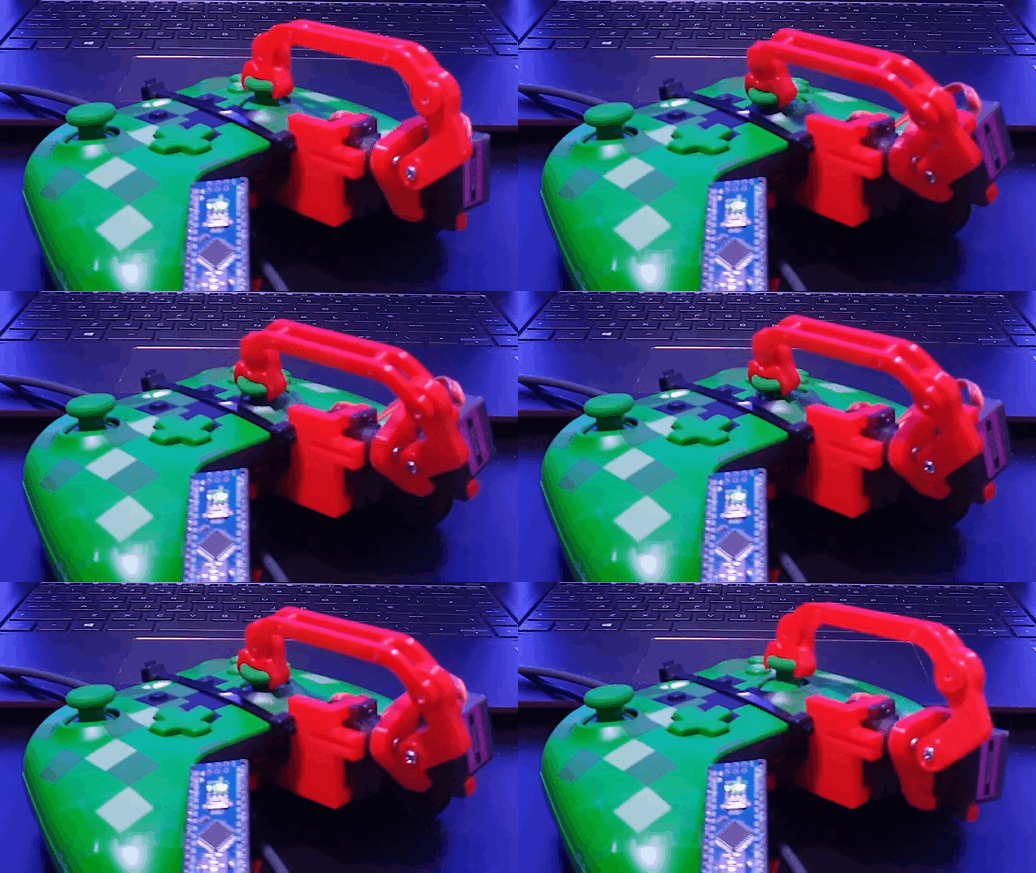
First the robots took our jobs, then they came for our video games. This dystopian future is brought to you by [Little French Kev] who designed this adorable 3D-printed robot arm to interface with an Xbox One controller joystick. He shows it off in the video after the break, controlling a ball-balancing physics demonstration written in Unity.

Hats off to him on the quality of the design. There are two parts that nestle the knob of the thumbstick from either side. He mates those pieces with each other using screws, firmly hugging the stick. Bearings are used at the joints for smooth action of the two servo motors that control the arm. The base of the robotic appendage is zip-tied to the controller itself.

The build targets experimentation with machine learning. Since the computer can control the arm via an Arduino, and the computer has access to metrics of what’s happening in the virtual environment, it’s a perfect for training a neural network. Are you thinking what we’re thinking? This is the beginning of hardware speed-running your favorite video games like [SethBling] did for Super Mario World half a decade ago. It will be more impressive since this would be done by automating the mechanical bit of the controller rather than operating purely in the software realm. You’ll just need to do your own hack to implement button control.

Continue reading “Automate Your Xbox”

Ultrasonic Sensor Helps You Enforce Social Distancing

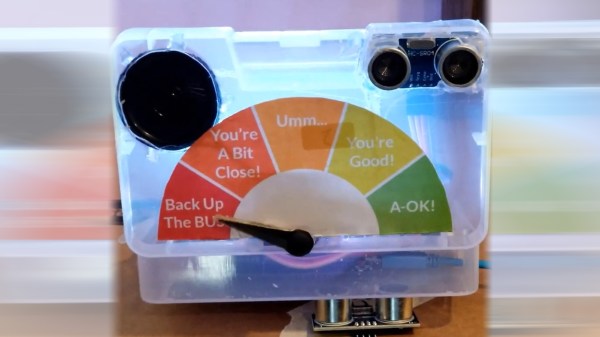
If you’re going outside (only for essential grocery runs, we hope) and you’re having trouble measuring the whole six feet apart from other people deal by eye, then [Guido Bonelli] has a solution for you. With a standard old HC-SR04 ultrasonic sensor, an audio module and a servo to drive a custom gauge needle he’s made a device which can warn people around you if they’re too close for comfort.

As simple as this project may sound like for anyone who has a bunch of these little Arduino-compatible modules lying around and has probably made something similar to this in their spare time, there’s one key component that gives it an extra bit of polish. [Guido] found out how intermittent the reliability of the ultrasonic sensor was and came up with a clever way to smooth out its output in order to get more accurate readings from it, using a bubble sort algorithm with a twist. Thirteen data points are collected from the sensor, then they are sorted in order to find a temporal middle point, and the three data points at the center of that sort get averaged into the final output. Maybe not necessarily something with scientific accuracy, but exactly the kind of workaround we expect around these parts!

Projects like these to help us enforce measures to slow the spread of the virus are probably a good bet to keep ourselves busy tinkering in our labs, like these sunglasses which help you remember not to touch your face. Make sure to check out this one in action after the break!

Continue reading “Ultrasonic Sensor Helps You Enforce Social Distancing”

AvoRipe Takes A Firm Grip On The Ultimate First World Food Problem

You don’t have to be an extinct mammal or a Millennial to enjoy the smooth, buttery taste of an avocado. Being psychic on the other hand is definitely an advantage to catch that small, perfect window between raw and rotten of this divaesque fruit. But don’t worry, as modern problems require modern solutions, [Eden Bar-Tov] and [Elad Goldberg] built the AvoRipe, a device to notify you when your next avocado has reached that window.

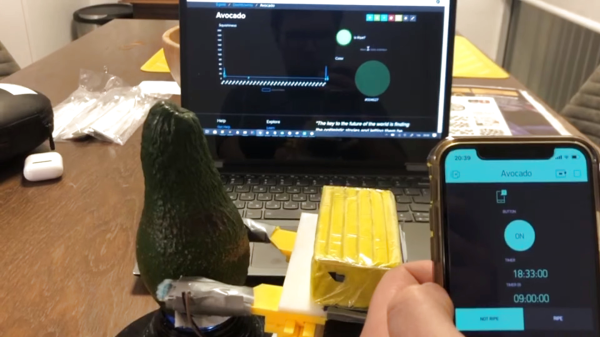
Taking both the firmness and color of an avocado as indicators of its ripeness into account, the team built a dome holding a TCS3200 color sensor as stand for the avocado itself, and 3D printed a servo-controlled gripper with a force sensor attached to it. Closing the gripper’s arms step by step and reading the force sensor’s value will determine the softness the avocado has reached. Using an ESP8266 as centerpiece, the AvoRipe is turned into a full-blown IoT device, reporting the sensor readings to a smartphone app, and collecting the avocado’s data history on an Adafruit.IO dashboard.

There is unfortunately one big drawback: to calibrate the sensors, a set of nicely, ripe avocados are required, turning the device into somewhat of a chicken and egg situation. Nevertheless, it’s a nice showcase of tying together different platforms available for widescale hobbyist projects. Sure, it doesn’t hurt to know how to do each part from scratch on your own, but on the other hand, why not use the shortcuts that are at our disposal to remove some obstacles — which sometimes might include programming itself.

Continue reading “AvoRipe Takes A Firm Grip On The Ultimate First World Food Problem”

New Part Day: Lynxmotion Smart Servos

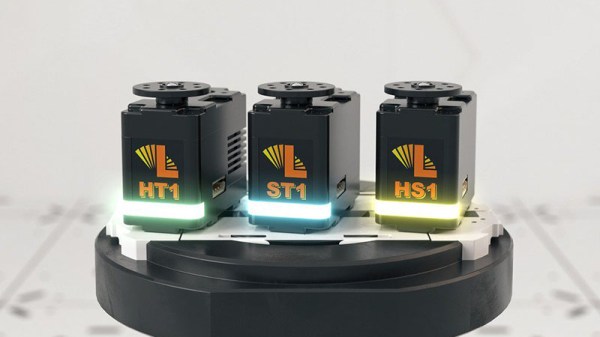
Anyone who shops for robotics kits would have come across a few designed by Lynxmotion. They’ve been helping people build robots since 1995, from robot arm kits to hexapod chassis and everything in between. We would expect these people know their motors, so when they launched their own line of servo motors called Lynxmotion Smart Servos (LSS), it is worth spending a bit of time to look over what they offer.

While these new devices have a PWM mode compatible with classic remote control servos, unleashing their full power requires bidirectional communication over a serial bus. We’ve previously given an overview of three serial bus servos already on the market for comparison. A quick look at the $68-$100 price tags listed on Lynxmotion’s parent company RobotShop made it clear they do not intend to compete on price, so what interesting features do these new kids on the block have?

Digging into product documentation found some great details. Acceleration and deceleration rates are adjustable, which can help with smoother robot movement. There’s also an adjustable level of “stiffness” that adds some “give” (compliance) so a robot won’t have to be as stiff as… well, a robot!

Mechanically, the most interesting internal component is the magnetic position sensor. They are far more precise than potentiometers, but more importantly, they allow positioning anywhere within full 360 degrees. Many other serial bus servos are constrained to positions within an arc less than 360 degrees leaving a blind spot.

An interesting quirk of the LSS offerings is that the serial communication protocol uses human-readable text characters, so sending a number 255 means transmitting a three byte string ‘2’, ‘5’, and ‘5’ instead of single byte 0xFF. This would make debugging our custom robot code far easier, at the cost of reduced bandwidth efficiency and loss of checksum for detecting communication errors. It’s a trade-off that some robot builders would be happy to make, but others might not.

Externally, these servos have bountiful mounting options including some we didn’t know to ask for. Historically Lynxmotion kits have used a wide variety of servo mounting brackets, so they are motivated to make mechanical integration easy. The most novel offering is the ability to bolt external gears to the servo body. A set of 1:3 gears allow for gearing the servo up or down, or you can use a set of 1:1 gears for a compact gripper.

As you’d expect of servos in this price range, they all have metal gears, but they also have the ability to power the motor directly from a battery pack (a 3 cell lithium polymer is recommended). There are additional features, like an RGB LED for visual feedback, which we didn’t cover here so dig into the documentation for more. We look forward to seeing how these interesting little actuators perform in future robotics projects.

Wrangling RC Servos Becoming A Hassle? Try Serial Bus Servos!

When we need actuators for a project, a servo from the remote-control hobby world is a popular solution. Though as the number of servos go up, keeping their wires neat and managing their control signals become a challenge. Once we start running more servos than we have fingers and toes, it’s worth considering the serial bus variety. Today we’ll go over what they are and examine three products on the market.

Continue reading “Wrangling RC Servos Becoming A Hassle? Try Serial Bus Servos!”

Evolving The 3D Printed Linear Actuator

Our open source community invites anyone with an idea to build upon the works of those who came before. Many of us have encountered a need to control linear motion and adapted an inexpensive hobby servo for the task. [Michael Graham] evaluated existing designs and believed he has ideas to advance the state of the art. Our Hackaday Prize judges agreed, placing his 3D Printed Servo Linear Actuator as one of twenty winners of our Robotics Module Challenge.

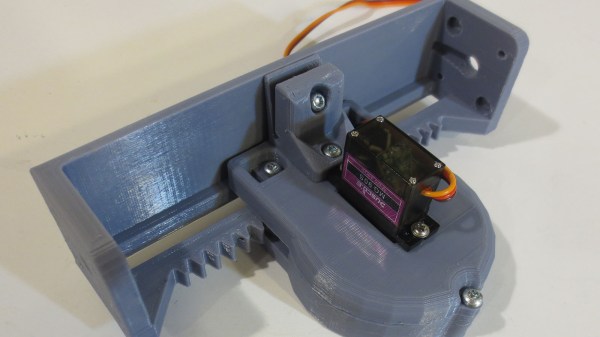
[Michael]’s actuator follows in the footstep of other designs based on a rack-and-pinion gear such as this one featured on these pages, but he approached the design problem from the perspective of a mechanical engineer. The design incorporated several compliant features to be tolerant of variances between 3D printers (and slicer, and filament, etc.) Improving the odds of a successful print and therefore successful projects. Beginners learning to design for 3D printing (and even some veterans) would find his design tips document well worth the few minutes of reading time.

Another useful feature of his actuator design is the 20mm x 20mm screw mounting system. Visible on either end of the output slider, it allows mixing and matching from a set of accessories to be bolted on this actuator. He is already off and running down this path and is facing the challenge of having too many things to share while keeping them all organized and usable by everyone.

The flexible construction system allows him to realize different ideas within the modular system. He brought one item (a variant of his Mug-O-Matic) to the Hackaday + Tindie Meetup at Bay Area Maker Faire, and we’re sure there will be more. And given the thoughtful design and extensive documentation of his project, we expect to see his linear servos adopted by others and appear in other contexts as well.

This isn’t the only linear actuator we’ve come across. It isn’t even the only winning linear actuator of our Robotics Module Challenge, but the other one is focused on meeting different constraints like compactness. They are different tools for different needs – and all worthy additions to our toolbox of mechanical solutions.