See How To Effectively Use A Green Screen In A Limited Space

Virtual green screens are pretty neat, but for results, nothing beats the real thing. But what if you have limited space? [Fred Emmott] had about 30 inches behind his desk to work with, and shares what it took to make a green screen work reliably in a limited space.
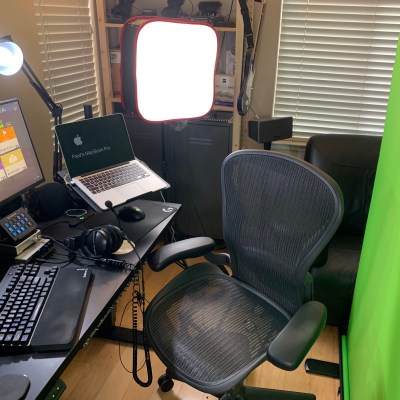
Even (and consistently deployable) lighting is even more important than the camera.

When it comes right down to it, the fundamentals of camera work (lighting, angles, and so on) are unchanged, but hanging a green screen only 30 inches behind one’s desk does make it a bit more challenging to dial in the right environment. In addition, [Fred] wanted a solution that could be deployed and packed away without much of a hassle, and without taking up too much storage space. He ended up using a collapsible green screen that can be pulled straight up and out from its container, similar to portable stand-up banners used at trade shows.

As for the camera end of things, [Fred] found that reliable, quality lighting was critically important, even more so than the camera used. For repeatable results, he suggests disabling any automatic features (such as low light enhancement, or auto white balance, and settings of that nature) and to use LED lighting in the ‘daylight’ range for illumination and fill. The key to good green screen results is to light things evenly, and this is a bit more challenging when working in such a tight space.

To deal with this, [Fred] suggests lights that can be easily repositioned, and put them as far back from things as you can. Get the lighting as even as possible, then adjust your software to match ([Fred] uses OBS Studio) for best results. Once that’s done, it can be more easily set up and torn down with minimal fiddling.

Computers sure make all this much easier than it was back in the day, and if you’re curious, here is all about how green screens were done before the digital age.

The Joy Of Broadcast Media Vs. The Paradox Of Choice

The rise of streaming services on the Internet was a revolutionary shift when it came to the world of media. No more would content be pumped in to homes in a one-way fashion, broadcast by major conglomerates and government-run organizations. Instead, individuals would be free to hunt for content suiting their own desires on an all-you-can-watch basis.

It’s led to a paradigm shift in the way we consume media. However, it’s also led to immense frustration thanks to the overwhelming amount of content on offer.  Let’s take a look at why that is, and some creative ways you can get around the problem.

The Paradox of Choice

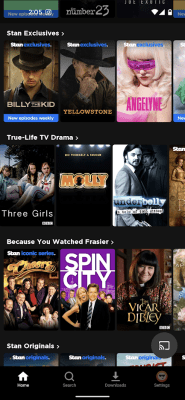
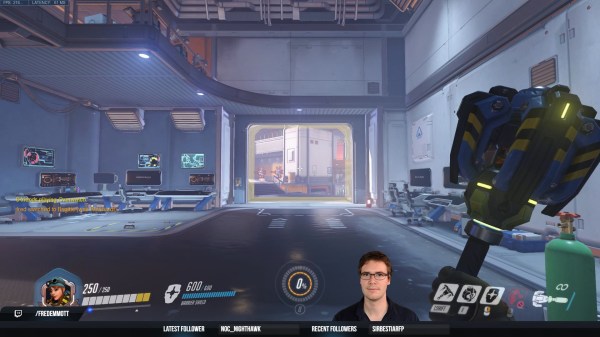
Many find the masses of content on streaming services to be overwhelming to choose from. Credit: author screenshot

Traditionally, when it came to media, there were two major arms of delivery: broadcast, and home media. One might listen to the radio, or flick on the TV, or alternatively, spin up a record, or select a movie to watch on tape. If none of those options  sufficed, one might take a walk down to the local video store to rent something more appealing.

Fundamentally, it was an era in which choices were limited. There were a handful of TV stations to choose from, and if nothing good was on, you could go as far as finding something watchable on tape or going without. Many will remember afternoons and evenings spent watching reruns or a Friday night movie that had been on a million times before. Some shows went as far as becoming legends for their seemingly endless replay, from The Simpsons to M*A*S*H. 

As the Internet grew, though, the game started to change. Torrent websites and streaming services came along, offering up the sum total of the world’s cultural output for free, or for a nominal cost for those averse to piracy. Suddenly when it came to choosing a movie to watch, one wasn’t limited to the five or so films on at the local cinema, nor what was left on the shelves at the local video rental. Instead, virtually any movie, from the invention of the format, could be yours to watch at a moment’s notice.

With so many options on the table, many of us find it harder to choose. It’s an idea popularly known as the Paradox of Choice, a term popularized by US psychologist Barry Schwartz in 2004. When our options are limited to a select few, choice is easy. They can quickly be compared and ranked and an ideal option chosen.

Add thousands of choices to the pile, and the job escalates in complexity to the point of becoming overwhelming. With so many different choices to contrast and compare, finding the mythical right choice becomes practically impossible. Continue reading “The Joy Of Broadcast Media Vs. The Paradox Of Choice”

Python Web Proxy Convinces Sonos To Stream YouTube

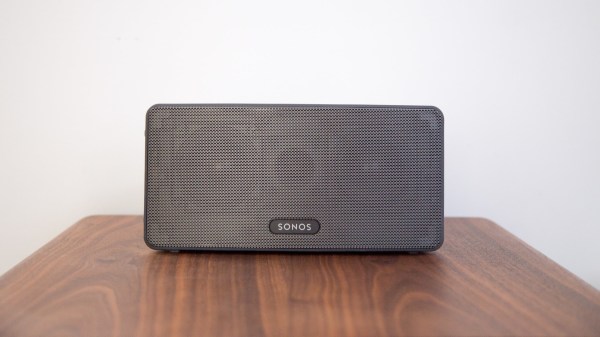
[Maurice-Michel Didelot] owns a Sonos smart speaker, and was lamenting the devices inability (or plain unwillingness) to stream music from online sources without using a subscription service. YouTube Music will work, but being a subscription product there is a monthly fee, which sucks since you can listen to plenty of content on YouTube for free. [Maurice] decided that the way forward was to dig into how the Sonos firmware accesses ‘web radio’ sources, and see if that could be leveraged to stream audio from YouTube via some kind of on-the-fly stream conversion process.

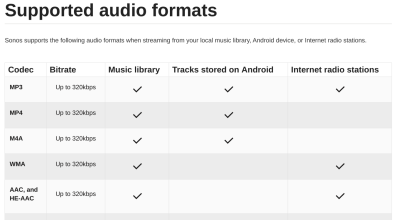
What? No MP4 support for web radio? Curses!

So let’s dig in to how [Maurice] chose to approach this. The smart speaker can be configured to add various streaming audio sources, and allows you add custom sources for those. The Sonos firmware supports a variety of audio codecs, besides MP3, but YouTube uses the MP4 format. Sonos won’t handle that from a web radio source, so what was there to do, but make a custom converter?

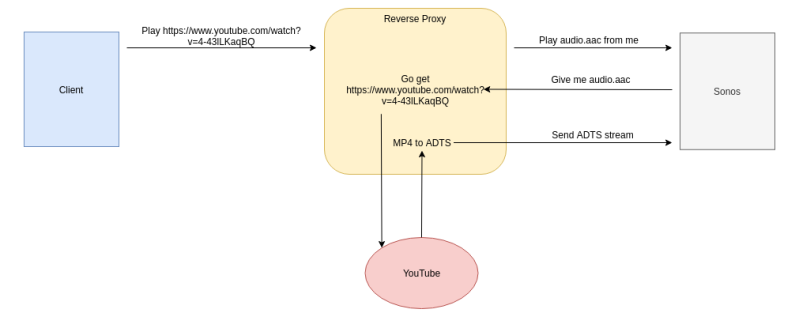
After a little digging, it was determined that Sonos supports AAC encoding (which is how MP4 encodes audio) but needs it wrapped in an ADTS (Audio Data Transport Stream) container. By building a reverse web-proxy application, in python using Flask, it was straightforward enough to grab the YouTube video ID from the web radio request, forward a request to YouTube using a modified version of pytube tweaked to not download the video, but stream it. Pytube enabled [Maurice] to extract the AAC audio ‘atoms’ from the MP4 container, and then wrap them up with ADTS and forward them onto the Sonos device, which happily thinks it’s just a plain old MP3 radio stream, even if it isn’t.

Sonos doesn’t have the best reputation, let’s say, but you can’t deny that there’s some pretty slick tech going on inside. Here’s a neat hack we covered last year, adding Sonos support to an old school speaker, and a nice teardown of a IKEA Sonos-compatible unit, which uses some neat design hacks.

Thanks [mip] for the tip!

Featured image by Charles Deluvio on Unsplash.

Bring That Old Hi-Fi Into The 2020s

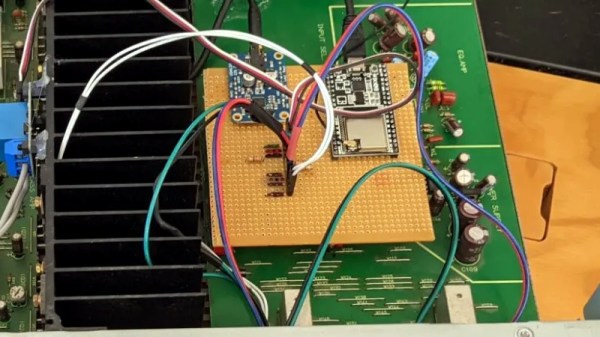
It’s a distressing moment for some of us, when a formerly prized piece of electronic equipment reaches a point of obsolescence that we consider jettisoning it. [Jon Robinson] ran into this dilemma by finding the Kenwood Hi-Fi amplifier his 17-year-old self had spent his savings on. It was a very good amp back in the day, but over two decades later, it’s no longer an object of desire in a world of soundbars and streaming music boxes. After a earlier upgrade involving an Arduino to auto-power it he’s now given it an ESP32 and an i2S codec which performs the task of digital audio streaming as well as a better job than the Arduino of controlling the power.

Inside the case is a piece of stripboard with the ESP and codec modules, but there was still the problem of seamlessly integrating it with the amp’s distinctly analogue-era controls. The output from the codec is wired into an audio input – quaintly labelled for a DAT player – and a simple cam on the input selector switch operates a microswitch to select the ESP32.

If you’re dipping your toe in decent audio then an old amp from decades past can make an excellent purchase, but you might wish to educate yourself through our Know Audio series.

Using MIDI To Solve A Keyboard Shortcut Problem

[Pete] admits that his MIDI-based slide advance alert system is definitely a niche solution to a niche problem, but it is a wonderful example of using available tools to serve a specific need. The issue was this: [Pete] is involved in numerous presentations streamed over video, and needed a simple and effective way for the Presenter to notify the Producer (the one responsible for the video streaming and camera switching) to discreetly advance slides on cue.

To most of us, this is a simple problem to solve. Provide the presenter with a USB macro keyboard to trigger the keyboard shortcuts for slide advancement, and the job’s done. But that didn’t quite cut it for [Pete]. In their situation, the Producer is managing more than just the slides as they switch between cameras, watch the chat window, and manage the video streaming itself. Triggering slide advancement via keyboard shortcuts only works if the presentation software is in focus when the buttons are pressed, which isn’t guaranteed.

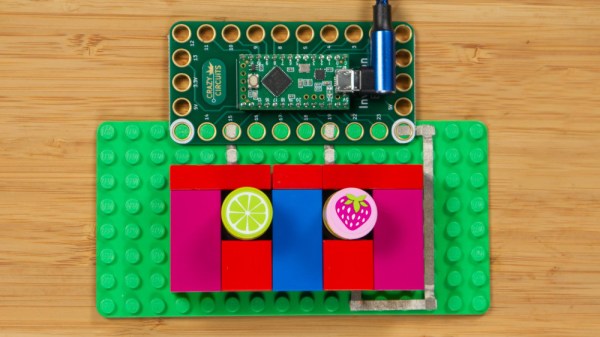
[Pete’s] solution was to make a small two-button device (one button for next slide, one for previous slide) that uses MIDI to communicate with a small custom application on the producer’s machine, and doesn’t care about application focus. Pressing the slide advance button plays a distinct tone into the producer’s headphones, plus the custom application displays “Forward”, “Back”, or “Waiting” in a window, depending on the state of the Presenter’s buttons. The design is available on Instructables for anyone wanting a closer look.

[Pete] reports that it works and it’s far more discreet than saying “next slide, please” twenty or more times per presentation. You may notice from the photo that LEGO bricks play a prominent part in the device, and if you’d like to see more of that sort of thing, make sure to check out these other brick-mountable PCB designs.

TinyPilot Provides KVM-over-IP, With Low Cost And Even Lower Latency

Remote access is great, but if the machine stops booting, ceases to connect to the network, or needs low-level interaction like BIOS settings or boot management, remote access is worthless because it’s only available once the host computer is up and running. The usual solution is to drag a keyboard and monitor to the machine in question for physical access.

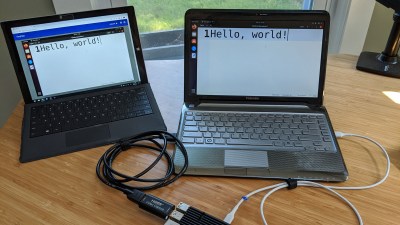
Ubuntu laptop (right) being accessed over IP, via web browser on the left.

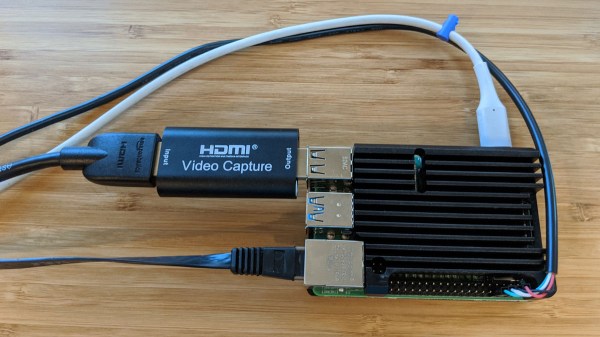
For most people, swapping cables in this way is an infrequent task at best. But for those who work more closely with managing hardware or developing software, the need to plug and unplug a keyboard and monitor into machines that otherwise run headless can get tiresome. The modern solution is KVM (keyboard, video, mouse) over IP, but commercial options are expensive. [Michael Lynch]’s TinyPilot on the other hand clocks in at roughly $100 of parts, including a Raspberry Pi and USB HDMI capture device. It does have to drop the ‘M’ from KVM (meaning it does not support a mouse yet) but the rest of it hits all the bases, and does it all from a web browser.

What exactly does TinyPilot do? It provides remote access via web browser, but the device is an independent piece of hardware that — from the host computer’s point of view — is no different from a physical keyboard and monitor. That means keyboard and video access works before the host machine even boots, so even changing something like BIOS settings is no problem.

[Michael] demonstrates his design in the video embedded below, but we encourage you to check out the project page for a fascinating exploration of all the challenges that were part of TinyPilot’s development.

Continue reading “TinyPilot Provides KVM-over-IP, With Low Cost And Even Lower Latency”

Giant LED Display Is 1200 Balls To The Wall

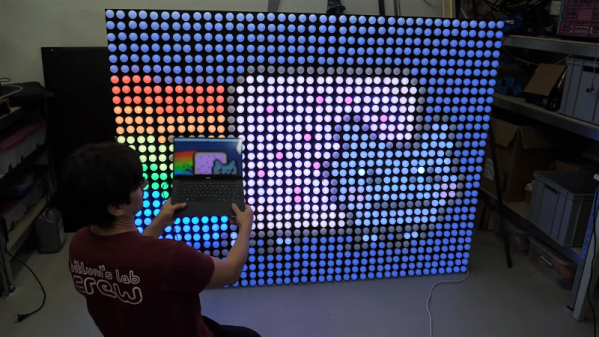
When you’re going to build something big, it’s often a good idea to start small and work out the bugs first. That’s what [bitluni] did with his massive 1200-pixel LED video wall, which he unveiled at Maker Faire Hanover recently.

We covered his prototype a while back, a mere 300 ping pong ball ensconced-LEDs on a large panel. You may recall his travails with the build, including the questionable choice of sheet steel for the panel and the arm-busting effort needed to drill 300 holes with a hand drill. Not wanting to repeat those mistakes, [bitluni] used the custom hole punch he built rather than a drill, and went with aluminum sheet for the four panels needed. It was still a lot of work, and he had to rig up some help to make the tool more comfortable to use, but in the end the punched holes appear much neater than their drilled counterparts.

[bitluni] mastered enough TIG welding to make nice aluminum frames for the panels, making them lightweight and easy to transport. 1200 ping pong balls, a gunked-up soldering iron, and a package of hot glue sticks later, the wall was ready for electronics. It took a 70-amp power supply and an ESP32 to run everything, but that’s enough horsepower to make some impressive graphics and even stream live video – choppy and low-res, but still usable.

We love the look this wall and we appreciate the effort that went into it. And it’s always good to see just how much fun [bitluni] has with his builds – it’s infectious.

Continue reading “Giant LED Display Is 1200 Balls To The Wall”