Your Snapshot On A Thermal Printed Receipt, Instantly!

What could be better than a low-res black and white photograph printed instantly on paper that will yellow and crumple over time? Wow, we really need to work on our sales pitch. But all kidding aside, we love the idea that [Niklas Roy] came up with in order to build this thermal printing camera.

His Picasa album has two snapshots of the hardware. He’s using an LM1881 for video sync separation just like he did with his PING project. From there an ATmega8 microcontroller grabs each column from the image and prints it using the thermal printer. It looks like everything runs on a 9V battery which is nice for portability (although we still never got our hands on that rechargeable 9V we’ve been meaning to pick up). Perhaps just as impressive is that [Niklas] got this up and running with about 400 lines of code. Nice!

Of course you’ll want to see this in action so we’ve placed a video clip after the break. Just like old-timey cameras it looks like you’re going to need to sit still until the image is done printing.

Continue reading “Your Snapshot On A Thermal Printed Receipt, Instantly!”

Retro-radio: Building On Another WiFi Radio Hack

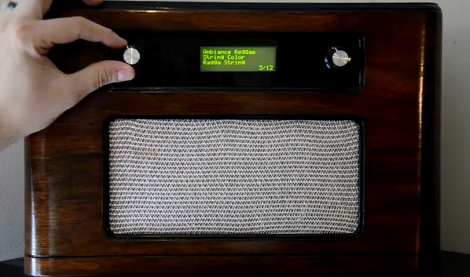
[Jay Collett] likes listening to Internet radio stations and decided to build his own standalone hardware that lets him listen without being at his computer. But he wasn’t starting from square one on this project. [Jay] built on the epic instruction set that [Mighty Ohm] published when he first built his own WiFi radio.

Both of these radios used the same method of getting onto the internet; a hacked router. We kind of like this because it means you should be able to use the radio as a bridge for wired Ethernet devices. But we digress. [Jay] departs from the instructions by using an Arduino and its IDE to interface an LCD screen with a different line/column orientation than the original, and to implement a different control scheme. This makes the project a bit more approachable if you prefer not to roll your own electronics.

Take a look at the video after the break. The router takes quite a while to boot, but once it does it seems that the controls are both intuitive and responsive.

Continue reading “Retro-radio: Building On Another WiFi Radio Hack”

A Plotter Made From Lego Parts

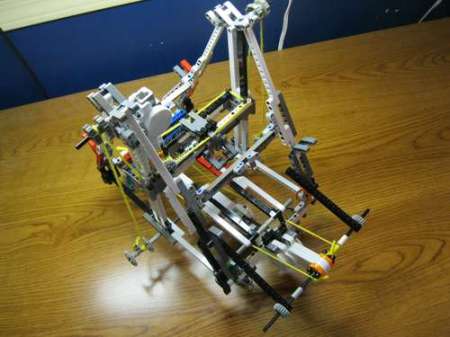
We’re always amazed at what people can come up with using Lego parts, but this hack certainly pushes the limits. Originally conceived as a 3D printer, this plotter is still an impressive proof-of-concept. Ironically, this “3D printer” was build with the hope of winning a Makerbot 3D printer, so be sure to vote for it if you’re impressed.

it’s pretty impressive seeing what [graphmastur] has done using only Lego parts. It’s especially entertaining to see a sheet of Lego “grass” used as the Y-axis table. The build was designed in Lego Digital designer, and the parts are available in “LDD” format or HTML.

This project is explained further in the video after the break. If you’d like to simply see it do a plotting operation, fast forward to around 4:30. The device is not perfect, but as the video says “it worked, pretty well” when drawing a square with an ordinary marker. Continue reading “A Plotter Made From Lego Parts”

Magic Locket

[Andrey] from RTFM has built himself a glowing LED pendant using only three parts and some simple code. The hack is not particularly complicated but [Andrey] provides some decent instructions on Pickaxe programming via an RS232 serial port and RGB LED control to produce the nice glowing effects. The pendant contains an RGB LED, a Pickaxe-08 microcontroller and a couple of button cell batteries. To cram everything inside the locket, [Andrey] had to grind down the LED and Pickaxe-08 to their minimum dimensions using a file.

All of the Basic code for the pendant is supplied on the project page and [Andrey] describes how he manages to PWM all three LED pins for the colour effects. The video after the break may be of interest to anyone who has not had a go at Picaxe programming before or for a beginner who wants to try out some new embedded devices without a big hit to the wallet.

Continue reading “Magic Locket”

Paper Craft Claw

Grab some stiff paper and get to work building your own paper claw. [Dombeef] posted the instructions to recreate the claw above because he was unsatisfied with his previous design which was flimsy and unable to pick up just about anything. This version is a bit larger and it internalizes all of the parts.

Being paper craft, you don’t need much in the way of materials or tools. A push-pin makes holes for the paperclip and wire which serve as the pivot points. Glue and some tape hold the rest of assembly together. You can see a video of the final product after the break. A shaft at the center closes the claw when pulled, and opens it when pushed to opposite way. This makes it perfect for that home-made crane game (or was that a claw game?)… as long as you’re not trying to pick up anything too heavy.

Continue reading “Paper Craft Claw”

GPS Lap Timer From Secondhand Parts

gps_racing_lap_timer

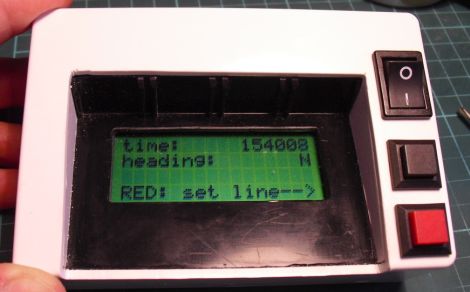
Hackaday forum member [nes] was training for an endurance race, and rather than having someone verbally call out his lap times, he wanted something he could keep in-vehicle to help keep track of his performance. With the race budget running dry, he and his teammates needed something cheap, if not free, to get the job done.

He scored a “broken” GPS receiver on eBay for a measly £4 and found that the receiver worked, but corrupted software prevented the unit from mapping routes. Since he didn’t require routing functions to keep track of his lap times, he splayed the GPS receiver open and started hunting around for a serial bit stream. He found what he was looking for after a bit of probing and hooked it up to his computer to see if the data contained NMEA sentences.

He cut the receiver down to the necessary parts and then started work on the lap timer itself. The timer uses an ATMega32 to run the show, displaying relevant time and location information on an LCD panel he scavenged from the trash bin.

He admits that the wiring is a bit questionable, but says that after about seven hours of rough use, everything is still intact and working great.

Electronics Tutorial Two-fer: Soldering Skills And Wires

electronics_tutorial_twofer_soldering_skills_and_wires

There is a plethora of electronics tutorials scattered about online. Sometimes it can be hard to separate the good ones from the bad, and the enlightening from the misinformed. We recently came across a pair that we found helpful, and thought they would appeal to anyone starting off in electronics.

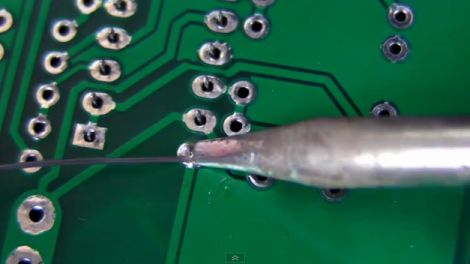
In this video tutorial, [Dave Jones] at the EEVblog covers soldering, detailing good practices and common mistakes to avoid when working with through-hole components. As the second video in a series he picks up where part one left off, excitedly demonstrating the ins and outs of good soldering skills.

Hackaday reader [grenadier] is working on a series of beginner’s electronics tutorials, and this week’s entry covers wiring. He discusses wire types, gauges, and even provides a nifty self-computing chart that calculates power loss based on the length and gauge of the selected wire. Before wrapping things up, he briefly touches on fuses and the pitfalls of choosing wire that’s not up to the task at hand. While you’re over there looking over his tutorial, be sure to check out the Junkbox, there’s plenty of awesome stuff to be had!