Passcode-Protecting The Means Of Caffeine

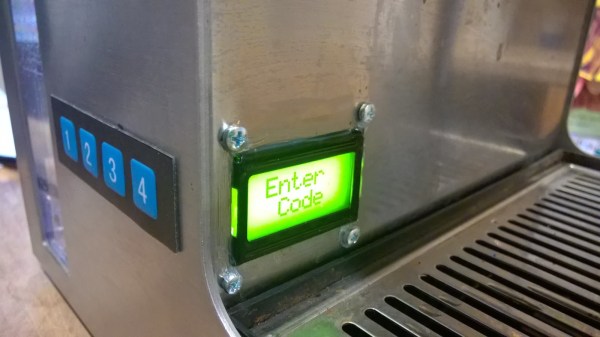
Several years ago, [Cameron] added an ATMega328-based PID temperature controller to his espresso machine. It has performed admirably to this day. But behind that cool bezel and LCD, all of the electronics are just sitting there, exposed. [Cameron] decided to give it a makeover. He has a better machine at home these days and wanted to take the old one to work. In order to keep untrained hands away from it in the office’s shared kitchen, [Cameron] installed a 4-digit keypad.

This makeover didn’t end with hiding wires and locking out noobs, though. [Cameron] added a float switch that will disable the pump when the water level gets too low. This is a nice touch. Otherwise, machines like this one will try to brew when the tank is dry, and then the pump has to be primed once the tank is refilled. [Cameron] also replaced the buttons’ back-lighting bulbs with bright LEDs. A small LCD mounted on the front of the machine shows the boiler temperature and shot-pulling duration.

If you’ve add PID temperature control to your espresso machine but have done nothing to improve the steam wand, why not add a pressure gauge?

Autonomous RiverBot Goes 15 Meters Deep

If you want to make a submersible robot (or, really, any robot) you can either design it for a specific mission, or you can try to make it general purpose. The researchers at the Cura Oceanus Foundation opted for the latter approach with RiverBot, a community-designed unmanned submersible.

Comparing it to the Space Shuttle, the RiverBot has payload bays that accept sensor kits or custom-made payloads. The builders hope to provide a platform for students and others and want to have students start with RiverBot in middle school, and keep working with the program all the way up to the PhD level.

Continue reading “Autonomous RiverBot Goes 15 Meters Deep”

The E-Traces Shoes

Visualizing Ballet Movements With E-Traces

When we think of wearable technologies, ballet shoes aren’t the first devices that come to mind. In fact, the E-Traces pointé shoes by [Lesia Trubat] may be the first ever “connected ballet shoe.” This project captures the movement and pressure of the dancer’s feet and provides this data to a phone over Bluetooth.

The shoes are based on the Lilypad Arduino clone, which is designed for sewing into wearables. It appears that 3 force sensitive resistors are used as analog pressure sensors, measuring the force applied on the ground by the dancer’s feet. A Lilypad Accelerometer measures the acceleration of the feet.

This data is combined in an app running on an iPhone, which allows the dancer to “draw” patterns based on their dance movements. This creates a video of the motion based on the dance performed, and also collects data that can be used to analyze the dance movements after the fact.

While these shoes are focused on ballet, [Lesia] points out that the same technique could be extended to other forms of dance for both training and visualization purposes.

Processing For Raspberry Pi

You know Processing? It is the programming language and IDE aimed at the electronic arts, new media art, and visual design communities. [Gottfried Haider] recently got Processing working on the Raspberry Pi and included a hardware input/output library to manipulate the Pi’s I/O pins.

If you want to experiment with Processing, you can download it right on your Pi with the following command:

curl https://processing.org/download/install-arm.sh | sudo sh

You can also download it from the download page. There’s a specific tutorial available or you can watch some general videos on Processing (see below).

Continue reading “Processing For Raspberry Pi”

VOCore Tutorial Gets You Started With Tiny Router

[Vadim] wrote up this short but sweet tutorial on getting started with the Vocore (tiny) OpenWRT-router-on-a-stamp. If you need more computing power than you can get with an ESP8266, and you want an open-source Linux-plus-Wifi solution in a square inch of board space, the Vocore looks pretty sweet.

We covered the Vocore a while ago. It has 28 GPIOs, all accessible from system calls in OpenWRT. It becomes much more computer-like if you add a dock that breaks out the USB and Ethernet functionality, but that also doubles the price.

IMG_5299_tnGetting started with a no-frills Linux box (chip?) can be intimidating. So it’s a good thing that [Vadim] details a first setup of the Vocore over WiFi and SSH, and then takes you through a button-and-LED style ‘Hello World’ application that makes simple use of the GPIOs.

He says he’s going to interface it eventually with a TI CC110 sub-gig radio unit, but that’s going to involve writing some drivers and will take him some time. We’d love to see how to connect peripherals, so we’re waiting with bated breath.

[Vadim] also helpfully included an un-bricking script for the Vocore, which restores the default firmware and gets you out of whatever hole you’ve managed to dig yourself into. Basically, you connect to the device over a USB-Serial adapter, run his script, and you should be set.

Any of you out there using a Vocore? Or other OpenWRT routers? Give [Vadim]’s tutorial a glance and let us know what you think.

RFM69 To MQTT Gateway On The Super-Cheap

[Martin] is working on a RFM69-to-MQTT bridge device. If you’re at all interested in DIY home automation, this is going to be worth following. Why? When your home automation network gets big enough, you’re going to have to think seriously about how the different parts talk to each other. There are a number of ways to handle this messaging problem, but MQTT is certainly a contender.

MQTT is a “lightweight” publish-subscribe framework that’s aimed at machine-to-machine data sharing, and runs on top of a normal TCP/IP network. IBM has been a mover behind MQTT since the beginning, and now Amazon is using it too.

But most MQTT servers need a TCP/IP network, which pretty much means WiFi, and this can be a killer for remote sensors that you’d like to run on battery power, or with limited processing power. For these use cases, a low-power, simple sub-gigahertz radio module is a better choice than WiFi. But then how to do you get your low-power radios to speak to your MQTT devices?

That’s the point of [Martin]’s MQTT bridge. Previously he had built a sub-gig radio add-on for a Raspberry Pi, and let the Pi handle the networking. But it looks like there’s enough processing power in a lowly ESP8266 to handle the MQTT side of things (over WiFi, naturally). Which means that you could now connect your 868 MHz radio devices to MQTT for less than the cost of two pumpkin spice, double-pump lattes.

On the firmware side, [Martin] has enlisted the help of [Felix], who developed the Arduino-plus-RFM69 project, the Moteino. [Felix] has apparently ported his RFM69 library to the ESP8266. We’re dying to see this working.

For now, we’ve got some suggestive screenshots which hint at some LAN-exposed configuration screens. We’re especially interested in the RFM + MQTT debug console window, which should really help in figuring out what’s gone wrong in a system that spans two radio protocols.

The bottom line of all of this? Super-cheap, power-efficient RFM69-based radio nodes can talk with your sophisticated MQTT network. Keep your eyes on this project.

Eyedrivomatic Wins The 2015 Hackaday Prize

Update: We’ve published an in-depth article about The Gaze-Controlled Wheelchair that Won the Hackaday Prize.

Eyedriveomatic are the Grand Prize winners of the 2015 Hackaday Prize. The winners were just announced on stage at the Hackaday Superconference, and awarded by the prize Judges. Eyedriveomatic is a non-invasive method of adding eye-control to powered wheelchairs. Many times these wheelchairs are rented and permanent alterations cannot be made. This inexpensive and easily adaptable hardware has the power to improve life for those who need more options for controlling powered wheelchairs.

We will be publishing more information about this year’s winners in the coming week. The full standings are listed below. Please check out all of the 2015 Hackaday Prize Finalist and the Best Product Finalists.

Continue reading “Eyedrivomatic Wins The 2015 Hackaday Prize”