Better 3D Graphics On The Arduino

There are cheap LCDs available from China, and when plugged into an Arduino, these displays serve as useful interfaces or even shinier baubles for your latest project. [Michael] picked up a few of these displays in the hope of putting a few animated .GIFs on them. This is an impossible task with an ATMega microcontroller – the Arduino does not have the RAM or the processing power to play full-screen animations. It is possible to display 3D vector graphics, with an updated graphics library [Michael] wrote.

The display in question uses the ILI9341 LCD driver, found in the Adafruit library, and an optimized 3D graphics driver. Both of these drivers have noticeable flicker when the animation updates, caused by the delay between erasing a previous frame and when a new frame is drawn.

With 16-bit color and a resolution of 320×240 pixels, there simply isn’t enough memory or the processing power on an ATMega microcontroller to render anything in the time it takes to display a single frame. There isn’t enough memory to render off-screen, either. To solve this problem, [Michael] built his render library to only render pixels that are different from the previous frame.

Rendering in 3D presents its own problems, with convex surfaces that can overlap themselves. To fix this, [Michael]’s library renders objects from front to back – if the pixel doesn’t change, it doesn’t need to be rendered. This automatically handles occlusions.

In a demo application, [Michael]’s LCD and Arduino can display the Stanford bunny, a low-poly 3D face, and geometric object. It’s not a video game yet, but [Michael] thinks he can port the classic game Spectre to this platform and have it run at a decent frame rate.

Video of the demo below.

Continue reading “Better 3D Graphics On The Arduino”

Czech Out Raspberry Pi Riding The Rails

If you were wandering around Prague this Christmas season you may have spotted a Raspberry Pi 2 controlled Christmas tree. But you had to look quick because it was on the back of a special tram car that lubricates the rails around the city to reduce noise. The colors on the tree were determined by a web site that allowed visitors to change the colors. The same system, with a few adjustments, controlled a tree in the entrance hall of Czech Technical University in Prague at Karlovo.

dsc-5786

The adjustments weren’t trival. Power was a problem, for one. The electrical noise from the tram’s drive motors needed to be filtered by using a switching power supply. Cold temperatures might have created a frozen Pi so they added a heater. After all, everyone loves warm Pi. The LEDs on the tree were handled by a WS2811 addressable LED driver chip.

You can catch the tram any time on the web, but the tree will be gone once the Christmas season ends.

Continue reading “Czech Out Raspberry Pi Riding The Rails”

The Hovalin: Open Source 3D Printed Violin Sounds Great

[Matt and Kaitlin Hova] have created The Hovalin, an open source 3D-printed violin. Yes, there have been 3D-printed instruments before, but [The Hovas] have created something revolutionary – a 3D printed acoustic instrument that sounds surprisingly good. The Hovalin is a full size violin created to be printed on a desktop-sized 3D printer. The Hovas mention the Ultimaker 2, Makerbot Replicator 2 (or one of the many clones) as examples. The neck is one piece, while the body is printed in 3 sections. The Hovalin is also open source, released under the Creative Commons Attribution Non-Commercial Share Alike license.

A pure PLA neck would not be stiff enough counter the tension in the strings, so [The Hovas] added two carbon fiber truss rods. A handful of other components such as tuners, and of course strings, also need to be purchased. The total price is slightly higher than a $60 USD starter violin from Amazon, but we’re betting the Hovalin is a better quality instrument than anything that cheap.

The Hovalin was released back in October. There are already some build logs in the wild, such as this one from [Emulsifide]. Like any good engineering project, the Hovalin is a work in progress. [Matt and Kaitlin] have already released version 1.0.1, and version 2.0 is on the horizon. Hearing is believing though, so click past the break to hear [Kaitlin] play her instrument.

Continue reading “The Hovalin: Open Source 3D Printed Violin Sounds Great”

SPI: Let Go And Use The Force

Take a leap the next time you use SPI and don’t poll for the busy flag. “What, are you crazy? That’s the whole point of the busy flag! It’s a quick check to make sure you don’t kill a byte waiting to be shifted out!” Sure, we thought the same thing, but the other side of the coin is that it takes time to check the busy flag, and that’s time he could be transmitting data. [bigjosh2] calculates that his technique saves 20% of those wasted cycles in this particular case. And he’s “using the force” only because he’s a Jedi master able to rely on the cycle count of a chunk of assembly code.

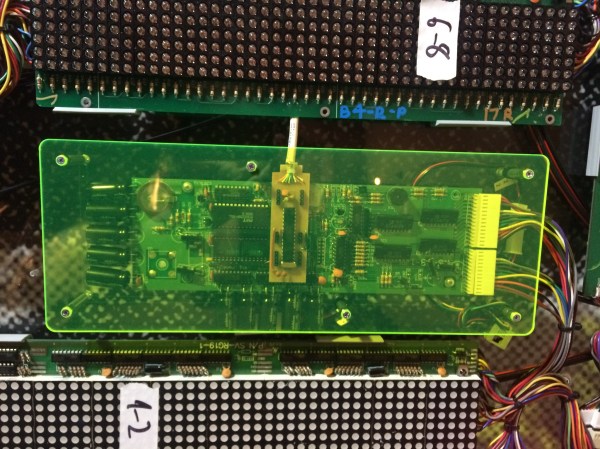
He’s working with an AVR processor, and pumping out bits to drive the vintage LED display pictured above. The ancient chips don’t have buffered SPI so he has to blank the display while shifting new data in to prevent it from glitching. Because the display blank during the SPI transmission, the slower it goes, the dimmer the lights.

He attacks the problem with synchronous code. It takes 2 cycles for the hardware SPI to send each bit, so he twiddles his thumbs (that’s exactly what he wrote in his code comments) for 16 cycles before reloading the SPI register with his next value. This leaves it up to faith in the silicon that the shifting will always take the same number of cycles, but the nice thing about hardware is that it’s deterministic. He ends up killing a few cycles in order to save time by not polling the busy flag.

Still need a crash course in what SPI actually does? [Bil Herd] has you covered with this SPI communication demo.

A Raspberry Pi Tidy Tide Tracker Predicts Propitious Promenades

The whims of the tides can make walking near the ocean a less than pleasant experience. A beautiful seascape one day may appear as a dismal, mucky, tidal flat the next. Frustrated over these weary walks, [Average Man] created a tidy tide tracker to predict propitious promenade periods.

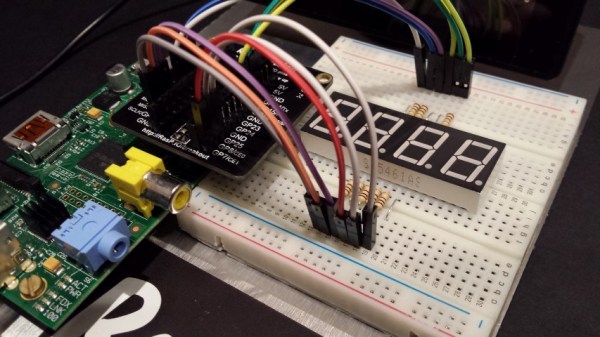
A Raspberry Pi A+ pulls tide timing information off the web by scraping a web page using Python code. The time for the high tide, when the estuary will be full of water, is shown on a 4-digit 7-seg display. It’s all sandwiched between two smoked black panels to provide a neat case while still letting the LEDs show through.

The code comes from two projects [Average] recalled from a kickstarter timing project and a 7-seg display project. As he points out:

It’s great to learn programming from others, but it’s even better if you learn them well enough to remember, re-use and combine that code later on as well.

The display chips are mounted on a product of his own, the no longer available ProtoPal board. This is a Pi A+ size board with 288 prototyping holes and the standard connector for mounting on the Pi GPIO header. It keeps the project neat and clean.

FPGA To Ethernet Direct

When [iliasam] needed an Ethernet connection, he decided to see how much of the network interface he could put in the FPGA logic. Turns out that for 10 Base-T, he managed to get quite a bit inside the FPGA. His original post is in Russian, but automatic translation makes a passable attempt at converting to English.

This is a classic trade off all FPGA designers face: how much external logic do you use for a particular design. For example, do you add memory to the PCB, or use FPGA resources as memory? Each has its advantages and disadvantages (that’s why it is a trade off). However, if you are trying to keep things cheap, slashing external circuitry is often the way to go.

Continue reading “FPGA To Ethernet Direct”

DIY Mini Butane Torch Would Make MacGyver Proud

Need to MacGyver yourself out of a situation with a mini torch? Well, you might want to watch this video of how to make a mini butane torch out of some random household components.

Built by [Roman UrsuHack], almost all the parts in this assembly are being used completely not as manufacturer intended. Which is why we love it. And why it’s a bit dangerous too.

Using an inkjet printer cartridge refill syringe, a bicycle pump needle, some tubing, a few compression valves (they look almost like medical equipment, for blood donation), a water bottle, a can of butane, lots of hot glue, and a few bicycle pump fittings, [Roman] has created a rather ingenious little butane torch.

Continue reading “DIY Mini Butane Torch Would Make MacGyver Proud”