“Hello Barbie” Not An IoT Nightmare After All

Security researchers can be a grim crowd. Everything, when looked at closely enough, is insecure at some level, and this leads to a lot of pessimism in the industry. So it’s a bit of a shock to see a security report that’s filled with neither doom nor gloom.

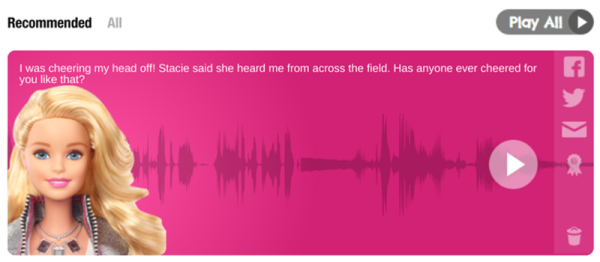
We’d previously covered Somerset Recon’s initial teardown of “Hello Barbie” and were waiting with bated breath for the firmware dump and some real reverse engineering. Well, it happened and basically everything looks alright (PDF report). The Somerset folks desoldered the chip, dumped the flash ROM, and when the IDA-dust settled, Mattel used firmware that’s similar to what everyone else uses to run Amazon cloud service agents, but aimed at the “toytalk.com” network instead. In short, it uses a tested and basically sound firmware.

The web services that the creepy talking doll connected to were another story, and were full of holes that were being actively patched throughout Somerset’s investigation, but we were only really interested in the firmware anyway, and that looked OK. Not everything is horror stories in IoT security. Some stories do have a happy ending. Barbie can sleep well tonight.
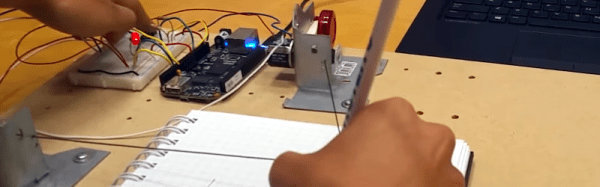
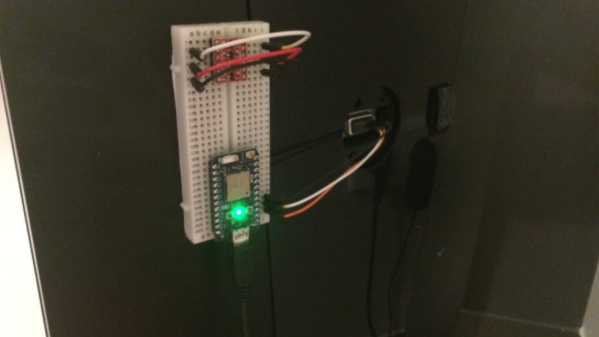
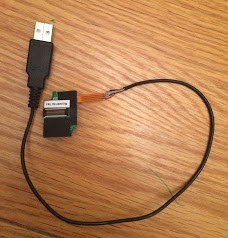
VGA In Memoriam

The reports of the death of the VGA connector are greatly exaggerated. Rumors of the demise of the VGA connector has been going around for a decade now, but VGA has been remarkably resiliant in the face of its impending doom; this post was written on a nine-month old laptop connected to an external monitor through the very familiar thick cable with two blue ends. VGA is a port that can still be found on the back of millions of TVs and monitors that will be shipped this year.

This year is, however, the year that VGA finally dies. After 30 years, after being depreciated by several technologies, and after it became easy to put a VGA output on everything from an eight-pin microcontroller to a Raspberry Pi, VGA has died. It’s not supported by the latest Intel chips, and it’s hard to find a motherboard with the very familiar VGA connector.

Continue reading “VGA In Memoriam”

LED Tester Royale

What do you get for the geek who has everything and likes LEDs? A tricked-out LED tester, naturally. [Dave Cook]’s deluxe model sports an LCD screen and two adjustable values: desired current and supply voltage. Dial these in, plug in your LED, and the tiny electronic brain inside figures out the resistor value that you need. How easy is that?

An LED tester can be as easy as a constant-current power supply, and in fact that’s what [Dave]’s first LED tester was, in essence. Set an LM317 circuit up to output 10mA, say, and you can safely test out about any LED. Read off the operating voltage, subtract that from the supply voltage, and then divide by your desired current to figure out the required resistor. It only takes a few seconds, but that’s a few seconds too many!

The new device does the math for you by adding an AVR ATtiny84 into the mix. The microcontroller reads the voltage that the constant current supply requires, does the above-mentioned subtraction and division, and displays the needed resistor. So simple. And as he demonstrates in the video below, it does double-duty as a diode tester.

This is a great beginner’s project, and it introduces a bunch of fundamental ideas: reading the ADC, writing to an LED screen, building a constant current circuit, etc. And at the end, you have a useful tool. This would make a great kit!

Continue reading “LED Tester Royale”

Back To The Drawing Board

Ever try signing your name with a mouse or a trackball? Not so easy. You could buy a graphics tablet with a pen. [Rahul Ramakrishnan] has a different approach. He took two 10-turn pots, and attached some strings and a washer. A pencil goes through the washer, and a BeagleBone Black reads the pots to determine what it is drawing on the paper. A couple of retractable badge lanyards keep tension on the string.

This ingenious design would be easy enough to replicate with any microcontroller that can read the two pots. The only awkward part is the need to press a button down when you want the device to treat the pencil as down (see the video below). It would probably be easy to rig up some switch on the pencil to make operation a little smoother.

Continue reading “Back To The Drawing Board”

Ford Explorer Lives Again As A Jurassic Truck

After Jurassic World came out and interest in Jurassic Park took off, [Voicey] decided he just had to make his very own Jurassic Park tour vehicle. Only problem? He lives in the UK and Ford Explorers aren’t exactly common there.

Wanting to keep it as movie-accurate as possible, he knew he had to get a first generation Explorer, and luckily, he managed to find one on an American car Facebook page. He bought it and got to work.

The first step was building custom bumper and brush guards, which he re-purposed from a Land Rover. Then he had a lot of painting to do. A lot.

Continue reading “Ford Explorer Lives Again As A Jurassic Truck”

Hacking A Coffee Machine

The folks at Q42 write code, lots of it, and this implies the copious consumption of coffee. In more primitive times, an actual human person would measure how many cups were consumed and update a counter on their website once a day. That had to be fixed, obviously, so they hacked their coffee machine so it publishes the amount of coffee being consumed by itself. Their Jura coffee machine makes good coffee, but it wasn’t hacker friendly at all. No API, no documentation, non-standard serial port and encrypted EEPROM contents. It seems the manufacturer tried every trick to keep the hackers away — challenge accepted.

The folks at Q42 found details of the Jura encryption protocol from the internet, and then hooked up a Raspberry-Pi via serial UART to the Jura. Encryption consisted of taking each byte and breaking it up in to 4 bytes, with the data being loaded in bit positions 2 and 5 of each of the 4 bytes, which got OR’ed into 0x5B. To figure out where the counter data was stored by the machine in the EEPROM, they took a data dump of the contents, poured a shot of coffee, took another memory dump, and then compared the two.

Once they had this all figured out, the Raspberry-Pi was no longer required, and was replaced with the more appropriate Particle Photon. The Photon is put on a bread board and stuck with Velcro to the back of the coffee machine, with three wires connected to the serial port on the machine.

If you’d like to dig in to their code, checkout their GitHub repository. Seems the guys at Q42 love playing games too – check out 0h h1 and 0h n0.

Thanks [Max] for letting us know about this.