The Arduino has proved to be a great platform for electronics projects. The same goes for the Raspberry Pi. However, there are some projects that fall in the gap between these two options. Projects that need more memory or processing power than the ATmega microcontrollers have to offer, but not so much as to require a full Linux/ARM powerhouse. For those projects, there is the Teensy series. [Paul Stoffregen] created these lilliputian boards, and he’s been adding features ever since. The thousands of Teensy projects out there stand as proof that these little boards have been well received by the hacker community. This week’s Hacklet is about some of the best Teensy projects on Hackaday.io!
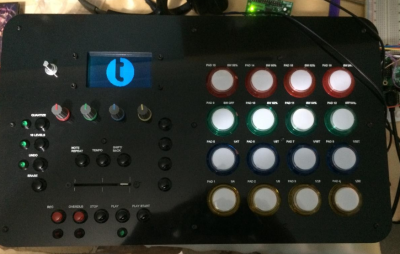 We start with [Jonathan Payne] and Beats by Teensy. Beats is an all in one music machine. A sampler, sequencer, and MIDI control surface; all powered by the Teensy 3.1 and the Teensy Audio Board. The audio board gives Beats the ability to record and playback 16 bit audio at a sampling rate of up to 44.1 kHz. [Jonathan’s] inspiration came from devices such as the Akai MPC, and the MIDI Fighter. He utilized the incredible Teensy audio library on the software side. A project like this needs a serious case. [Jonathan] designed and built the perfect panel and case utilizing arcade buttons and a 128×64 LCD from Adafruit.
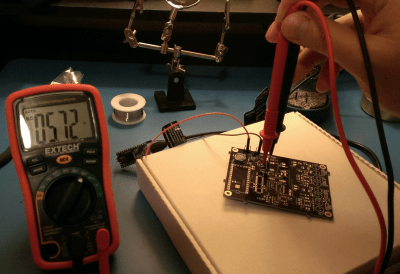 Next we have [RF William Hollender] and Teensy Super Audio Board. Not satisfied with CD quality 44.1 kHz audio, [William] decided to add a high quality audio codec to Teensy’s bag of tricks. He picked the CS4272 codec from Cirrus Logic. Capable of sampling rates up to 192 kHz, with a THD+N of -100 db, this codec should please all but the most discerning audiophiles. The high noise immune design doesn’t stop there though. [William’s] design isolated the Teensy and the rest of the interfaces from the codec to prevent ground loops. Connectivity is via standard I2S for the audio stream and I2C for control. This means the super audio board can be used with Raspberry Pi’s and the like.
 Next up is [Spino] with Spino. Teensy boards can do a lot more than just audio. Spino is a POV display with 32 spinning RGB LEDs. Spino can do more than just show pretty pictures though. With a Teensy 3.2 and bluetooth radio on board, the spino team is able to play games on their display. LEDs don’t work exactly like CRTs and LCDs though, so some color changes were necessary. The team utilized cell shading with a sobel filter to make Doom look even better than ever. The Teensy is even powerful enough to handle live webcam video sent over USB. The video is rendered and displayed on the spinning LEDs.
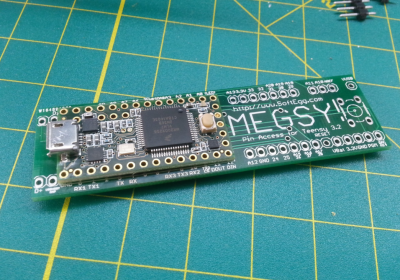 Finally we have [Tim Trzepacz] with Megsy? A homebrew Teensy 3++. [Tim] is working on Megsy as part of his residency at the Supplyframe Design Lab. Teensy’s have lots of edge mounted IO pins. There isn’t enough real estate for all the pins though, so some are routed to pads on the bottom. Megsy is a Teensy carrier board that breaks these pads out to pins. The idea is to solder the Teensy directly do the Megsy. As [Tim] calls it, “a poor man’s BGA”. The problem is getting the solder hot enough to melt while sandwiched between two insulating PCBs. [Tim’s] first attempt netted him a rather scorched Megsy board. Blacked as it may have been, the board did work!
If you want to see more Teensy projects, check out our new Teensy projects list. Notice a project I might have missed? Don’t be shy, just drop me a message on Hackaday.io. That’s it for this week’s Hacklet, As always, see you next week. Same hack time, same hack channel, bringing you the best of Hackaday.io!

