ESP8266 MicroPython Contest Gives You The Excuse You Need

As if the prospect of having everyone’s favorite scripting language ported over weren’t enough to get you to install MicroPython on a spare ESP8266, there is now a contest for that. Over on Hackaday.io the MicroPython on ESP8266 contest is under way and you’ve only got until the end of August to submit your creation.

The prizes? First place gets an OpenMV camera board because [Radomir], who’s running the contest, has an extra one. OK, it’s not as lush as the corporate-sponsored goody-bag that we’ve got running in the Hackaday Prize, but there’s no reason that you can’t enter both. And if anyone wants to throw some more goodies into the pot, I’m sure they’d be welcome.

The rules are simple: use an ESP8266 or ESP8285 with MicroPython and post the project up on Hackaday.io. Bonus points are given for creating new libraries or hardware drivers. Basically, this just gives you an extra reason to get in there and play around. How cool is that?

If you need a start-up on MicroPython on the ESP8266, the official tutorial is great. We wrote up a first-look review of running MicroPython on the WeMos D1 hardware, but were plagued with (re-)flashing difficulties, so we’re going to have to give it another go.

[Nick Thatcher]’s Plan-B Is A Commuter Electric Unicycle

[Nick Thatcher] is a serial builder of self-balancing rides. His various Segway clones and unicycles have until now suffered from one significant problem, that of portability when not being ridden. Taking one on a train was a significant undertaking, hardly convenient in a personal transport machine.

His latest design, the Plan-B, is an electric unicycle designed to address this problem to create a truly portable piece of commuter transport. It has been designed to be as compact as possible with the ability to fold to fit in a confined space, and the weight has been reduced to a minimum.

Power comes from a 24V 350W geared motor kept on a leash through a Dimension Engineering motor controller by an Arduino with a gyro to maintain the unit’s stability The battery is an ULTRAMAX LiFePO4 , and the single wheel is an inexpensive plastic wheelbarrow part with chain drive from the motor.

The result is both rideable and portable, though with a 10mph top speed not the fastest of personal transport. He’s posted a video which you can see below the break, showing him taking it on a train journey and traversing the British urban landscape.

Continue reading “[Nick Thatcher]’s Plan-B Is A Commuter Electric Unicycle”

From Project To Kit: So You Want To Sell Electronic Kits

Many of us have enjoyed building electronic projects that come not from our own inspiration or ingenuity but from a ready-made kit. It makes sense, after all in buying a kit you should receive a tried-and-tested design that you can assemble without some of the heartache associated with getting a self-designed project right. And though in recent years the barriers to entry into the professional PCB market for small projects have lowered significantly, there is still an attraction to a kit that comes with a decent PCB and case.

The kit version of the Sinclair ZX81 microcomputer. By Smaddison (Own work) [CC BY-SA 3.0], via Wikimedia Commons.
If you start your electronic odyssey through kit-building, you gain more than a set of electronic projects. You learn about the circuits you build, and you gain a feel for how a well-designed project should go together. Eventually this feeds into your own projects, and in time you are producing builds that equal or surpass those you can buy as kits.

From the point of having a nicely executed project to that of wondering whether it too could be sold as a kit is not a huge step. This is the first of a series of articles that will examine the kit manufacturing process from project to customer, and will with luck deliver some insight to those of you who have always wondered whether you could make it as a kit vendor.

Continue reading “From Project To Kit: So You Want To Sell Electronic Kits”

3-Phase BLDC Motor Controller Will Run You $20 In Parts

If you’re an active shopper on RC websites, you’ll find tiny motors spec’ed at hundreds of watts while weighing just a few grams, like this one. Sadly, their complementary motor controllers are designed to drive them at a high speed, which means we can only hit that “520-watt” power spec by operating in a max-speed-minimum-torque configuration. Sure, that configuration is just fine for rc plane and multicopter enthusiasts, but for roboticists looking to drive these bldc motors in a low-speed-high-torque configuration, the searches come up blank.

The days in the dust are coming to an end though! [Cameron] has been hard at work at a low cost, closed-loop controller for the robotics community that will take a conventional BLDC airplane motor and transform it into a high end servo motor. Best of all, the entire package will only run you about $20 in parts–including the position sensor!

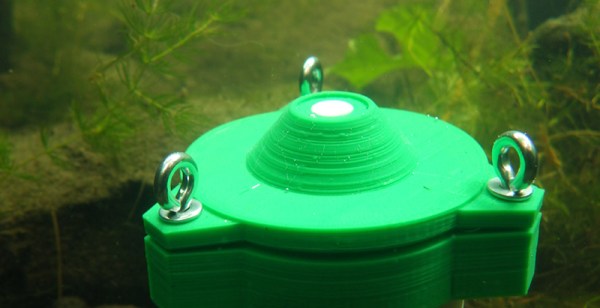
“Another BLDC motor controller?” you might think. “Surely, I’ve seen this before“. Fear not, faithful readers; [Cameron’s] solution will get even the grumpiest of engineers to crack a smile. For starters, he’s closing the loop with a Melexis MLX90363 hall effect sensor to locate the rotor position. Simply glue a small magnet to the shaft, calibrate the magnetic field with one revolution, and–poof–a wild 14-bit encoder has appeared! Best of all, this solution costs a mere $5 to $10 in parts.

Next off, [Cameron] uncovered a little-known secret of the ATMEGA32u4, better known as the chip inside the Arduino Leonardo. It turns out that this chip’s TIMER4 peripheral contains a feature designed exclusively for 3-phase brushless motor control. Complementary PWM outputs are built into 3 pairs of pins with configurable dead time built into the chip hardware. Finally, [Cameron] is pulsing the FETs at a clean 32-Khz — well beyond the audible range, which means we won’t hear that piercing 8-Khz whine that’s so characteristic of cheap BLDC motor controllers.

Curious? Check out [Cameron’s] firmware and driver design on the Githubs.

Of course, there are caveats. [Cameron’s] magnetic encoder solution has a few milliseconds of lag that needs to be characterized. We also need to glue a magnet to the shaft of our motor, which won’t fly in all of our projects that have major space constraints. Finally, there’s just plain old physics. In the real world, motor torque is directly proportional to current, so stalling an off-the-shelf bldc motor at max torque will burn them out since no propeller is pushing air through them to cool them off. Nevertheless, [Cameron’s] closed loop controller, at long last, can give the homebrew robotics community the chance to explore these limits.

This NES Emulator Build Lets You Use Cartridges To Play Games

You may not remember this, but Nintendo hardware used to be a pretty big deal. The original Game Boy and NES both had remarkable industrial design that, like the Apple II and IBM Thinkpad, weren’t quite appreciated until many years after production ended. But, like many of you, [daftmike] had nostalgia-fueled memories of the NES experience still safely locked away.

Memories like lifting the cartridge door, blowing on the cartridge, and the feel of the cartridge clicking into place. So, understandably, reliving those experiences was a key part of [daftmike’s] Raspberry Pi-based NES build, though at 40% of the original size. He didn’t just want to experience the games of his youth, he wanted to experience the whole NES just as he had as a child.

20160727_181746

Now, like any respectable hacker, [daftmike] didn’t let gaps in his knowledge stop him. This project was a learning experience. He had to teach himself a lot about 3D design and modeling, using Linux, and programming. But, the end result was surely worth the work; the attention to detail shows in features like the USB placement, the power and reset buttons, and of course the game cartridges which work with the magic of NFC and still include the insert and toggle action of the original cartridge carriage.

If you have a 3D printer and Raspberry Pi available, you could build a similar NES emulator yourself. But if you don’t have a 3D printer, but do have an original NES lying around, you could pull of the Raspberry Pi in a NES case hack. Whichever you do, the NES’s beauty deserves to be displayed in your home.

Continue reading “This NES Emulator Build Lets You Use Cartridges To Play Games”

Hackaday Prize Entry: Profiling Underwater Light

The goal for the Citizen Science portion of the Hackaday Prize is to empower people to create their own devices to perform their own analyses For [Adam]’s project, he’s designing a device that measures the health of waterways simply by looking at the light availability through the water column. It’s called PULSE, the Profiling Underwater Light SEnsor, and is able to monitor changes that are caused by algal blooms, suspended sediments, or sewer runoff.

The design of PULSE is a small electronic depth charge that can be lowered into a water column from anything between a research vessel to a kayak. On the top of this sinkable tube is a sensor to measure photosynthetically active radiation (PAR). This sensor provides data on light irradiance through the water column and gives a great insight into the health of photosynthesis, marine plant life, and ultimately the health of any aquatic environment.

Measuring the light available for photosynthesis through a water column is great, but PULSE isn’t a one trick pony. On the bottom of the aquatic probe are three sensors designed to measure photosynthesis, dissolved organic matter, and turbidity. These sensors are really just a few LEDs and photodiodes, proving just how much science you can do with simple tools.

The goal of the Citizen Science portion of the Hackaday Prize is to put scientific discovery in the hands of everyone. PULSE is a great example of this: it’s a relatively simple device that can be thrown over the side of a boat, lowered to the bottom or a lake, and hoisted back up again. It’s inexpensive to build, but still provides great data. That’s remarkable, and an excellent example of what we’re looking for in the Hackaday Prize.

20kW Light Is As Bright As You’d Expect

[Photonicinduction] purchased a very very bright light. This 20,000 Watt half meter tall halogen will just about light the back of a person’s skull with their eyes closed. These are typically used to light film sets.

Most people couldn’t even turn such a light on, but [Photonicinduction] is a mad scientist. Making lightning in his attic, it’s easy to mentally picture him as the villain in a Sherlock Holmes novel. Luckily for us, if he has any evil tendencies, they are channeled into YouTube videos.

He gives a good description of the mechanical and electrical properties of the light. The body is as one would expect for an incandescent light. A glass filament envelope with the filaments supported within. The envelope is evacuated and filled with an appropriate gas. This light is dangerous enough that the outside must be thoroughly cleaned of fingerprints to keep a hot-spot from forming, which could cause the lamp to explode.

After some work, he managed to convince himself that the filaments within were not, in fact, garage door springs, and gave a demonstration of their properties. For example, their resistance goes up as they are heated. In order to keep from tripping the power supply, filaments this large must be preheated. Failure to do so passes a very large number of amps.

The next step was to hook the lamp up to his home-made 20 kW power supply. He gives a good demonstration of just how bright it is. Within seconds he’s sweating from the heat and definitely can’t even open his eyes to see with the tiny sun occupying the center of his abode. Video after the break.

Continue reading “20kW Light Is As Bright As You’d Expect”