Open Source Digital Cinema

Years in the making, Apertus has released 25 beta developer kits for AXIOM–their open source digital cinema camera. This isn’t your point-and-shoot digital camera. The original proof of concept from 2013 had a Zynq processor (a Zedboard), a super 35 4K image sensor, and a Nikon F-Mount.

The device today is modular with several options. For example, there is an HDMI output module, but  DisplayPort, 4K HDMI, and USB 3.0 options are in development. You can see several sample videos taken with the device, below.

Continue reading “Open Source Digital Cinema”

FabricKeyboard

FabricKeyboard Is Piano, Theremin And More

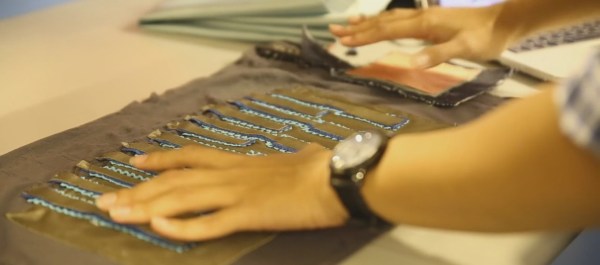
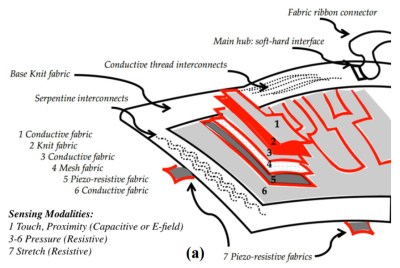
Two researchers of Responsive Environments, MIT Media Lab, have put to together a device that is an amazing array of musical instruments squeezed into one flexible package. Made using seven layers of fabrics with different electrical properties, the result can be played using touch, proximity, pressure, stretch, or with combinations of them. Using a fabric-based keyboard, ribbon-controller, and trackpad, it can be played as a one-octave keyboard, a theremin, and in ways that have no words, such as stretching while pressing keys. It can also be folded up and stuffed into a case along with your laptop, and care has even been taken to make it washable.

The FabricKeyboard layers

Layer one, the top layer, is a conductive fabric for detecting proximity and touch. The twelve keys can work independently with a MPR121 proximity touch controller or the controller can treat them all as one, extending the distance the hand can be and have it still work. Layer two is just a knit fabric but layers three to six detect pressure, consisting to two conductive layers with a mesh fabric and a piezo-resistive fabric in between. The piezo-resistive fabric is LTT-SPLA from eeonyx, a knit fabric coated with the conductive polymer, polypyrrole (PPy). Layer seven consists of two strips of knitted spandex fabric, also coated with PPy, and detects stretching. Two strips of this are sewn on the bottom, one horizontal and one vertical. You can see and hear the amazing sound this all produces in the video below.

Continue reading “FabricKeyboard Is Piano, Theremin And More”

Hackaday Prize Entry: Yet Another Unmanned Vehicle Controller

To build any sort of autonomous vehicle, you need a controller. This has to handle all sorts of jobs – reading sensor outputs, controlling motors and actuators, managing power sources – controlling a vehicle of even moderate complexity requires significant resources. Modern cars are a great example of this – even non-autonomous vehicles can have separate computers to control the engine, interior electronics, and safety systems. In this vein, [E.N. Hering] is developing a modular autonomous vehicle controller, known as YAUVC.

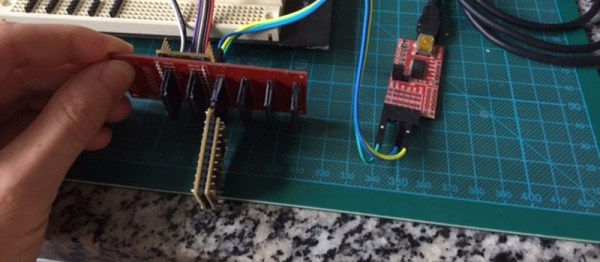
The acronym stands for Yet Another Unmanned Vehicle Controller, though its former name – Fly Hard With A Vengeance – was not without its charms. The project is built around the concept of modularity and redundancy. The controller, designed primarily for flying vehicles, has an ATMega328P as its primary processor, into which various modules can be plugged in to handle different tasks.

This design choice has several benefits – having separate processors to handle individual jobs can make sense in real-time systems. You’d hardly want your quadcopter to crash because the battery management routines were stealing CPU time from the flight dynamics calculations. Instead, by offloading tasks to individual modules, each can run without interfering with the others. Modularity does come with drawbacks however — the problem of maintaining efficient communication between modules is one of them. [Hering] also plans to make sure the system can be set up to use multiples of the same module for redundancy – similar to modern flight systems in passenger aircraft that weigh the results of several computers to make decisions.

Much work has already been done – with the YAUVC platform already fleshed out with a backbone design as well as modules for WiFi, accelerometers and GPS navigation. We look forward to seeing YAUVC reaching flight-ready status soon!

Annealing Plastic For Stronger Prints

Much fuss has been made over the strength of 3D printed parts. These parts are obviously stronger in one direction than another, and post processing can increase that strength. What we’re lacking is real data. Luckily, [Justin Lam] has just the thing for us: he’s tested annealed printed plastics, and the results are encouraging.

The current research of annealing 3D printed parts is a lot like metallurgy. If you put a printed part under low heat — below the plastic’s glass transition temperature — larger crystals of plastic are formed. This research is direct from the Society of Plastics Engineers, and we’re assuming they know more about material science than your average joe. These findings measured the crystallinity of a sample in relation to both heat and time, and the results were promising. Plastic parts annealed at a lower temperature can attain the same crystallinity, and therefore the same strength, if they’re annealed for a longer time. The solution is simple: low and slow is the best way to do this, which sounds a lot like sous vide.

A while back, [Justin] built a sous vide controller for the latest cooking fad. The idea behind a sous vide controller is to heat food in a water bath at a lower temperature, but for a longer time. The result here is the most tender steaks you’ll ever have, and also stronger 3D printed parts. In his test, [Justin] printed several rectangular samples of PLA, set the temperature to 70°C, and walked away for a few hours. The samples annealed in the water bath were either cooled quickly or slowly. The test protocol also included measuring the strength in relation to layer height. The test jig consisted of a bathroom scale, a drill press, and a slot head screwdriver bit.

Although the test protocol is slightly questionable, the results are clear: annealing works, but only if the part is printed at a low layer height. However, parts with larger layer heights had a higher maximum stress. Is this helpful for the home prototyper? That depends. The consensus seems to be that if you’re at the mechanical limits of a 3D printed part, you might want to think about more traditional manufacturing. That’s just common sense, but there’s always room to push the envelope of 3D printing.

Graphene From Graphite By Electrochemical Exfoliation

Graphene is an interesting material, but making enough of the stuff to do something useful can be a little tough. That’s why we’re always on the lookout for new methods, like this electrochemical process for producing graphene in bulk.

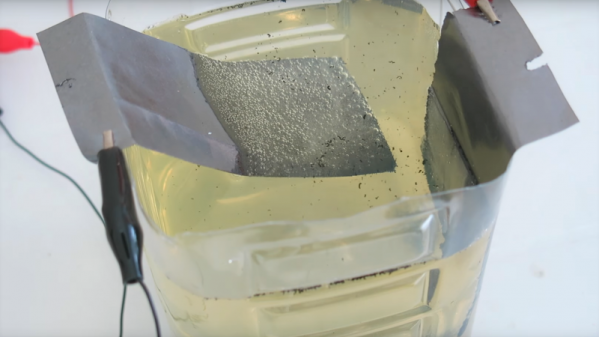
You probably know that graphene is a molecular monolayer of carbon atoms linked in hexagonal arrays. Getting to that monolayer is a difficult proposition, but useful bits of graphene can be created by various mechanical and chemical treatments of common graphite. [The Thought Emporium]’s approach to harvesting graphene from graphite is a two-step process starting with electrochemical exfoliation. Strips of thin graphite foil are electrolyzed in a bath of ferrous sulfate, resulting in the graphite delaminating and flaking off into the electrolyte. After filtering and cleaning, the almost graphene is further exfoliated in an ultrasonic cleaner. The result is gram quantity yields with very little work and at low cost.

There’s plenty of effort going into new methods of creating graphene these days, whether by barely controlled explosions or superheating soybean oil. But will graphene be the Next Big Thing? The jury is still out on that.

Continue reading “Graphene From Graphite By Electrochemical Exfoliation”

Controlling A Robot Over The Internet Grows Up

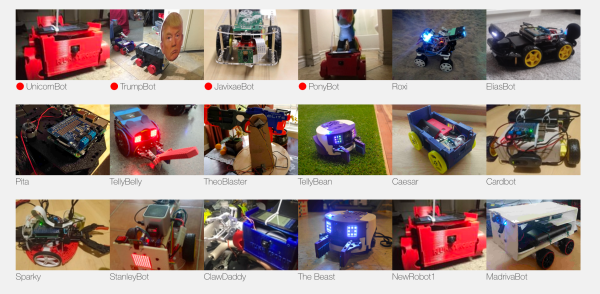
Since the beginning of the Internet people have been controlling robots over it, peering at grainy gifs of faraway rec rooms as the robot trundles around. RunMyRobot.com has taken that idea and brought it fully into the teens. These robots use wifi or mobile connections, are 3D printed, and run Python.

The site aims to provide everything to anyone who wants to participate. If you’re just an anonymous visitor, you can still play with the robots, but anyone can also play with the same one, and sometimes a whole bunch of visitors create a cacophony of commands that makes it not fun—but you can always move to a different robot. Logged-in members of the site have the option to take over a robot and not allow anyone else to use it.

If you want to build a robot and add it to the site, the creators show how to do that as well, with a Github code repository and 3D-printable designs available for download, as well as YouTube instructions on how to build either the printed robot or one made with off-the shelf parts. They’re also looking for patrons to help with development, with the first item on their list being a mobile app.

Thanks to [Sim] for the link.


Sharpening Drills Bits The Hard Way

Drill bits are so cheap that when one is too chowdered up to keep working, we generally just toss it out. So you might expect a video on sharpening drill bits to be somewhat irrelevant, but [This Old Tony] makes it work.

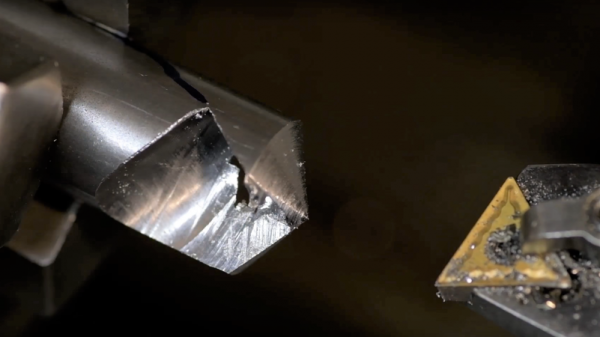
The reason this video is worth watching is not just that you get to learn how to sharpen your bits, although that’s an essential metalworker’s skill. Where [This Old Tony]’s video shines is by explaining why a drill bit is shaped the way it is, which he does by fabricating a rudimentary twist drill bit from scratch. Seeing how the flutes and the web are formed and how all the different angles interact to cut material and transport the swarf away is fascinating. And as a bonus, knowing what the angles do allows you to customize a grind for a special job.

[This Old Tony] may be just a guy messing around in his shop, but he’s got a wealth of machine shop knowledge and we always look forward to seeing what he’s working on, whether it’s a homemade fly cutter or a full-blown CNC machine.

Continue reading “Sharpening Drills Bits The Hard Way”