Émilie Du Châtelet: An Energetic Life

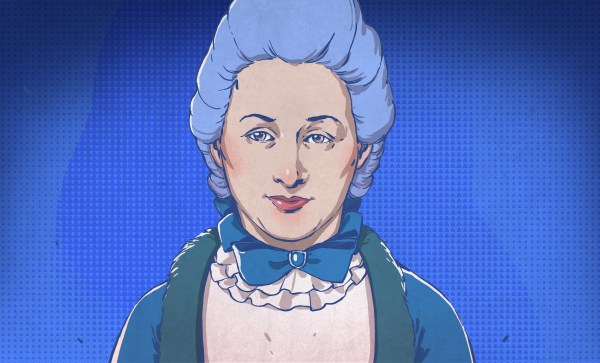
Émilie du Châtelet lived a wild, wild life. She was a brilliant polymath who made important contributions to the Enlightenment, including adding a mathematical statement of conservation of energy into her French translation of Newton’s Principia, debunking the phlogiston theory of fire, and suggesting that what we would call infrared light carried heat.

She had good company; she was Voltaire’s lover and companion for fifteen years, and she built a private research institution out of a château with him before falling in love with a younger poet. She was tutored in math by Maupertuis and corresponded with Bernoulli and Euler. She was an avid gambler and handy with a sword. She died early, at 41 years, but those years that she did live were pretty amazing. Continue reading “Émilie Du Châtelet: An Energetic Life”

Making a 3D camel using a scroll saw

Making 3D Objects The Scroll Saw Way

These days most have come to think that if you want to make a complex 3D object with all curved surfaces then a 3D printer is the only way to go. Many have even forgotten that once such things could be hand carved. [JEPLANS], on the other hand, is a master at making these objects using only a scroll saw as he’s done with his latest, a miniature camel cut from a single block of maple.

His process has a lot of similarities to 3D printing. He starts with a computer drawn design, in this case for the camel’s front and side. After cutting it out, he peels off the unwanted pieces and the camel emerges like magic from the block. But he didn’t like the amount of manual work he’d need in order to improve it further so he modifies the design by adding a top view, iterating just as you would with 3D printing. But after cutting that out, he finds he’d damaged one of the legs. And so he cuts out a new one but only after making one more design change, this time adjusting the camel’s head position. And with that result he’s satisfied. Check out his painstaking and somehow familiar process in the video below.

Continue reading “Making 3D Objects The Scroll Saw Way”

Hackaday guide to Lathes

A Buyer’s Guide To Lathe Options

Lathes are complicated machines, and buying one requires weighing a lot of options. We’ve already talked about buying new Asian, or old American machines (with apologies to the Germans, British, Swiss, and all the other fine 20th century machine tool making-countries). We also talked about bed length and swing, and you ain’t got nothin’ if you ain’t got that swing. Let’s talk about the feature set now. If you’re buying new, you’ll shop on these details. If you’re buying used, knowing the differences will help you pick a good project machine.

Continue reading “A Buyer’s Guide To Lathe Options”

Heat Seeking Robot And Camera Tear Down

[Marco Reps] found an HT02 thermal imaging camera in his mailbox. He found the resolution was fine for looking at big objects but worthless for examining circuit boards. So he decided to just tear it into pieces — an urge we totally understand.

Inside was a thermopile sensor that was easy to reverse engineer. So [Marco] decided to rework a Raspberry Pi robot to use the camera and turn it into a heat seeker.

Continue reading “Heat Seeking Robot And Camera Tear Down”

Dissecting The AVR DebugWire

Anyone who’s ever written more than a dozen or so lines of code knows that debugging is a part of life in our world. Anyone who’s written code for microcontrollers knows that physical debugging is a part of our life as well. Atmel processors use a serial communications protocol called debugWire, which is a simpler version of JTAG and allows full read/write access to all registers and allows one to single step, break, etc. [Nerd Ralph], a prominent fixture here at Hackaday has dug into the AVR debugWire protocol and enlightened us with some valuable information.

While the protocol side of debugWire is a mostly-solved problem, the physical layer was giving him trouble. He started with a diode, and then went through a couple resistors and other components to interface with the debugWire pin on the AVR microcontroller, doing most of the troubleshooting work so now you don’t have to. He notes that interface components might need to be tailored to specific USB-TTL adapters, so keep that in mind if you care to delve into working with debugWire yourself.

We’re no strangers to debugging techniques here at Hackaday. As always, be sure to let us know if you run across any new techniques or try anything new yourself!

Assemble Your Own Modular Li-Ion Batteries

Low-voltage DC power electronics are an exciting field right now. Easy access to 18650 battery cells and an abundance of used Li-Ion cells from laptops, phones, etc. has opened the door for hackers building their own battery packs from these cheap cells. A big issue has been the actual construction of a pack that can handle your individual power needs. If you’re just assembling a pack to drive a small LED, you can probably get by with spring contacts. When you need to power an e-bike or other high power application, you need a different solution. A spot welder that costs $1000 is probably the best tool, but out of most hackers’ budget. A better solution is needed.

Vruzend v2 Battery Caps.

Enter [Micah Toll] and his Vruzend battery connectors, whose Kickstarter campaign has exceded its goal several times over. These connectors snap onto the ends of standard 18650 cells, and slot together to form a custom-sized battery pack. Threaded rods extend from each plastic cap to enable connection to a bus bar with just a single nut. The way that you connect each 18650 cell determines the battery pack’s voltage and current capability. There are a couple of versions of the connector available through the campaign, and the latest version 2.0 should allow some tremendously powerful battery pack designs. The key upgrade is that it now features corrosion-resistant, high-power nickel-plated copper busbars allowing current up to 20A continuous. A side benefit of these caps instead of welded tabs is that you can easily swap out battery cells if one fails or degrades over time. Continue reading “Assemble Your Own Modular Li-Ion Batteries”

Parametric Hinges With Tinkercad

Simple tools are great, but sometimes it is most convenient to just use something easy, and since it gets the work done, you don’t try out some of the other features. Tinkercad is a great example of that kind of program. It is actually quite powerful, but many people just use it in the simplest way possible. [Chuck] noticed a video about making a 3D-printed hinge using Tinkercad and in that video [Nerys] manually placed a bunch of hinges using cut and paste along with the arrow keys for positioning. While it worked, it wasn’t the most elegant way to do it, so [Chuck] made a video showing how to do it parametrically. You can see that video below, along with the original hinge video.

There are really two major techniques [Chuck] shows. First, he adds the necessary pieces to create the hinges to the Tinkercad toolbox. That makes it really simple to add them to any of your future designs. Second, he uses a combination of numeric parameters and duplication to quickly and precisely place the hinge components across another object — in this case a Batman logo.

Continue reading “Parametric Hinges With Tinkercad”