Bringing Modern Control To An Old Radio

The modern ham radio shack can take many forms. Some are shrines the “boat anchor” radios of old, named for their considerable weight. Others are simply a small, unassuming software-defined radio (SDR) hooked up to a laptop. Nowadays, many shacks fall somewhere in the middle. It’s not uncommon to find a sleek Icom IC-7300 sitting atop an ancient Hallicrafters SX-115 (which sounds suspiciously like the author’s setup). When a ham wants to work a digital mode such as FT-8, they will undoubtedly reach for a newer radio complete with USB (Universal Serial Bus in this case, not Upper Sideband) rig control — but what if the newest piece of equipment they have is a thirty-year-old Kenwood?

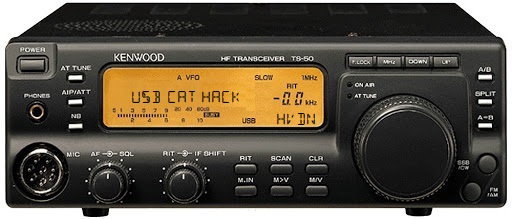
If that sounds like you, then fear not because [Steve Bossert] has you covered. He took his trusty Kenwood TS-50, a classic radio from 1993 whose most advanced feature is fuzzy logic, and upgraded it with USB (again, the serial bus) control.

When Kenwood designed the TS-50, they had computer control in mind. There’s a hidden port on the bottom of the unit which reveals a connector that mates with Kenwood’s proprietary (and expensive) set of serial control cables. Thankfully, the engineers over at Kenwood decided to use UART for PC communication, so slapping a USB port in the radio’s case isn’t as daunting as it may sound. [Steve] picked up a CP2104 USB-TTL UART Serial Adapter and wired it up to the radio’s control port. After a bit of drilling, screwing, and gluing, the radio had an upgraded (and non-proprietary!) interface compatible with the ever-popular hamlib. While this doesn’t cover all radio control functions, it gets you tuning, which is pretty important. For a fully modern radio experience, [Steve] suggests using the 8-pin mic connector along with an interface such as Rigblaster or Signalink. This adds PTT and audio signal routing.

If you want to try this for yourself, be sure to check out [Steve]’s extremely well-documented writeup. You could even take this a step further and control your TS-50 from your smartphone with this HTML5 interface we saw a few months back.

The V-Bomber Ejector Seat Controversy

Once upon a time, bailing out of a plane involved popping open the roof or door, and hopping out with your parachute, hoping that you’d maintained enough altitude to slow down before you hit the ground. As flying speeds increased and aircraft designs changed, such escape became largely impossible.

Ejector seats were the solution to this problem, with the first models entering service in the late 1940s. Around this time, the United Kingdom began development of a new fleet of bombers, intended to deliver its nuclear deterrent threat over the coming decades. The Vickers Valiant, the Handley Page Victor, and the Avro Vulcan were all selected to make up the force, entering service in 1955 through 1957 respectively. Each bomber featured ejector seats for the pilot and co-pilot, who sat at the front of the aircraft. The remaining three crew members who sat further back in the fuselage were provided with an escape hatch in the rear section of the aircraft with which to bail out in the event of an emergency.

Continue reading “The V-Bomber Ejector Seat Controversy”

Laser Blasts Out High-Quality PCBs

With how cheap and how fast custom PCBs have gotten, it almost doesn’t make sense to roll your own anymore, especially when you factor in the messy etching steps and the less than stellar results. That’s not the only way to create a PCB, of course, and if you happen to have access to a 20-Watt fiber laser, you can get some fantastic homemade PCBs that are hard to tell from commercial boards.

Lucikly, [Saulius Lukse] of Kurokesu fame has just such a laser on hand, and with a well-tuned toolchain and a few compromises, he’s able to turn out 0.1-mm pitch PCBs in 30 minutes. The compromises include single-sided boards and no through-holes, but that should still allow for a lot of different useful designs. The process starts with Gerbers going through FlatCAM and then getting imported into EZCAD for the laser. There’s a fair bit of manual tweaking before the laser starts burning away the copper between the traces, which took about 20 passes for 0.035-mm foil on FR4. We have to admit that watching the cutting proceed in the video below is pretty cool.

Once the traces are cut, UV-curable solder resist is applied to the whole board. After curing, the board goes back to the laser for another pass to expose the pads. A final few passes with the laser turned up to 11 cuts the finished board free. We wonder why the laser isn’t used to drill holes; we understand that vias would be hard to connect to the other side, but it seems like through-hole components could be supported. Maybe that’s where [Saulius] is headed with this eventually, since there are traces that terminate in what appears to be via pads.

Whatever the goal, these boards are really slick. We usually see lasers used to remove resist prior to traditional etching, so this is a nice change.

Continue reading “Laser Blasts Out High-Quality PCBs”

Retro Terminals Bring Some Style To Your Desktop

It wasn’t so long ago that a desktop computer was just a beige box with another, heavier, beige box sitting next to it or maybe perched on top. They’re a bit more visually exciting these days, with even mass produced PCs now shipping with RGB lighting and clear side panels. But even so, few could really look at a modern desktop computer and call it objectively beautiful.

But [Oriol Ferrer MesiĆ ] wonders if we couldn’t improve on things a bit. Over the last few months, he’s been experimenting with small 3D printed enclosures that reimagine the traditional desktop computer aesthetic. With their distinctively retro-futuristic style, they look like the kind of gadgets science magazines in the 1960s thought would be dotting kitchens, living rooms, and space stations by the year 2000. But unlike those fanciful creations, each one of these beauties is a fully functional computer.

A few of the designs are relatively conservative, and not entirely unlike some of the old “dumb terminals” of the 1970s. With a Raspberry Pi 4 and a tablet-sized screen, these diminutive terminals would be perfectly usable for light desktop work or some retro gaming.

But we particularly like the ultra-widescreen design that [Oriol] has come up with. With a fairly unusual 4:1 aspect ratio LCD, the printed enclosure for this one was so large that it had to be done in two pieces on his Ender 3. To keep the 8″ 1920 x 480 panel well fed, this design uses a Jetson Nano 2GB which has considerably more graphical punch than other Linux SBCs of similar size and price.

As part of the recent cyberdeck craze, we’ve seen plenty of people recreating the look and feel of vintage portable computers with 3D printed cases and modern components. Desktop creations have been far less common, but with gorgeous designs like these to serve as inspiration, that may change.