OLED Display Kicks Knob Up Several Accurate Notches

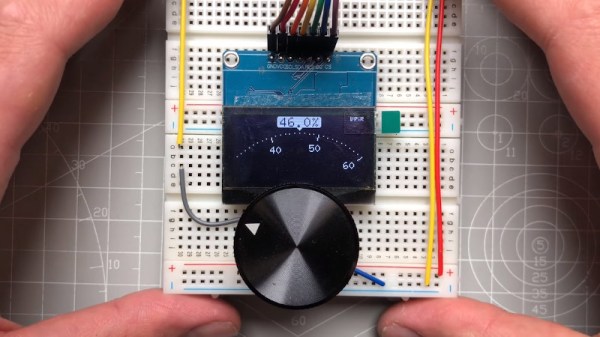
As far as input devices go, the potentiometer is pretty straightforward: turn it left, turn it right, and you’ve pretty much seen all there is to see. For many applications that’s all you need, but we can certainly improve on the experience with modern technology. Enter this promising project from [upir] that pairs a common potentiometer with a cheap OLED display to make for a considerably more engaging user experience.
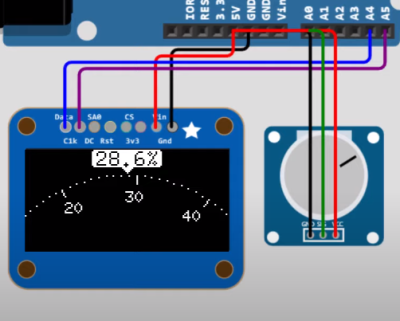
To save time, the code is fine tuned in a simulator.

The basic idea is to mount the display over the potentiometer knob so you can show useful information such a label that shows what it does, and a readout of the currently detected value. But you’ll likely want to show where the knob is currently set within the range of possible values as well, and that’s where things get interesting.

In the video after the break, [upir] spends a considerable amount of time explaining the math behind details like the scrolling tick marks. The nearly 45 minute long video wraps up with some optimization, as getting the display to move along with the knob in real-time on an Arduino UNO took a bit of extra effort. The final result looks great, and promises to be a relatively cheap way to add an elegant and functional bit of flair to an otherwise basic knob.

With the code and this extensive demonstration of how it all works, adding a similar capability to your next knob-equipped gadget shouldn’t be too much of a challenge. Perhaps it could even be combined with the OLED VU meters we’ve covered previously. Be sure to let us know if you end up using this technique, as we’d love to see it in action.

Continue reading “OLED Display Kicks Knob Up Several Accurate Notches”

Custom-Fit Small Shop Crane Lightens The Load

On the shortlist of workshop luxuries, we’d bet a lot of hackers would include an overhead crane. Having the ability to lift heavy loads safely and easily opens up a world of new projects, and puts the shop into an entirely different class of capabilities.

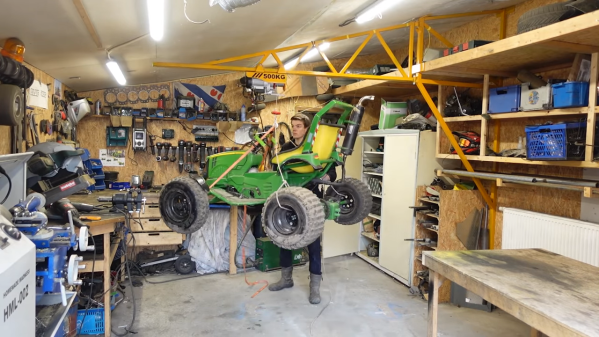
As with many of us, [Jornt] works in a shop with significant space constraints, so the jib crane he built had to be a custom job. Fabricated completely from steel tube, the build started with fabricating a mast to support the crane and squeezing it into a small slot in some existing shelves in the shop, which somehow didn’t catch on fire despite being welded in situ. A lot of custom parts went into the slewing gear that mounts the jib, itself a stick-built space frame that had to accommodate a pitched ceiling. A double row of tubing along the bottom of the jib allows a trolley carrying a 500 kg electric winch to run along it, providing a work envelope that looks like it covers the majority of the shop. And hats off for the safety yellow and black paint job — very industrial.

From the look of the tests in the video below, the crane is more than up to the task of lifting engines and other heavy loads in the shop. That should prove handy if [Jornt] tackles another build like his no-compromises DIY lathe again.

Continue reading “Custom-Fit Small Shop Crane Lightens The Load”

2022 Sci-Fi Contest: The Animatronic Baby Yoda You’ve Always Wanted

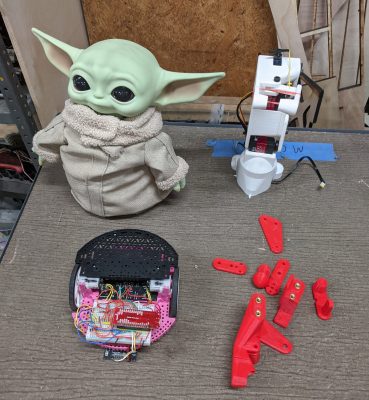
Simple robot parts make up the internals.

When it comes to sci-fi, it’s hard to go past Star Wars, and many submissions to our contest land in that exact universe. [Kevin Harrington]’s entry is one such example, with his animatronic Baby Yoda that’s exactly as cute as you’d hope it would be.  

The build is based on a Pololu Romi chassis, a simple two-wheeled differential-drive robot platform. It’s paired with a robot arm in the form of Hephaestus Arm 2, which provides the articulation for the precocious little creature. An ESP32 microcontroller serves as the brains of the operation, controlling all the servos and motors that make baby Yoda move. Control is via WiFi, using a website hosted on the ESP32 via RBE1001lib.

The animatronic baby Yoda would surely be a hit sitting on one’s shoulder at any sci-fi convention. Overall, it’s a simple robot that becomes more personable by skinning it with an adorable toy. It’s not the first baby Yoda (or Grogu) that we’ve seen, either – the popular character has inspired builds before, too! Video after the break.

Continue reading “2022 Sci-Fi Contest: The Animatronic Baby Yoda You’ve Always Wanted”

Mobile-Focused Windows 11 Leaves Taskbar Stuck Along The Bottom

Yeah, I’ll admit it: I’m a Windows person. Two years ago this summer, I traded in an overworked Windows 7 laptop that was literally screaming in pain for a SFF Windows 10 box as my main machine. But 10 might mean the end for this scribe, who has used Windows since the late 1980s. Admittedly, it’s for a fairly petty reason — Microsoft have gotten rid of alternate-location taskbar support in Windows 11. As in, you can have the taskbar anywhere you want, as long as it’s the bottom of the screen.

Years ago, I switched my taskbar to the top for various reasons. For one, it just made more sense to me to have everything at the top, and nothing at the bottom to interrupt visual flow while reading a web page or a document. Plenty of people move it to one of the sides or hide it when not in use for the same reason. More importantly, I thought moving the taskbar to the top would help with my neck/shoulder strain issues, and I believe that it has. So oddly enough, this one little thing may be the dealbreaker that gets me to switch after thirty-something years to Linux, where top-aligned taskbars are more or less the norm.

Continue reading “Mobile-Focused Windows 11 Leaves Taskbar Stuck Along The Bottom”

A Line Follower With No Brains

A line follower is a common project for anyone wishing to make a start in robotics, a small wheeled device usually with some kind of optical sensor which allows it to follow a line drawn on the surface over which it runs. In most cases they incorporate a small microcontroller or perhaps an analogue computer which supplies power and steering control, but as the Crayon Car from [Greg Zumwalt] demonstrates, it’s possible to make a line follower without any brains at all.

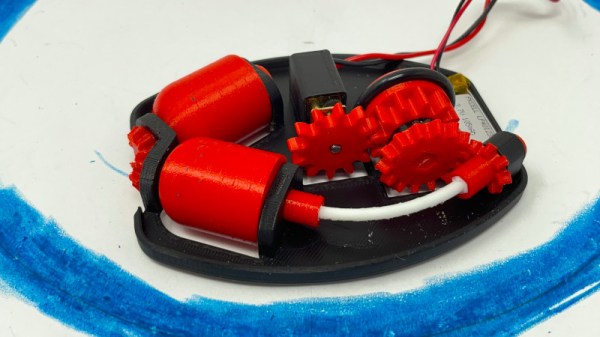
This seemingly impossible feat is achieved thanks to the line and road surface, it runs on a piece of paper over which the line is drawn with a crayon. The robot has a single straight-line drive wheel at one end and a pair of driven rollers at 90 degrees to each other at the other end, with the magic happening due to the difference in friction between paper and crayon. The robot follows a circular track with no problem, and while we can see it’s not without flaws we doubt it would be possible to make a simpler follower.

Sharp-eyed readers will have noticed that this is not the first line follower we’ve shown you which claims to have no brains, but we’d claim that since the previous machine had an analogue circuit, this one is a more worthy contender to the crown.

Continue reading “A Line Follower With No Brains”

Arm Pumps Up The Volume With Mbed And A Potentiometer

Last time, I told you how to get started with the “Black Pill” STM32F411 board using the Mbed OS. The example program, admittedly, didn’t use many of the features of the OS, unless you count what the USB serial port driver uses behind the scenes. However, this time, we’ll make a practical toy that lets you adjust your PC’s volume level with a pot.

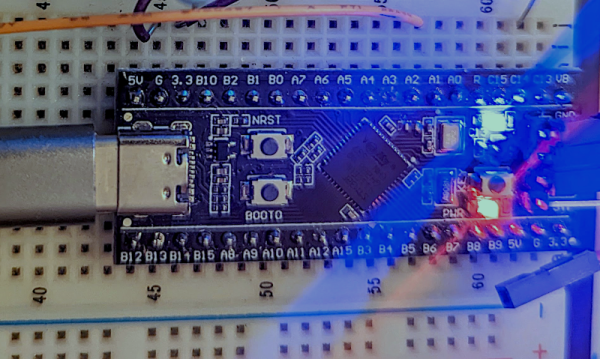
The Black Pill module on a breadboard.

The Black Pill is a good choice for this application since it has analog inputs and can act as a USB keyboard. In fact, the Mbed OS has drivers for all kinds of USB devices. We’ve seen the serial port, but you can also look like a mass storage device or a mouse, for example. Just for practice, we’ll create two threads of execution. One will read the pot and send a message over to the other thread. That thread will communicate with the PC as a USB keyboard. Any computer that understands media keys on a keyboard should work with the device.

Threads

Creating threads is very simple. For many cases, you just define a void function that takes no arguments and use it with a Thread object:

readknobThread.start(vol_thread);

Of course, the function shouldn’t return unless you want the thread to end. As I mentioned in the last post, you can sleep with the ThisThread::sleep_for call. There is also a yield call if you simply want to give up the time slice without sleeping for a specific amount of time.

Continue reading “Arm Pumps Up The Volume With Mbed And A Potentiometer”

Edible Electronics Let Us Hear The Lamentations Of The Chocolate Bunnies

Yet another Day of the Chocolate Bunnies has passed by, and what did you do to mark the occasion? You likely kicked back and relaxed, surrounded by whatever you gave up for Lent, but good for you if you mixed chocolate and electronics like [Repeated Failure] did. They created a completely edible chocolate Easter bunny that screams when bitten.

So obviously, the hardest part is figuring out something to build the circuit with that is both conductive and safe to eat. [Repeated Failure] spent a lot of time with carbon oleogel paste, which is made from natural oils and waxes. Not only was it less conductive than [Repeated Failure]’s skin, it came out pitch black and tasted like nothing, which kind of a bonus, when you think about it.

Then came the cake paint, which [Repeated Failure] laced with trace amounts of silver powder. While that worked somewhat better, a successful circuit would have likely required near-fatal amounts of the stuff. Yikes!

The winner turned out to be edible silver leaf, which is like gold leaf but cheaper. Ever had Goldschläger? Gold leaf is what’s suspended inside. The really nice thing about silver leaf is that it comes in thin sheets and can easily be cut into circuit traces with scissors and connected to I/O pins with copper tape. Be sure to check it out after the break, including [Repeated Failure]’s friend’s reaction to innocently biting the chocolate bunny’s ears off, as one tends to do first.

Think you’d rather hear plants giggle? Sure, it sounds cute, but it’s actually kind of creepy.

Continue reading “Edible Electronics Let Us Hear The Lamentations Of The Chocolate Bunnies”