Fail Of The Week: The SMD Crystal Radio That Wasn’t

The crystal radio is a time-honored build that sadly doesn’t get much traction anymore. Once a rite of passage for electronics hobbyists, the classic coil-on-an-oatmeal-carton and cat’s whisker design just isn’t that easy to pull off anymore, mainly because the BOM isn’t really something that you can just whistle up from DigiKey or Mouser.

Or is it? To push the crystal radio into the future a bit, [tsbrownie] tried to design a receiver around standard surface-mount inductors, and spoiler alert — it didn’t go so well. His starting point was a design using a hand-wound air-core coil, a germanium diode for a detector, and a variable capacitor that was probably scrapped from an old radio. The coil had three sections, so [tsbrownie] first estimated the inductance of each section and sourced some surface-mount inductors that were as close as possible to their values. This required putting standard value inductors in series and soldering taps into the correct places, but at best the SMD coil was only an approximation of the original air-core coil. Plugging the replacement coil into the crystal radio circuit was unsatisfying, to say the least. Only one AM station was heard, and then only barely. A few tweaks to the SMD coil improved the sensitivity of the receiver a bit, but still only brought in one very local station.

[tsbrownie] chalked up the failure to the lower efficiency of SMD inductors, but we’re not so sure about that. If memory serves, the windings in an SMD inductor are usually wrapped around a core that sits perpendicular to the PCB. If that’s true, then perhaps stacking the inductors rather than connecting them end-to-end would have worked better. We’d try that now if only we had one of those nice old variable caps. Still, hats off to [tsbrownie] for at least giving it a go.

Note: Right after we wrote this, a follow-up video popped up in our feed where [tsbrownie] tried exactly the modification we suggested, and it certainly improves performance, but in a weird way. The video is included below if you want to see the details.

Continue reading “Fail Of The Week: The SMD Crystal Radio That Wasn’t”

A Month Without IPV4 Is Like A Month Without…

Recently, there was a Mastodon post from [nixCraft] challenging people to drop their NAT routers for the month of November and use only IPv6. What would it be like to experience “No NAT November?” [Alex Haydock] decided to find out.

What did he learn? You’d imagine he’d either wholeheartedly embrace IPv6 or stagger back in and warn everyone not to mess with their configuration. Instead, he recommends you go IPv6 mostly. He notes he is only talking about a home network, not necessarily networks for a big company or an Internet carrier. That’s a different topic.

IPv6 has been around since 1998, but it has been slow to catch on. However, OS support seems universal at this point. [Alex] was able to easily switch on IPv6 only using Windows, macOS, and several Linux flavors. He didn’t use any Android devices, but they should be OK. His iOS phones were fine.

Continue reading “A Month Without IPV4 Is Like A Month Without…”

3D Printing Threaded Replacements

Printing an object with threads is nothing new. If you know the specifications on the other thread or you are in control of it, no problem. But [Shop Therapy] wanted to print parts that mate with an existing unknown thread. Out come the calipers.

The first measurement is the height. He rounded that up in the video but mentioned in the comments that it should really be a little smaller so that it seats properly.

Continue reading “3D Printing Threaded Replacements”

Car Radio Chip Goes Into DIY Build

[Sjef Verhoeven] still loves radio and enjoys the challenge of listening to radio signals from far away. He wanted to build his own radio and turned to the TEF6686 chip, a device often found in car radios. It is known to be very sensitive and seemed perfect for pulling in weak signals. So [Sjef] built this DIY radio and shares the details in this recent Spectrum post.

Unlike older radio-on-chip devices, the TEF6686 is a DSP, which, according to the post, is part of the reason it is ultrasensitive. Even though it is made for car radios, the device is versatile and can pick up shortwave as well as the usual broadcast bands, with the right configuration.

Continue reading “Car Radio Chip Goes Into DIY Build”

PI Board chess board on a table in a room

Chess What: One More Pi-Powered Board

Chess is timeless, but automating it? That’s where the real magic begins. Enter [Tamerlan Goglichidze]’s Pi Board, an automated chess system that blends modern tech with age-old strategy. Inspired by Harry Potter’s moving chessboard and the commercial Square Off board, [Tamerlan] re-imagines the concept using a Raspberry Pi, stepper motors, and some clever engineering. It’s not just about moving pieces — it’s about doing so with precision and flair.

At its core, the Pi Board employs an XY stepper motor grid coupled with magnets to glide chess pieces across the board. While electromagnets seemed like a promising start, [Tamerlan] found them impractical due to overheating and polarity-switching issues. Enter servo linear actuators: efficient, precise, and perfect for the job.

But the innovation doesn’t stop there. A custom algorithm maps the 8×8 chess grid, allowing motors to track positions dynamically—no tedious resets required. Knight movements and castling? Handled with creative coding that keeps gameplay seamless. [Tamerlan] explains it all in his sleekly designed build log.

Though it hasn’t been long since we featured a Pi-powered LED chess board, we feel that [Tamerlan]’s build stands out for its ingenuity and optimization. For those still curious, we have a treasure trove of over fifty chess-themed articles from the last decade. So snuggle up during these cold winter months and read up on these evergreens!

Continue reading “Chess What: One More Pi-Powered Board”

Holograms: The Art Of Recording Wavefronts

The difference between holography and photography can be summarized perhaps most succinctly as the difference between recording the effect photons have on a surface, versus recording the wavefront which is responsible for allowing photographs to be created in the first place. Since the whole idea of ‘visible light’ pertains to a small fragment of the electromagnetic (EM) spectrum, and thus what we are perceiving with our eyes is simply the result of this EM radiation interacting with objects in the scene and interfering with each other, it logically follows that if we can freeze this EM pattern (i.e. the wavefront) in time, we can then repeat this particular pattern ad infinitum.

Close-up of the wavefront pattern recorded on the holographic film (Credit: 3Blue1Brown, YouTube)

In a recent video by [3Blue1Brown], this process of recording the wavefront with holography is examined in detail, accompanied by the usual delightful visualizations that accompany the videos on [3Blue1Brown]’s channel. The type of hologram that is created in the video is the simplest type, called a transmission hologram, as it requires a laser light to illuminate the holographic film from behind to recreate the scene. This contrasts with a white light reflection hologram, which can be observed with regular daylight illumination from the front, and which is the type that people are probably most familiar with.

The main challenge is, perhaps unsurprisingly, how to record the wavefront. This is where the laser used with recording comes into play, as it forms the reference wave with which the waves originating from the scene interact, which allows for the holographic film to record the latter. The full recording setup also has to compensate for polarization issues, and the exposure time is measured in minutes, so it is very sensitive to any changes. This is very much like early photography, where monochromatic film took minutes to expose. The physics here are significant more complex, of course, which the video tries to gently guide the viewer through.

Also demonstrated in the video is how each part of the exposed holographic film contains enough of the wavefront that cutting out a section of it still shows the entire scene, which when you think of how wavefronts work is quite intuitive. Although we’re still not quite in the ‘portable color holocamera’ phase of holography today, it’s quite possible that holography and hologram-based displays will become the standard in the future.

Continue reading “Holograms: The Art Of Recording Wavefronts”

Scratch And Sniff Stickers And The Gas Panic Of ’87

Ever wonder how those scratch and sniff stickers manage to pack a punch of aroma into what looks like ordinary paper? The technology behind it is deceptively clever, and has been used everywhere from children’s books to compact discs.

Most Scratch and Sniff stickers are simple nose-based novelties, though they’ve seen other uses as diagnostic tools, too. As Baltimore Gas and Electric discovered in 1987, though, these stickers can also cause a whole lot of hullabaloo. Let’s explore how this nifty technology works, and how it can go—somewhat amusingly—wrong.

The Science

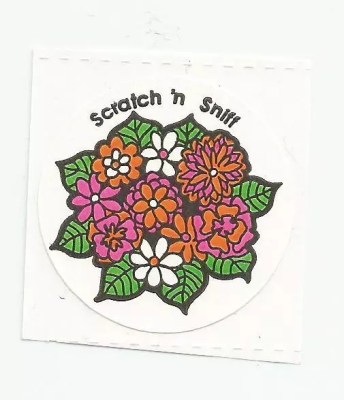
3M developed the scratch and sniff technology in the 1960s. It quickly gained iconic status in the decades that followed. via eBay

At its heart, scratch and sniff technology involves the microencapsulation of tiny smellable particles, which are then impregnated into stickers or other paper products. Microscopic amounts of aromatic materiale are trapped inside gelatin or plastic capsules, and then stuck to paper. When you scratch the surface, these capsules rupture, releasing their aromatic cargo into the air. It’s an elegant feat of materials engineering, originally developed by Gale W. Matson. Working at 3M in the 1960s, he’d been intending to create a new kind of carbonless copy paper.

Scratch and Sniff stickers soon became a popular novelty in the 1970s. The catchy name was perfect—it told you everything you need to know. A children’s book named Little Bunny Follows His Nose was one of the first widespread applications. Released in 1971, it  was entirely based around the whole scratch and sniff concept. Children could read along and scratch various illustrations of peaches, roses and pine needles to see what they smelled like. The book was reprinted multiple times, remaining in publication for over three decades.

Other popular media soon followed. Pop rock band The Raspberries put a scratch and sniff sticker on their album cover in 1972. Director John Waters would go on to release his 1981 film Polyester with an accompanying “Odorama” card, which featured multiple smells for viewers to sniff during the movie. The concept still resurfaces occasionally, though the gimmick is now well-worn. In 2010, Katy Perry’s Teenage Dream album smelled like cotton candy thanks to a scratch-and-sniff treatment on the Deluxe Edition, and King Gizzard & The Lizard Wizard put a similar touch on 2017’s Flying Microtonal Banana. Continue reading “Scratch And Sniff Stickers And The Gas Panic Of ’87”