An array of tiny parallel green lines appears over a steel surface. The white dot a laser beam is visible in the lower center of the picture.

A New Way To Make (Almost) Holograms With Lasers

The spectrum of laser technologies available to hackers has gradually widened from basic gas lasers through CO2 tubes, diode lasers, and now fiber lasers. One of the newer entries is the MOPA laser, which combines a laser diode with a fiber-based light amplifier. The diode’s pulse length and repetition rate are easy to control, while the fiber amplifier gives it enough power to do interesting things – including, as [Ben Krasnow] found, etch hologram-like diffraction gratings onto stainless steel.

Stainless steel works because it forms a thin oxide layer when heated, with a thickness determined by the temperature it reaches. The oxide layer creates thin-film interference with incoming light, letting the laser mark parts of a steel sheet with different colors by varying the intensity of heating. [Ben] wrote a script to etch color images onto steel using this method, and noticed in one experiment that one area seemed to produce diffraction patterns. More experimentation revealed that the laser could consistently make diffraction gratings out of parallel patterns of oxide lines. Surprisingly, the oxide layer seemed to grow mostly down into the metal, instead of up from the surface.

The pitch of the grating is perpendicular to the direction of the etched lines, and varying the line spacing changes the angle of diffraction, which should in theory be enough control to print a hologram with the laser. [Ben]’s first experiment in this general direction was to create a script that turned black-and-white photographs into shimmering matrices of diffraction-grating pixels, in which each pixel’s grating orientation was determined by its brightness. To add a parallax depth effect, [Ben] spread out images into a gradient in a diffraction grating, so that it produced different images at different angles. The images were somewhat limited by the minimum size required for the grating pixels, but the effect was quite noticeable.

Unfortunately, since the oxide layers grow down into the metal, [Ben] doubts whether the laser can etch molds for diffraction-grating chocolate. If you’re interested in more diffraction optics, check out these custom diffraction lenses or the workings of normal holograms.

A metal needle tip comes to a point against a white background. A scale bar in the lower left shows a 300 micrometer length.

Etching Atomically Fine Needle Points

[Vik Olliver] has been extending the lower resolution limits of 3D printers with the RepRapMicron project, which aims to print structures with a feature size of ten micrometers. A molten plastic extruder would be impractical at such small scales, even if a hobbyist could manufacture one small enough, so instead [Vik]’s working on a system that uses a very fine needle point to place tiny droplets of UV resin on a substrate. These points have to be sharper than anything readily available, so his latest experiments have focused on electrochemically etching his own needles.

The needles start with a fine wire, which a 3D-printed bracket holds hanging down into a beaker of electrolyte, where another electrode is located. By applying a few volts across the circuit, with the wire acting as an anode, electrochemical erosion eventually wears through the wire and it drops off, leaving an atomically sharp point. Titanium wire performs best, but Nichrome and stainless steel also work. Copper wire doesn’t work, and by extension, nor does the plated copper wire sometimes sold as “stainless steel” by sketchy online merchants.

The electrolyte was made from either a 5% sodium chloride solution or 1% nitric acid. The salt solution produced a very thin, fine point, but also produced a cloudy suspension of metal hydroxides around the wire, which made it hard to tell when the wire had broken off. The goal of nitric acid was to prevent hydroxide formation; it produced a shorter, blunter tip with a pitted shaft, but it simply etched the tip of the wire to a point, with the rest of the wire never dropping off. Some experimentation revealed that a mixture of the two electrolyte solutions struck a good balance which etched fine points like the pure salt solution, but also avoided cloudy precipitates.

If you’re interested in seeing more of the RepRapMicron, we’ve looked at a previous iteration which scribed a minuscule Jolly Wrencher in marker ink. On a more macro scale, we’ve also seen one 3D printer which used a similar resin deposition scheme.

A vertically-mounted black disk with a concentric pattern of reflective disks is illuminated under a red light. A large number of copper wires run away from the the disk to a breadboard.

Deforming A Mirror For Adaptive Optics

As frustrating as having an atmosphere can be for physicists, it’s just as bad for astronomers, who have to deal with clouds, atmospheric absorption of certain wavelengths, and other irritations. One of the less obvious effects is the distortion caused by air at different temperatures turbulently mixing. To correct for this, some larger observatories use a laser to create an artificial star in the upper atmosphere, observe how this appears distorted, then use shape-changing mirrors to correct the aberration. The physical heart of such a system is a deformable mirror, the component which [Huygens Optics] made in his latest video.

The deformable mirror is made out of a rigid backplate with an array of linear actuators between it and the thin sheet of quartz glass, which forms the mirror’s face. Glass might seem too rigid to flex under the tenth of a Newton that the actuators could apply, but everything is flexible when you can measure precisely enough. Under an interferometer, the glass visibly flexed when squeezed by hand, and the actuators created enough deformation for optical purposes. The actuators are made out of copper wire coils beneath magnets glued to the glass face, so that by varying the polarity and strength of current through the coils, they can push and pull the mirror with adjustable force. Flexible silicone pillars run through the centers of the coils and hold each magnet to the backplate.

A square wave driven across one of the actuators made the mirror act like a speaker and produce an audible tone, so they were clearly capable of deforming the mirror, but a Fizeau interferometer gave more quantitative measurements. The first iteration clearly worked, and could alter the concavity, tilt, and coma of an incoming light wavefront, but adjacent actuators would cancel each other out if they acted in opposite directions. To give him more control, [Huygens Optics] replaced the glass frontplate with a thinner sheet of glass-ceramic, such as he’s used before, which let actuators oppose their neighbors and shape the mirror in more complex ways. For example, the center of the mirror could have a convex shape, while the rest was concave.

This isn’t [Huygens Optics]’s first time building a deformable mirror, but this is a significant step forward in precision. If you don’t need such high precision, you can also use controlled thermal expansion to shape a mirror. If, on the other hand, you take it to the higher-performance extreme, you can take very high-resolution pictures of the sun.

A magnifying glass is seen behind a small tea candle. The magnifying image is projecting the shadow of a column of heated air.

Finding Simpler Schlieren Imaging Systems

Perhaps the most surprising thing about shadowgraphs is how simple they are: you simply take a point source of light, pass the light through a the volume of air to be imaged, and record the pattern projected on a screen; as light passes through the transition between areas with different refractive indices, it gets bent in a different direction, creating shadows on the viewing screen. [Degree of Freedom] started with these simple shadowgraphs, moved on to the more advanced schlieren photography, and eventually came up with a technique sensitive enough to register the body heat from his hand.

The most basic component in a shadowgraph is a point light source, such as the sun, which in experiments was enough to project the image of an escaping stream of butane onto a sheet of white paper. Better point sources make the imaging work over a wider range of distances from the source and projection screen, and a magnifying lens makes the image brighter and sharper, but smaller. To move from shadowgraphy to schlieren imaging, [Degree of Freedom] positioned a razor blade in the focal plane of the magnifying lens, so that it cut off light refracted by air disturbances, making their shadows darker. Interestingly, if the light source is small and point-like enough, adding the razor blade makes almost no difference in contrast.

With this basic setup under his belt, [Degree of Freedom] moved on to more unique schlieren setups. One of these replaced the magnifying lens with a standard camera lens in which the aperture diaphragm replaced the razor blade, and another replaced the light source and razor with a high-contrast black-and-white pattern on a screen. The most sensitive technique was what he called double-pinhole schlieren photography, which used a pinhole for the light source and another pinhole in place of the razor blade. This could image the heated air rising from his hand, even at room temperature.

The high-contrast background imaging system is reminiscent of this technique, which uses a camera and a known background to compute schlieren images. If you’re interested in a more detailed look, we’ve covered schlieren photography in depth before.

Thanks to [kooshi] for the tip!

A person's hand wearing a black glove is shown in the right part of the image, making a series of gestures. A representation of a hand mimics those motions on a laptop screen.

Weaving Circuits From Electronic Threads

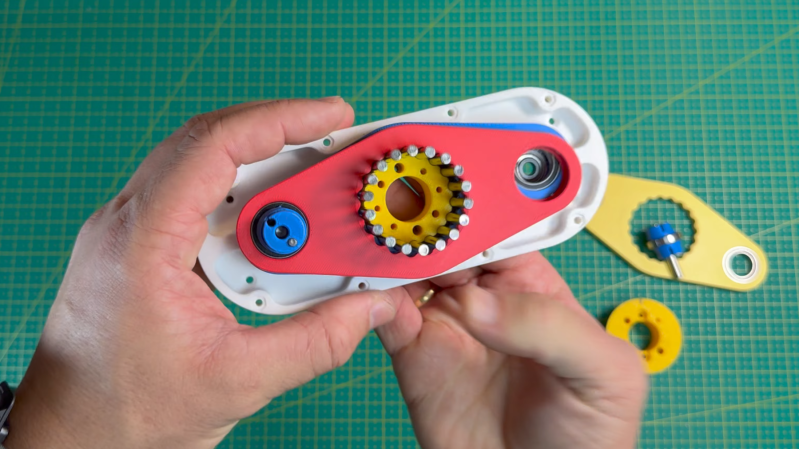
Though threading is a old concept in computer science, and fabric computing has been a term for about thirty years, the terminology has so far been more metaphorical than strictly descriptive. [Cedric Honnet]’s FiberCircuits project, on the other hand, takes a much more literal to weaving technology “into the fabric of everyday life,” to borrow the phrase from [Mark Weiser]’s vision of computing which inspired this project. [Cedric] realized that some microcontrollers are small enough to fit into fibers no thicker than a strand of yarn, and used them to design these open-source threads of electronics (open-access paper).

The physical design of the FiberCircuits was inspired by LED filaments: a flexible PCB wrapped in a protective silicone coating, optionally with a protective layer of braiding surrounding it. There are two kinds of fiber: the main fiber and display fibers. The main fiber (1.5 mm wide) holds an STM32 microcontroller, a magnetometer, an accelerometer, and a GPIO pin to interface with external sensors or other fibers. The display fibers are thinner at only one millimeter, and hold an array of addressable LEDs. In testing, the fibers could withstand six Newtons of force and be bent ten thousand times without damage; fibers protected by braiding even survived 40 cycles in a washing machine without any damage. [Cedrik] notes that finding a PCB manufacturer that will make the thin traces required for this circuit board is a bit difficult, but if you’d like to give it a try, the design files are on GitHub.

[Cedrik] also showed off a few interesting applications of the thread, including a cyclist’s beanie with automatic integrated turn signals, a woven fitness tracker, and a glove that senses the wearer’s hand position; we’re sure the community can find many more uses. The fibers could be embroidered onto clothing, or embedded into woven or knitted fabrics. On the programming side, [Cedrik] ported support for this specific STM32 core to the Arduino ecosystem, and it’s now maintained upstream by the STM32duino project, which should make integration (metaphorically) seamless.

One area for future improvement is in power, which is currently supplied by small lithium batteries; it would be interesting to see an integration of this with power over skin. This might be a bit more robust, but it isn’t first knitted piece of electronics we’ve seen. Of course, rather than making wearables more unobtrusive, you can go in the opposite direction. Continue reading “Weaving Circuits From Electronic Threads”

A man is shown behind a table, on which a glass apparatus like a distillation apparatus is set, with outlets leading into a large container in the center of the table, and from there to a pump.

Pulling A High Vacuum With Boiling Mercury

If you need to create a high vacuum, there are basically two options: turbomolecular pumps and diffusion pumps. Turbomolecular pumps require rotors spinning at many thousands of rotations per minute and must be carefully balanced to avoid a violent self-disassembly, but diffusion pumps aren’t without danger either, particularly if, like [Advanced Tinkering], you use mercury as your working fluid. Between the high vacuum, boiling mercury, and the previous two being contained in fragile glassware, this is a project that takes steady nerves to attempt – and could considerably unsteady those nerves if something were to go wrong.

Continue reading “Pulling A High Vacuum With Boiling Mercury”

A violet laser beam is shown expanding outward from a diode in a darkened room and illuminating the back of a man's hand.

Driving A Laser At 200 Volts For Nanoseconds

If there’s one lesson to be learned from [Aled Cuda]’s pulsed laser driver, it’s that you can treat the current limits on electronic components as a suggestion if the current duration is measured in nanoseconds.

The components in question are a laser diode and an NPN transistor, the latter of which operates in avalanche mode to drive nanosecond-range pulses of high current through the former. A buck-boost converter brings a 12 volt power supply up to 200 volts, which then passes through a diode and into the avalanche transistor, which is triggered by an external pulse generator. On the other side of the transistor is a pulse-shaping network of resistors and capacitors, the laser diode, and a parallel array of low-value resistors, which provide a current monitor by measuring the voltage across them. There is an optoisolator to protect the pulse generator from the 200 volt lines on the circuit board, but for simplicity’s sake it was omitted from this iteration; there is some slight irony in designing your own laser driver for the sake of the budget, then controlling it with “a pulse generator we don’t mind blowing up.” We can only assume that [Aled] was confident in his work.

The video below details the assembly of the circuit board, which features some interesting details, such as the use of a transparent solder mask which makes the circuit layout clear while still helping to align components during reflow. The circuit did eventually drive the diode without destroying anything, even though the pulses were probably 30 to 40 watts. A pulse frequency of 360 hertz gave a nice visual beating effect due to small mismatches between the pulse frequency of the driver and the frame rate of the camera.

This isn’t the first laser driver to use avalanche breakdown for short, high-power pulses, but it’s always good to see new implementations. If you’re interested in further high-speed electronics, we’ve covered them in more detail before.

Continue reading “Driving A Laser At 200 Volts For Nanoseconds”