The end result - motorized window in a silver stainless steel frame, with the linear actuators and gas struts, shown from the outside half-open.

Swing Gate Motors Come To Help For Opening A Giant Servery Window

[Martin Roberts] wrote to us, telling us about a build that his company, [Ocean View Workshop], was tasked with. Creating a four meter wide window able to open vertically is no small feat, and it had to be custom-built because the local company building such windows wasn’t comfortable working with anything other than aluminum — insufficient for the window’s scale. With massive weight of the glass alone, structural requirements for supporting it, and the mechanical loads to be applied, some careful planning was in order.

To start with, this window had to be motorized, as an average person wouldn’t be capable of pulling it upwards. Not satisfied with the linear actuator choice available, they went to a hardware store and found some swing gate actuators that, in workshop tests, proved themselves to be more than capable of handling way over the weight required. In fact, they were capable of lifting [Martin] himself off the ground without much hassle.

Continue reading “Swing Gate Motors Come To Help For Opening A Giant Servery Window” →

Two pairs of boards described in the article, with toggle switches and RCA jacks, shown interconnected, LEDs on all four boards lit up.

Boards For Playful Exploration Of Digital Protocols

Teaching people efficiently isn’t limited to transmitting material from one head to another — it’s also about conveying the principles that got us there. [Mara Bos] shows us a toolkit (Twitter,
nitter link
) that you can arm your students with, creating a small playground where, given a set of constraints, they can invent and figure communication protocols out on their own.

This tool is aimed to teach digital communication protocols from a different direction. We all know that UART, I2C, SPI and such have different use cases, but why? Why are baud rates important? When are clock or chip select lines useful? What’s the deal with the start bit? We kinda sorta figure out the answers to these on our own by mental reverse-engineering, but these things can be taught better, and [Mara] shows us how.

Gently guided by your observations and insights, your students will go through defining new and old communication standards from the ground up, rediscovering concepts like acknowledge bits, bus contention, or even DDR. And, as you point out that the tricks they just discovered have real-world counterparts, you will see the light bulb go on in their head — realizing that they, too, could be part of the next generation of engineers that design the technologies of tomorrow.

Continue reading “Boards For Playful Exploration Of Digital Protocols” →

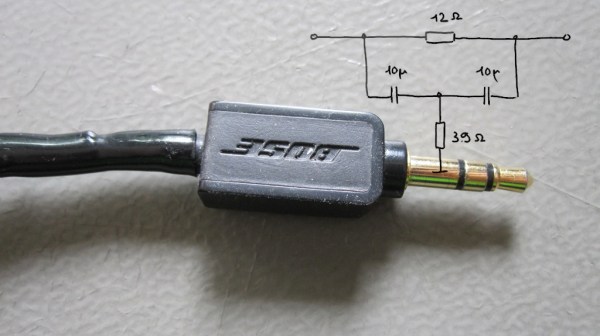
The Bose headphone plug in question, with reverse-engineered schematic of the filter overlaid.

This 3.5mm Cable Distorts Signals, Hides Audio-Filtering Circuit

[Avian]’s dad got a new ham radio transceiver with a 3.5 mm jack, and his pile-of-cables got him a headphone cable from Bose headphones. He built a DB9 to 3.5 mm adapter with that one – and it failed to let data through, outputting distorted garbage of a waveform instead. With a function generator and an oscilloscope, [Avian] plotted the frequency response of the cable, which turned out to be quite far from a straight line. What was up?

Taking the connector apart was a tricky job. A combination of blunt force and a nail polish remover soak didn’t quite get them all the way, so [Avian] continued to apply blunt force and took the jack apart with minimal casualties. Turned out that there was more to the 3.5 mm plug indeed — a whole PCB with a few resistors and capacitors, reverse-engineered into the schematic seen above.

Looks like Bose decided to tweak the audio characteristics of a specific pair of headphones, and an in-plug filter was, somehow, the most efficient solution. We probably shouldn’t expect to see this often, but it bears keeping in mind: next time your repurposed 3.5 mm cable doesn’t behave as expected, it would be prudent to do a capacitance test with your trusty meter or oscilloscope.

With how small MCUs have gotten, you can easily hide more than just a few capacitors! We don’t often see circuits built into cables, but when we do, it’s for malicious purposes.

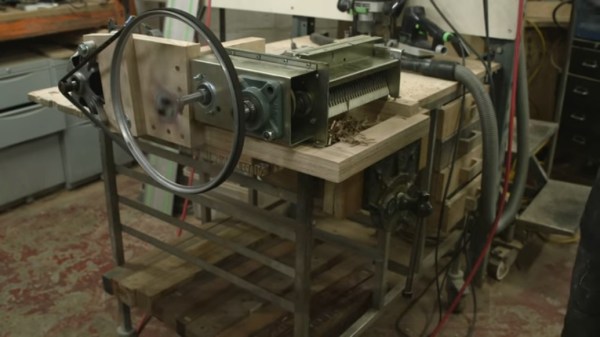
The shredder after being rebuilt, on the bench top, with the washing machine pulley driving it spinning. It has not yet been fed, but that's about to happen.

Shredder Rebuilt From The Ashes, Aims To Produce More Ashes

What do you do when you buy a broken shredder and, upon disassembly, find its gears in pieces? You might reach towards your 3D printer – this one’s not that kind of shredder, however. [New Yorkshire Workshop] gives us a master class on reviving equipment and putting it to good use – this one’s assigned to help turn their cardboard stores into briquettes for their wood burner.

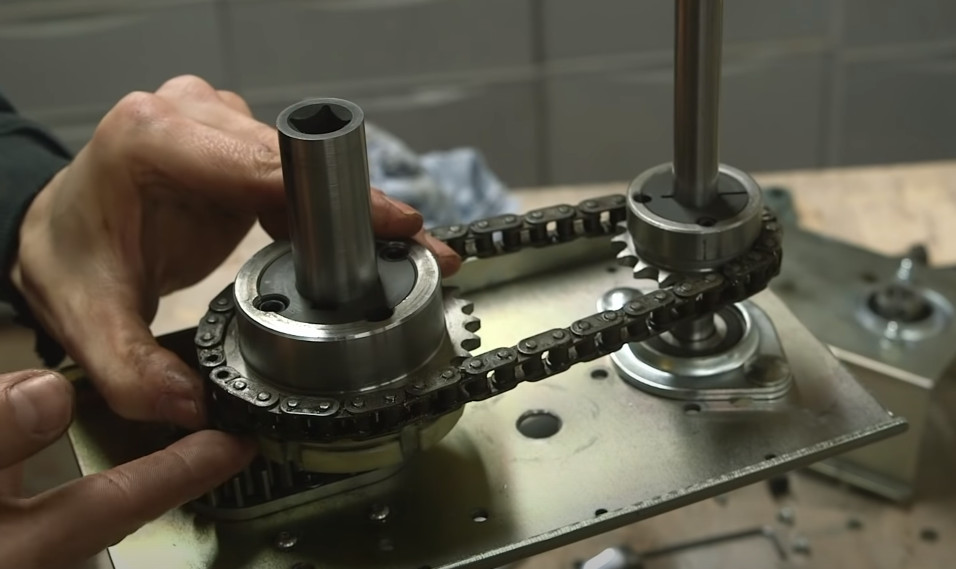
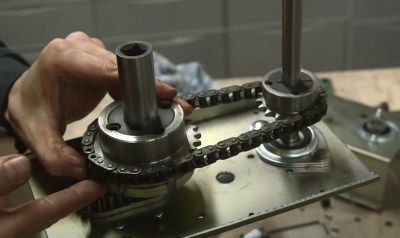
But first, of course, it had to be fixed – and fixed it was, the crucial parts re-designed and re-built around a sturdy wooden frame. It was made into a machine built to last; an effort not unlikely to have been fueled with frustration after seeing just how easily the stock gears disintegrated. The stock gear-based transmission was replaced with a sprocket and chain mechanism, the motor was wired through a speed controller, and a washing machine pulley was used to transfer power from the motor to the freshly cleaned and re-oiled shredder mechanism itself. This shredder lost its shell along the way, just like a crab does as it expands – and this machine grew in size enough to become a sizeable benchtop appliance.
After cutting loads of cardboard into shredder-fitting pieces, they show us the end result – unparalleled cardboard shredding power, producing bags upon bags of thinly sliced cardboard ready to be turned into fuel, making the workshop a bit warmer to work in. The video flows well and is a sight to see – it’s a pleasure to observe someone who knows their way around the shop like folks over at [New Yorkshire Workshop] do, and you get a lot of insights into the process and all the little tricks that they have up their sleeves.

The endgoal is not reached – yet. The shredder’s output is not quite suitable for their briquette press, a whole project by itself, and we are sure to see the continuation of this story in their next videos – a hydraulic briquette press was suggested as one of the possible ways to move from here, and their last video works on exactly that. Nevertheless, this one’s a beast of a shredder. After seeing this one, if you suddenly have a hunger for powerful shredders, check this 3D printed one out.

Continue reading “Shredder Rebuilt From The Ashes, Aims To Produce More Ashes” →

Hacker Dictionary: RS-485 Will Go The Distance

RS485 is a communication standard that should be part of the advanced hardware hacker’s arsenal; it’s not commonly encountered, but powerful exactly when you need it. It’s a physical layer interface for wired communications that uses a single differential pair for noise immunity, has good long-distance properties, and allows many connections to a single bus. Because of that, you will encounter it in security systems and even cameras, wired sensor networks, DMX512 lighting and all sorts of industrial electronics. For our hobbyist goals, you can absolutely use RS485 to build your home (or room) automation system, or a relatively large robot – without all those worries that wireless brings.

The name might remind you of RS232, and that’s because both RS232 and RS485 are standards that come from EIA (Electronics Industries Alliance). It also might remind you of RS422, if you’ve ever seen this name mentioned online – RS422 and RS485 are closely intertwined, sharing most of the physical layer, and I’ll show how exactly they relate. Continue reading “Hacker Dictionary: RS-485 Will Go The Distance” →

Quick-Swap Socket For Stemma QT Experiments

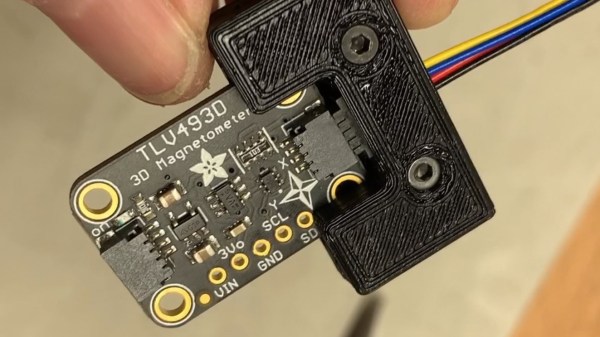
[kmatch98] shares a quick hack with us over at Hackaday.io – a 3D-printed socket for Adafruit Stemma QT-based I2C modules. Since Adafruit has standardized the dimensions for their Stemma QT boards, it’s possible to make a socket that would fit many different sensors at once, where the board just slides in.

This reminds us of sci-fi datadisks, or, thinking of something more grounded in reality, game console cartridges – except that here, the fun you’re having is from exploring all the different devices you can get to speak I2C. To make such a socket, you only need to 3D-print two plastic parts, put a JST-SH plug between them, and screw them together – if you want to modify these to your liking, .f3d sources are available. Now you no longer have to use fingernails or tin snips to take the JST-SH plug out of your modules!

[kmatch98] is no stranger to sharing his projects on Hackaday.io with us, and we’ve covered some of his larger projects before, like this CircuitPython-powered cyber-duck cyberdeck, or the 3D-printable Maypole braider machine!

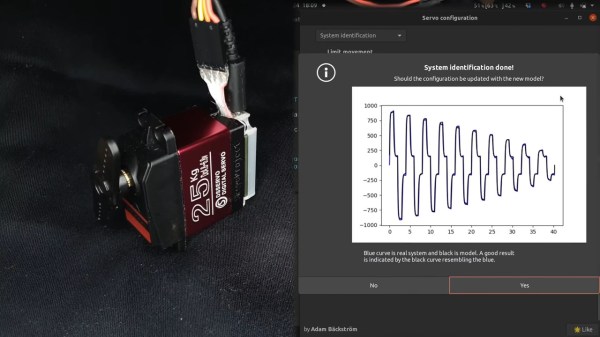
The modified servo being calibrated on the left half of the screen, with some graphs of its operation being shown on the right half.

Servo Surgery Teaches Us DIY Encoder Implants

Today, we shall talk about how [Adam Bäckström] took a DS3225 servo and rebuilt it to improve its accuracy, then built a high-precision robot arm with those modified servos to show just how much of an improvement he’s got – up to 36 times better positional accuracy. If this brings a déjà vu feeling, that’s because we’ve covered his servo modifications before, but now, there’s more. In a year’s time since the last video came out, [Adam] has taken it to the next level, showing us how the modification is made, and how we ourselves can do it, in a newly released video embedded below.

After ordering replacement controller PCBs designed by [Adam] (assembled by your PCBA service of choice), you disassemble the servo, carefully setting the gearbox aside for now. Gutting the stock control board is the obvious next step, but from there, you don’t just drop the new PCB in – there’s more to getting a perfect servo than this, you have to add extra sensing, too. First, you have to print a spacer and a cover for the control board, as well as a new base for the motor. You also have to print (or perhaps, laser-cut) two flat encoder disks, one black and one white, the white one being eccentric. It only escalates from here!

Continue reading “Servo Surgery Teaches Us DIY Encoder Implants” →