You Can And Should Build Something For The Hackaday Prize

For the third year in a row, we’re running the greatest hardware challenge on the planet. It’s the Hackaday Prize, a contest to build something that matters. We’re giving away $300,000 to people who build something that solves a problem. We’ve already awarded $1000 to 20 lucky hackers for the first challenge in the Hackaday Prize — and we’re doing that every 5 weeks this summer! Now it’s your turn. You, too can build something for the Hackaday Prize. It doesn’t have to be complex. All it has to do is solve a problem.

hand-driveThink building something that solves a problem is too hard? Not true. Last year, [Kate Reed], a high school student, built a device that makes a wheelchair much easier. Her device, the Hand Drive, allows anyone in a wheelchair to use a rowing motion to move forward, instead of pulling themselves by the rim of the chair. It is perhaps the most clever and elegant device we’ve ever seen; it’s basically a ratchet that bolts onto a wheelchair, and if wheelchairs were around five hundred years ago, the Hand Drive would bolt right on to those antique chairs. For her entry, [Kate] was a finalist for last year’s Hackaday Prize, gave a talk at the Hackaday Supercon, and demonstrated her device to the president in the White House.
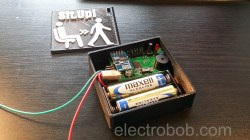
sit-upIs the simple tech behind a ratcheting wheelchair attachment not cool enough? Here’s a device that tells you to sit up. This device is just a few bits of electronics mounted to a chair that tells you to get up and walk around every hour or so. Deep vein thrombosis isn’t a joke, and for this entry to last year’s Hackaday Prize, [electrobob] was one of the 100 creators that made it to the finals.

Your project for the Hackaday Prize doesn’t need to be complex. It doesn’t need to be complicated, and you don’t need to invest months of work into your entry. All you need to do is build something that matters.

If you have an idea for a project that solves a problem, start your project now. There’s nothing to lose, and we’re giving away $300,000 in prizes for people who build something that matters.


The HackadayPrize2016 is Sponsored by:

Peachy Printer Collapses, Investor Built A House Instead Of A Printer

The Peachy Printer, originally a crowdfunding campaign for a $100 stereolithography 3D printer, is now dead in the water.[Rylan Grayston], the creator of the Peachy Printer, announced that [David Boe] — investor, 50% owner of Peachy Printer, and business partner — had stolen over $300,000 in Kickstarter campaign funds. According to [Rylan], this money was used to build a house.

An example print from the Peachy Printer Kickstarter campaign

When the Peachy Printer was announced on Kickstarter, it was, by any measure, a game changing product. Unlike other stereolithographic printers like the Form 1 and DLP projector kit printers, the Peachy was cheap. It was also absurdly clever. Instead of using a stepper motor to raise a print out of a vat of resin, the Peachy Printer floated the resin on a vat of salt water. By slowly dripping salt water into this vat, the level of the resin rose up, allowing the galvanometers and laser diode to print the next layer of a 3D object. In our first coverage of the Peachy Printer, everyone was agog at how simple this printer was. It wasn’t a high-resolution printer, but it was a 3D resin printer that only cost $100. Even today, nearly three years after the launch of the Kickstarter campaign, there’s nothing like it on the market.

For the last two years, [Rylan] appeared to have the Peachy Printer in a pseudo-stealth mode. Whispers of the Peachy Printer circled around 3D printer forums, with very little information coming from [Rylan]. For the last year, the Peachy Printer appeared to be just another failed crowdfunded 3D printer. Either [Rylan] didn’t have the engineering chops to take a novel device to market, there were problems with suppliers, or [Rylan] just couldn’t get the product out the door.

In the update published to the Kickstarter campaign, the reason for the failure of Peachy Printer to deliver becomes apparent. The Kickstarter campaign was set up to deliver the funds received – $587,435.73 – directly into [David Boe]’s account. Thirty days after the funds were received, [David] had spent over $165,000. In just over three months, all the Kickstarter funds, save for $200,000 transferred into the Peachy Printer corporate account, were spent by [David].

With no funds to complete the development of the Peachy Printer, [Rylan] looked into alternative means of keeping the company afloat until Kickstarter rewards had shipped. Peachy Printer received two government grants totalling $90,000 and $135,000. In March of 2015, one of [Rylan]’s family members loaned $50,000 to Peachy Printer. A plan to finance the delivery of Kickstarter rewards with new sales – a plan that is usually looked down upon by Kickstarter backers – was impossible, as cost and time required of certifying the laser in the Peachy Printer would have put the company in the red.

Right now, [Rylan] and the Peachy Printer are pursuing repayment from [David Boe], on the basis that Kickstarter reward money is still tied up in the construction of a house. Once the house is complete, the bank will disburse funds from the construction mortgage, and funds can then be transferred from [David] to Peachy Printer.

In all, the Peachy Printer is a mess, and has been since the Kickstarter funds were disbursed to [David]. There is – potentially – a way out of this situation that gets Peachy Printers into the hands of all the Kickstarter backers if the mortgage construction funds come through and production resumes, but that’s a lot of ‘ifs’. Failed Kickstarter projects for 3D printers are nothing new, but [Rylan]’s experience with the Peachy Printer is by far the most well-documented failure of a crowdfunding project we’ve ever seen.

Dirt Cheap Dirty Decapping

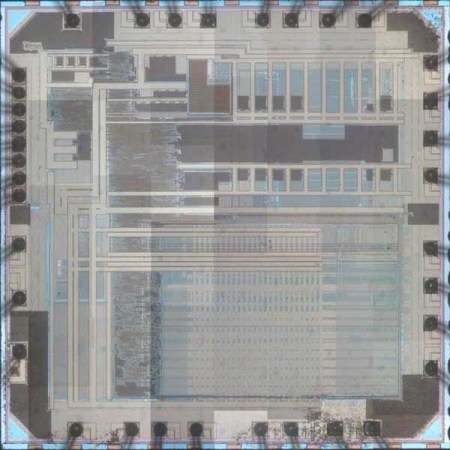
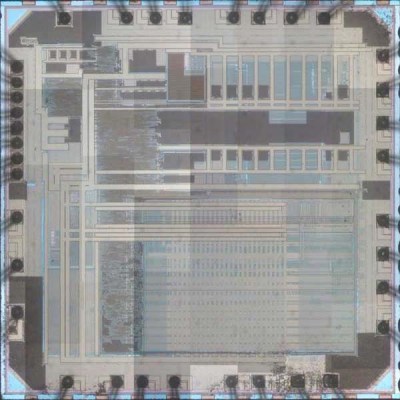
Those tiny black rectangles of epoxy aren’t black boxes anymore. Decapsulating ICs is becoming somewhat common, and if you’re reverse engineering a chip-on-board epoxy blob, or just figuring out if the chip you bought is the chip you wanted, you’ll need to drop some acid. Usually this means finding someone with the knowhow to decap a chip, or having enough confidence in yourself to mess around with fuming nitric acid. Now Dangerous Prototypes has a better solution – Dirty Decapsulation. Send your chip to Dangerous Prototypes, and they’ll melt away the epoxy and take a few pictures of the die hidden inside your chip.

dirty-decappingDirty Decapsulation is Dangerous Prototype’s addition to their array of hacker services including cheap, crappy PCBs and SLA printing service. Dirty Decapsulation follows in the tradition of these other services; it’s not the best you can possibly get, but you’re not paying thousands of dollars for the job.
Right now, Dirty Decapsulation will take a chip, strip off the epoxy, and take a few pictures. These pictures are stitched together, producing a medium quality image of the die. No, you can’t see individual gates, and you can’t see different layers of metal and silicon. If you want that, you’ll need some nitric or a few thousand dollars. Dirty Decapsulation is just to verify the chip’s identity and give a rough idea of the layout of the die.

Hackaday Prize Entry: You Can Do Anything With A Bunch Of NANDs

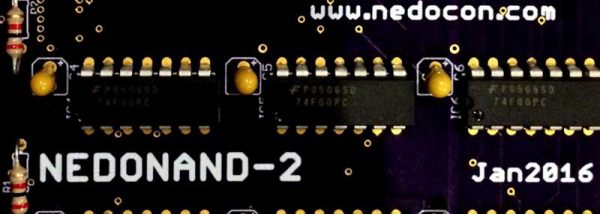
Every few years, someone on the Internet builds a truly homebrew CPU. Not one built with a 6502, Z80, or a CPU from the 80s, either: one built completely out of 74-series logic chips or discrete transistor. We’re lucky enough to have [Alexander] document his build on Hackaday.io, and even luckier to have him enter it into this year’s Hackaday Prize. It’s an 8-bit computer built completely out of NAND gates.

Computers are just logic, and with enough NAND gates, you can do anything. That’s exactly what [Alex] is doing with this computer. It’s built entirely out of 74F00 chips – a ‘fast’ version of the ubiquitous quad 2-input NAND chip. The architecture of this computer borrows from the best CPUs of the 70s and 80s. The ALU is only four bits, like the Z80, but also uses the 6502 technique where the borrow is an inverted carry. It’s a small instruction set, a 2-stage pipeline, and should be able to compute one million instructions per second.

Designing a CPU is one thing, and thanks to Logisim, this is already done. Constructing a CPU is another matter entirely. For this, [Alex] is going for a module and backplane approach, where the ALU is constructed of a few identical modules tied together into a gigantic motherboard. [Alex] isn’t stopping at a CPU, either: he has a 16-byte ROM that’s programmed by plugging diodes into holes.

It’s an amazingly ambitious project, and for entering this project into the 2016 Hackaday Prize, [Alex] already netted himself $1000 and a trip to the final round of competition.

The HackadayPrize2016 is Sponsored by:

New Part Day: A BeagleBone On A Chip

The current crop of ARM single board computers have a lot in common. Everything from the Odroid to the Raspberry Pi are built around Systems on a Chip, a piece of silicon that has just about everything you need to build a bare minimum board. You won’t find many hardware hackers playing around with these chips, though. That would require putting some RAM on the board, and some other high-speed connectors. Until now, the only people building these ARM boards were Real Engineers™, with a salary commensurate of their skills.

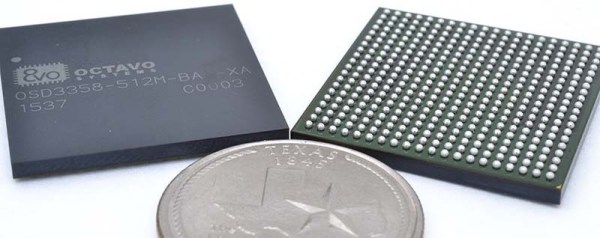
This is now about to change. Octavo Systems has launched a new product that’s more or less a BeagleBone on a chip. If you can handle putting a PCB with a BGA package in a toaster oven, you too can build your own ARM single board computer running Linux.

Octavo’s new System in Package is the OSD335x family, featuring a Texas Instruments AM335x ARM Cortex A8 CPU, up to 1GB of DDR3, and peripherals that include 114 GPIOs, 6 UARTs, 2 SPIs, 2 I2Cs, 2x Gigabit Ethernet, and USB.

The chips used in commercially available single board computers like the Pi and BeagleBone have hundreds of passive components sprinkled around the board. This makes designing one of these single board computers challenging, to say nothing about actually assembling the thing. Octavo is baking a bunch of these resistors, capacitors, and inductors right into this chip, allowing for extremely minimal boards running Linux. [Jason Kridner] – the BeagleBone guy – is working on a PocketBone, a full-fledged Linux computer that will fit inside an Altoids tin.

Of course, with this degree of integration, a BeagleBone on a chip won’t be cheap. The first part number of this family to be released, with the AM3358 CPU and 1GB of RAM, sells for $50 in quantity one.

Still, this is something we haven’t seen before. It’s a Linux computer on a chip that anyone can use. There is an Eagle symbol for this module. This is a chip designed for hardware hackers, and we can’t wait to see what people using this chip will come up with.

Hackaday Prize Entry: A Programmable Calculator With Nixie Tubes

For [Robert]’s entry into The Hackaday Prize, he’s starting off with some basic questions. What’s better than a Nixie tube? More Nixies. What’s better than a calculator? An RPN calculator. What do you get when you combine the two? A calculator that is absurdly large, even by 1970s desk calculator standards, uses a lot of power, and takes up too much space. Sounds good to us.

Nixies, at least when there are a lot of them, are tricky devices. They only draw about 50mA of current, but they only light up when above 150V. That’s only about seven watts, and it’s easy enough for the Arduino-heads out there to build a circuit to drive a few Nixies for a clock. Driving dozens of Nixies is a bit harder. For [Robert]’s RPN calculator, he’s estimating a little under 50W of power being dumped into this calculator.

With the considerable power considerations taken care of, [Robert] turned his attention to the display board. This is going to be a very impressive build, with 80 IN-12B tubes organized in four stack levels of twenty tubes each. The tubes will be controlled with the Maxim MAX6922 VFD driver. This chip has a serial interface, which means it’s relatively easy to have any microcontroller blink these tubes. And of course, it does double-duty as a clock.

The HackadayPrize2016 is Sponsored by:

Perfecting The DIY BB-8

Until about a year ago, the Droid Builder’s Club had just about everything figured out to build any sort of robot from Star Wars. Building an R2D2 clone was easy, and even R5 and R6 droids were common. There were even a few attempts to clone IG-88. Then Disney happened, The Force Awakens was released, and the world was introduced to the hero of the third trilogy, BB-8. Several people have gone to incredible lengths to replicate BB-8 as a unique homebrew robot, but no one has put in more effort than [James Bruton]. He’s wrapping up his third DIY version of BB-8.

[James]’ third version of the BB-8 droid has two older brothers we’ve seen before. [James] started the construction of his earliest BB-8 not long after the trailer for The Force Awakens, and long before we knew the makers of Sphero robot toys weren’t behind this hero puppet. Since then, a number of improvements have been made to the drive system, allowing the third version of [James]’ BB-8 to turn on a dime and roll just like its on-screen counterpart.

Right now, [James] is about 80% done with his newest droid, with just a bit extra circuitry to have all the functionality seen on the ‘real’ stage droid. Like most of the R2D2 builds out there, there might be enough room inside this droid for some additional capabilities. There appears to be enough space behind one of the body panels for an extending arm, making the possibility of a flamethrower thumbs up very real.

[James] is also one of the judges for this year’s Hackaday Prize, and will (hopefully) be at this year’s Hackaday Prize award ceremony and Hackaday SuperConference in San Francisco. If a set of highly likely probabilities pans out, [James]’ BB-8 will also be at the con, and we’ll see it careening down that one weird block of Lombard Street. Awesome.

Entire playlist for the build of BB-8 v.3 below. Pictures are available here.

Continue reading “Perfecting The DIY BB-8”