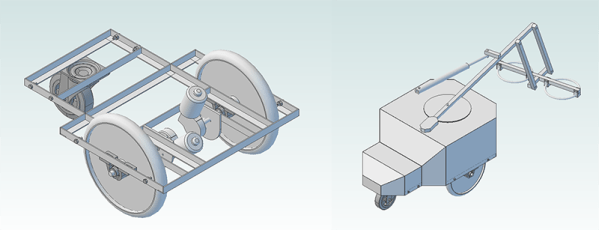
Hackaday Prize Entry: Ground Penetrating Radar

This year’s Hackaday Prize is heating up, and right now there are quite a few projects in the works covering domains that are rarely, if ever, seen coming out of a garage or a workshop. One of the most interesting is [Glenn Powers]’ Open Ground Penetrating Radar. It’s exactly what the title says: an open-source radar system that can see into the Earth for less than $500.

While ground penetrating radar is great for archaeology and people searching for hoards buried in the middle of farmland, the biggest application is safety. You need only to Google “Florida sinkhole” to see the value of peering into the Earth.

[Glenn] is building his ground penetrating radar with a bare minimum of parts. A Baofeng VHF/UHF My First Radio™ serves as the signal generator, the controller is just an optoisolator, and the switch controller is a 7404 hex inverter. It literally can’t get simpler than that.

Of course these components can only be assembled into a simple radar, and the real value of a ground penetrating radar is the ability to map an area. For that, [Glenn] is bringing out a Pi and a GPS dongle to control the whole thing. Visualization is provided by none other than the US Navy. If it works for submarines, it should work for a metal cart, right?

It’s a great project, not only in the fact that it could help a whole bunch of people, but as a prime example of doing so much without tens of thousands of dollars in test equipment.



The 2015 Hackaday Prize is sponsored by:

Upgrading A Microsoft Surface To A 1 TB SSD

The Microsoft Surface Pro 3 is a neat little tablet, and with an i7 processor, a decent-resolution display, and running a full Windows 8.1 Pro, it’s the closest you’re going to get to a desktop in tablet format. Upgrading the Surface Pro 3, on the other hand, is nigh impossible. iFixit destroyed the display in their teardown, as did CNET. [Jorge] wanted to upgrade his Surface Pro 3 with a 1 TB SSD, and where there’s a will there’s a way. In this case, a very precise application of advanced Dremel technology.

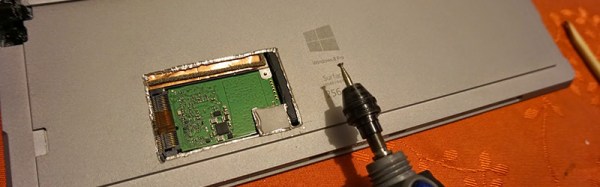
Taking a Surface Pro 3 apart the traditional way with heat guns, spudgers, and a vast array of screwdrivers obviously wasn’t going to work. Instead, [Jorge] thought laterally; the mSSD is tucked away behind some plastic that is normally hidden by the small kickstand integrated into the Surface. If [Jorge] could cut a hole in the case to reveal the mSSD, the resulting patch hole would be completely invisible most of the time. And so enters the Dremel.

By taking some teardown pictures of the Surface Pro 3, printing them out to scale, and aligning them to the device he had in his hand, [Jorge] had a very, very good idea of where to make the incision. A Dremel with a carbide bit was brought out to cut into the metal, and after a few nerve-wracking minutes the SSD was exposed.

The only remaining task was to clone the old drive onto the new one, stuff it back in the Surface, and patch everything up. [Jorge] is using some cardboard and foam, but a sticker would do just as well. Remember, this mod is only visible when the Surface kickstand is deployed, so it doesn’t have to look spectacular.

Thanks [fridgefire] and [Neolker] for sending this in.

Hackaday Retro Edition: TRS Wiki

1977 was a special year for computing history; this year saw the release of the 8085 following the release of the Z80 a year before. Three companies would launch their first true production computers in 1977: Apple released the Apple II, Commodore the PET 2001, and Tandy / Radio Shack the TRS-80 Model I. These were all incredibly limited machines, but at least one of them can still be used to browse Wikipedia.

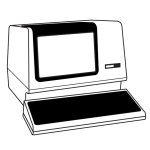
[Pete]’s TRSWiki is a Wikipedia client for the TRS-80 Model I that is able to look up millions of articles in only uppercase characters, and low resolution (128×48) graphics. It’s doing this over Ethernet with a very cool Model I System Expander (MISE) that brings the lowly Trash-80 into the modern era.

The MISE is capable of booting from CF cards, driving an SVGA display and connecting to 10/100 Ethernet. Connecting to the Internet over Ethernet is one thing, but requesting and loading a web page is another thing entirely. There’s not much chance of large images or gigantic walls of text fitting in the TRS-80’s RAM, so [Pete] is using a proxy server on an Amazon Web Services box. This proxy is written in Java, but the code running on the TRS-80 is written entirely in Z80 assembly; not bad for [Pete]’s first project in Z80 assembly.


vt100normal The Hackaday Retro Edition is our celebration of old computers doing something modern, in most cases loading the old, no CSS or Javascript version of our site.

If you have an old computer you’d like featured, just load up the retro site, snap some pictures, have them developed, and send them in.

An Introduction To Individually Addressable LED Matrices

The most fascinating project you can build is something with a bunch of blinky hypnotic LEDs, and the easiest way to build this is with a bunch of individually addressable RGB LEDs. [Ole] has a great introduction to driving RGB LED matrices using only five data pins on a microcontroller.

The one thing that is most often forgotten in a project involving gigantic matrices of RGB LEDs is how to mount them. The enclosure for these LEDs should probably be light and non-conductive. If you’re really clever, each individual LED should be in a light-proof box with a translucent cover on it. [Ole] isn’t doing that here; this matrix is just a bit of wood with some WS2812s glued down to it.

To drive the LEDs, [Ole] is using an Arduino. Even though the WS2812s are individually addressable and only one data pin is needed, [Ole] is using five individual data lines for this matrix. It works okay, and the entire setup can be changed at some point in the future. It’s still a great introduction to individually addressable LED matrices.

If you’d like to see what can be done with a whole bunch of individually addressable LEDs, here’s the FLED that will probably be at our LA meetup in two weeks. There are some crazy engineering challenges and several pounds of solder in the FLED. For the writeup on that, here you go.

Hackaday Links Column Banner

Hackaday Links: April 26, 2015

In case you haven’t heard, we’re giving away a trip to space. We have $50,000 to promote giving away a trip to space too, and this week we’re giving away some OSH Park gift cards. If you have a project that’s held together with hot glue on a 40-year-old piece of perf board, add a project log describing how you need some free PCBs.

A few months ago, some guy in Texas found the original molds for the Commodore 64C, the Plus/4 and the 128. That discovery turned into one of the best examples of what Kickstarter can do. Now, new keycaps are being manufactured with an Indiegogo campaign. If you’re waiting on your C64c case to be pressed out of a mold, this is not the time to think about the sunk cost fallacy. They’re not Cherry MX compatible, but they will work with just about every version of the C64. Not bad for under €20.

The UK has a fabulously rich history of ancient melee weapons, ranging from the flail to the mace and a bunch of odd bladed weapons used by the Scots. This tradition was passed down to the UK mains plug, the single most painful plug to step on. Apple just released a USB charger with a folding UK mains plug and [oliver] did a teardown on it.

For St. George’s Day in Catalonia, there’s a tradition of giving roses to women, and books to men. [Nixieguy] has all the books he could want, and would prefer to receive a rose. Bucking tradition, he made himself a rose from a punch card. It’s the closest he’s going to get to ‘@}-\—’. A few years ago, he carved a rose out of a 10mm LED.

Finally, a decent tutorial on how to grow your own SMD components.

Need to take apart a cellphone? Use acetone! Need the phone to work after you take it apart? Ummmm….

The Dayton Hamvention is just three weeks away! Yes, the same weekend as the Bay Area Maker’s Faire, which means most of the Hackaday crew will be elsewhere, but I hear [Chris Gammell] will be there putting Parts.io stickers on everything. By the way, I’m looking for a Tek PM203 Personality Module for a 68000 64-pin PDIP.

A Deadbugged GPS/GLONASS/Geiger Counter

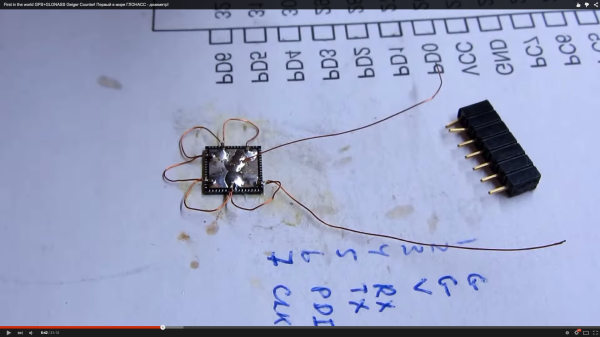
So you think you’re pretty good at soldering really tiny parts onto a PCB? You’re probably not as good as [Shibata] who made a GPS/GLONASS and Geiger counter mashup deadbug-style with tiny 0402-sized parts.

The device uses an extremely small GPS/GLONASS receiver, an AVR ATxmega128D3 microcontroller, a standard Nokia phone display and an interesting Geiger tube with a mica window to track its location and the current level of radiation. The idea behind this project isn’t really that remarkable; the astonishing thing is the way this project is put together. It’s held together with either skill or prayer, with tiny bits of magnet wire replacing what would normally be PCB traces, and individual components making up the entire circuit.

While there isn’t much detail on what’s actually going on in this mess of solder, hot glue, and wire, the circuit is certainly interesting. Somehow, [Shibata] is generating the high voltage for the Geiger tube and has come up with a really great way of displaying all the relevant information on the display. It’s a great project that approaches masterpiece territory with some crazy soldering skills.

Thanks [Danny] for sending this one in.

Continue reading “A Deadbugged GPS/GLONASS/Geiger Counter”

The Ultimate Tool For Homebrew PCB Manufacturing

While OSHPark, Seeed Studio, and DirtyPCB have taken most of the fun and urgency out of making your own circuit boards at home, there are still a few niche cases and weird people who like to go it alone. For them, [Jarzębski] has created the ultimate homebrew PCB manufacturing solution (.pl, here’s the Google translatrix).

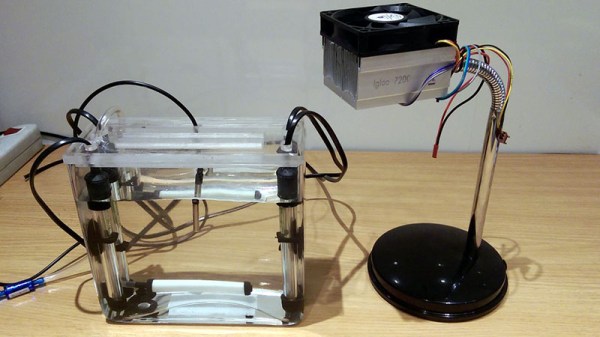
[Jarzębski] is using UV-sensitive photomasks for his PCBs, but he’s not doing something simple like a blacklight to develop his boards. He’s using a 30 Watt UV LED for exposing his boards. This, of course, generates a lot of heat and to mitigate that he’s added a Peltier cooler, temperature sensor, and a fan to cool off this retina-burning LED. 30 Watts will get the job done, considering [Jarzębski] was using a quartet of 4.5W LEDs before this build.

Developing a PCB is only one part of the equation; you need to etch it, too. For this, [Jarzębski] is using a small 1.6 Liter aquarium and four aquarium heaters for dunking 120mm x 120mm PCBs in the tank. There’s no mention of what chemistry [Jarzębski] is using – ferric chloride, cupric chloride, or otherwise – but the heaters and aerator should make etching go very smoothly.

There’s a video (English) going over the rest of the project below.

Continue reading “The Ultimate Tool For Homebrew PCB Manufacturing”