Filming Light Reflecting Off Objects

light

With high-speed cameras you’re able to see bullets passing through objects, explosions in process, and other high-speed phenomena. Rarely, though, are you able to see what happens when light shines on an object without hundreds of thousands of dollars worth of equipment. A group of researchers at The University of British Columbia are doing just that with hardware that is well within the range of any home tinkerer.

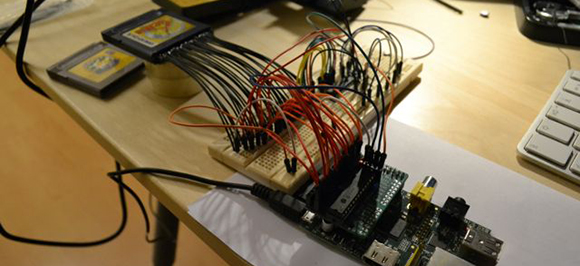
Making videos of light passing through and around objects has been done before (great animated gifs of that here), but the equipment required of previous similar projects cost $300,000 and couldn’t be used outside the controlled environment of a lab. [Matthias] and his team put together a similar system for about $1,000. The only hardware required is an off-the-shelf 3D time of flight camera and a custom driver powering six red laser diodes.

Aside from having a much less expensive setup than the previous experiments in recording the flight of a pulse of light, [Matthias] and his team are also able to take their and record the flight of light in non-labratory settings. They’ll be doing just that at this year’s SIGGRAPH conference, producing videos of light reflecting off attendee-produced objects in just a few minutes. You can check out the video for the project below.

Reading Game Boy Carts With I2C

rasgame

After seeing a Game Boy emulator for the first time, [Thijs] was amazed. A small box with just a handful of electronics that turns a Game Boy cartridge into a file able to be run on an emulator is simply magical. [Thijs] has learned a lot about GB and GBC cartridges in the mean time, but still thinks the only way to really learn something is to roll up your sleeves and get your hands dirty. Thus was born [Thijs]’ Game Boy cartridge dumper, powered by a pair of I2C port expanders and a Raspberry Pi.

Inspired by a build to dump ROMs off Super Nintendo games with the help of a Raspberry Pi, [Thijs] grabbed all the hardware necessary to create his own GB cart dumper. A DS Lite cartridge adapter provided the physical connection and a pair of MCP23017 I/O expanders – one soldered to a Slice of PI/O board – provided the electrical connections.

In the end, [Thijs] managed to dump the ROMs off the Japanese editions of Pokemon Yellow and Gold in about 13 minutes. This is a much slower transfer rate of 26 minutes per SNES cart in the post that gave [Thijs] the inspiration for this build. Still, [Thijs] will probably be the first to say he’s learned a lot from this build, especially after some problems with dumping the right banks from the cartridge.

Drinking Games And Digital Logic

Untitled-1

For those of you who might have forgotten, let’s go over the rules of Centurion. The object of the game is for every minute, for 100 minutes, drink a shot of beer. It doesn’t sound like a lot, but after completing the challenge you’ll have had 3 liters of beer (or about eight and a half 12 oz cans) in just under two hours. When [Peter] played Centurion, he found the biggest problem was – understandably – keeping track of the time and who drank what. For an upcoming weekend of drinking, [Peter] decided to solve this problem once and for all with shift registers and seven-segment displays.

[Peter]’s Centurion score box comes in two parts. The first and largest part of the build is the main board housing an ATMega8 microcontroller and a huge two digit seven-segment display to keep track of the countdown until the next shot. Two other boards house eight additional two digit seven-segment displays for each player, incremented every time a player presses a giant arcade button.

The entire build is designed around a small travel case that also holds a large battery for cordless drinking parties. Let’s just hope the project is reasonably water-resistant; we can see a lot of spills happening in the future. Check out the video demo below.

Continue reading “Drinking Games And Digital Logic”

Homebrew GPS Gets ±1 Meter Resolution With A Raspberry Pi

GPS

We’ve been following the work of [Andrew Holme] and his homebrew GPS receiver for a while now. A few years ago, [Andrew] built a four-channel GPS receiver from scratch, but apparently that wasn’t enough for him. He expanded his build last year to track up to eight satellites, and this month added a Raspberry Pi for a 12-channel, battery-powered homebrew GPS receiver that has an accuracy of about 3 feet.

The Raspi is attached to an FPGA board that handles the local oscillator, real-time events, and tracks satellites automatically. The Pi handles the difficult but not time-critical math through an SPI interface. Because the Pi is attached to the FPGA through an SPI interface, it can also load up the FPGA with even more custom code, potentially turning this 12-channel receiver into a 16- or 18-channel one.

An LCD display attached to the FPGA board shows the current latitude, longitude, and other miscellaneous data like the number of satellites received. With a large Li-ion battery, the entire system can be powered for about 5 hours; an impressively portable GPS system that rivals the best commercial options out there.

Turning An Easter Egg Hunt Into A Fox Hunt

fox

We’ve seen [Todd Harrison]’s work a few times before, but he’s never involved his son so throughly before. This past Easter, he thought it would be a good idea for his son and a few of his friends to take part in an easter egg hunt. Being the ham he is, he decided to turn an easter egg hunt into an adventure in radio direction finding, or as amateur radio operators call it, a fox hunt.

[Todd] put together a great tutorial on building a yagi – a simple directional antenna – out of a couple of pieces of PVC pipe and a few aluminum and brass rods. With this and a handheld ham set, [Todd] hid a fox along with a stuffed easter bunny and a basket of candy near a local park. Operating under the guidance of his dad, [Todd]’s son and his friends were eventually able to find the fox. Leaving candy out in the Arizona sun probably wasn’t [Todd]’s best idea – the fox, and candy, were covered in ants when they were found – but it was a great introduction to amateur radio.

Pranking A Hackerspace IRC For April Fool’s Day

face

Like most hackerspaces, when the folks at DIYode, the Guelph, Ontario hackerspace, aren’t in the workshop, they’re on IRC. It’s a great way to build a community, complete with a bot that collects and catalogues to-do items, meeting topics, posts events to IRC, and even does a bit of text-to-speech so members currently at the DIYode can listen in on the IRC room. There’s also a webcam for the DIYode space that members check constantly. [Simon] thought it would be a great prank to freak out those members that constantly check the webcam, and we’ll say he succeeded with a little help from the Alabama Face Guy.

The build listens for a specific phrase in the IRC room – “Hey, someone just entered the shop without the doorbot noticing” – and sends a command via Python to an Arduino to raise and lower a cardboard cutout of a sneering face in front of the web cam. For an April Fool’s build, this is probably one of the most creative and creepy we’ve seen this year.

Upgrading A Router With Impeccable Soldering Skills

router

[Necromant] recently acquired a router that was nearly free. Looking his gift horse in the mouth, he hooked up a serial port to see if it could run some updated firmware such as OpenWRT. The initial findings were promising; it used the same CPU as the very popular WR703N, but this free router only had 2 MiB of Flash and 8 MiB of RAM – barely enough to do anything. His solution to this problem is in the true hacker tradition: just solder some more chips onto the router.

Upgrading the RAM was comparatively easy; [Necromant] found an old stick of RAM, desoldered one of the chips, and replaced the measly 8 MiB chip with a new 64 Megabyte chip.

The Flash, though, proved more difficult. Without the right code in the Flash for the radio test, the router wouldn’t be useful at all. The solution was to read the original 2 MiB chip, read the Flash from a  WR703, and combined the two with a simple dd command. This was written to a new SPI flash chip with a buspirate and a home etched board.