So You Want To Run A Kickstarter?

Earlier this year, [Anthony Clay] wanted to test the waters of Kickstarter with a low-risk project. The idea he came up with was a series of EE reference posters we featured in a Hackaday links post. Now that [Anthony]’s project is over, he decided to write about the whole ordeal of putting together a Kickstarter, giving all the gory details of putting on your own crowd-sourced project.

We’ve got to give [Anthony] credit for doing his homework. Even before he designed his first poster, he looked over unsuccessful Kickstarter campaigns to see what they did wrong. Once he knew what he was going to offer, [Anthony] put on his project manager hat and made sure he knew exactly what everything was going to cost, had contingency plans in place, and knew what his Kickstarter was before he spread the word.

The best laid schemes of mice and men ‘oft go awry, so of course [Anthony] hit a few snags in his Kickstarter. In his microcontroller quicknotes poster, a few weird underlines made it into the final draft of the voltage characteristics section. Everyone he showed this to thought it was no big deal, but this is something that should have been caught in proofing. Keeping in mind that [Anthony] was only doing a poster and not an electronics project, we think this is a valuable lesson for future Kickstartees.

If you’re wondering what the one thing that [Anthony] credits for the success of his Kickstarter, it’s actually the small blurb we featured in a links post. Once that happened, word started to spread and the funding picked up. To be honest, we’re impressed by that fact, and we’ll try to wield our powers carefully in the future.
Using An IR Remote With Your Arduino

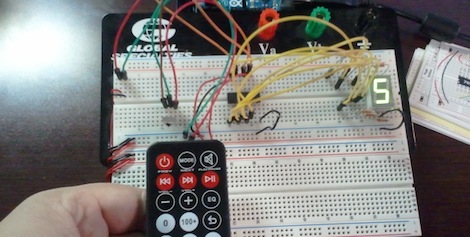
If you’ve ever needed a short-range remote control for a project, [firestorm] is here to help you out. He put up a great tutorial on using an IR remote to do just about anything with everyone’s favorite microcontroller platform.

[firestorm] used the Arduino IRremote library to decode the button presses on his remote. After uploading the IR receive demo included in the library, the Arduino spit out hex codes of what the IR receiver was seeing. [firestorm] wrote these down, and was able to program his Arduino to respond to each individual button press.

After figuring out the IR codes for his remote, [firestorm] threw a shift register into his bread board and attached a seven-segment LED. Since [firestorm] knows the codes for the number buttons on his remote, it’s very easy to have the LED display flash a number when the corresponding button on the remote is pressed.

A single seven-segment display might not be extremely useful, but with [firestorm]’s tutorial, it’s easy to give your Arduino some remote control capabilities with a simple IR receiver. Not bad for a few dollars in parts.

Retrotechtacular: Recovering Lost Moon Images By Dumpster Diving

In 1966 and 67, NASA launched five probes to image the surface of the moon from orbit, eventually returning over two thousand high-resolution images of future Apollo landing sites and selenogical features to researchers on Earth. After taking its pictures of the moon, developing the film in orbit, and scanning the print with an electron gun and photomultiplier tube, the images were sent to Earth stations and recorded onto magnetic tape with a hugely expensive tape recorder, a state-of-the-art storage system costing $300,000. Researchers poured over these images of another world, made a few 35mm prints and sent the magnetic tapes off to the NASA archives.

Under the care of [Nancy Evans], the tapes sat in a warehouse eventually moving to an abandoned McDonalds at Ames Research Center. In 2005, retired and not bound by NASA, [Nancy] made a plea to preserve this milestone of human spaceflight wasting away under the golden arches which was heard by [Dennis Wingo]. [Wingo] and admin of the NASA Watch website admin [Keith Cowling] drove out to [Nancy]’s house with a truck, picked up the Ampex FR-900 tape drives she had saved in her garage from the trash heap at Eglin Air Force Base and headed to the cache of Lunar Orbiter tapes at Ames.

None of these drives worked, of course. Forty years will do a lot to expensive precision equipment. Luckily, one of the employees at Ames tasked with fixing video equipment had worked on the ancient Ampex drives before. Taking the unbroken parts of these machines and turning them into a single working unit didn’t come easily; again, parts needed to be scavenged from the Ames boneyard.

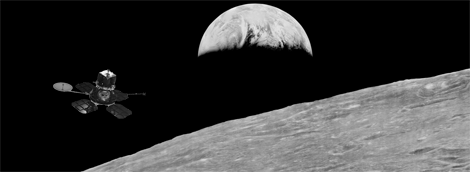
All this work was worth it for [Cowling], [Wingo], and [Evans] when the first image – an Earthrise picture seen above (sans the obvious Photoshoppery) – appeared on their monitor. Later, an amazing oblique shot of Copernicus crater was recovered.

In the years since these first images from the LOIRP project were released, many more images have been made available. These images are actually comparable to the Lunar Reconnaissance Orbiter, launched in 2012. Not bad for 45-year-old hardware that has since crashed into the moon.

As for what the future holds for the still-magnetized images from the Lunar Orbiter program, [Dennis Wingo] says they’re considering putting up a Kickstarter to close the gap between the necessary funding and what NASA provides. We’ll be sure to post a link when that happens.

via boingboing

Reverse Engineering A Stylophone

The Stylophone – a musical toy from the 60s – is a surprisingly simple piece of engineering. With a simple metallic keyboard played with a stylus and just a handful of transistors, the Stylophone was able to produce a few marvelous for their time sounds, and is the equivalent of a pre-[Stradivarius] violin for the electronic music scene. [Simon] tore apart an original Stylophone, and did a complete teardown of the circuit, going over the ins and outs of why this ancient noise box is so cool.

There have been quite a few DIY Stylophone clones, but all of them suffered from the same raspy sound made by a 555 timer chip slightly misguided makers used instead of the relaxation oscillator (in the pic seen above) used in the original. Aside from the oscillator connect to the RC circuit of the metallic keyboard, [Simon] also looked into the vibrato circuit. This is just a simple oscillator producing an 8 Hz sine-ish wave. The keyboard, of course, is connected to the circuit with an array of resistors which [Simon] happily provided the values for.

[Simon] put up a schematic of his reverse engineered Stylophone, allowing you to clone this ancient electronic instrument. If you can source the transistors, that is.

Editing Your FPGA Source

[Dave] noted that in a recent poll of FPGA developers, emacs was far and away the most popular VHDL and Verilog editor. There are a few reasons for this – namely, emacs comes with packages for editing your HDL of choice. For those of us not wanting to install (and learn) the emacs operating system, [Dave] got Notepad++ to work with these packages.

Notepad++ already has VHDL and Verilog highlighting along with other advanced text editor features, but [Dave] wanted templates, automated declarations and beautification. To do this, he used the FingerText to store code as snippets and call them up at the wave of a finger.

As [Dave] writes his code, the component declarations constantly need to be updated, and with the help of a Perl script [Dave] can update them with the click of a hotkey. Beautification is a harder nut to crack, as Notepad++ doesn’t even have a VHDL or Verilog beautifier plugin. This was accomplished by installing emacs and running the beautification process as a batch script. Nobody can have it all, but we’re thinking [Dave]’s method of getting away from emacs is pretty neat.

Servos, Servos, And More Servos

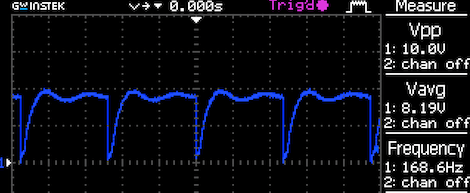
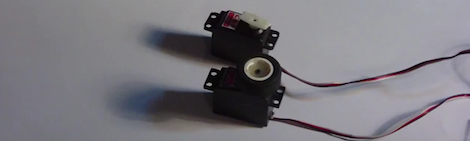
For one reason or another, a lot of Hackaday readers are doing stuff with servos as of late. Here’s a few servo hacks that made their way into our tip line over the past day or so:

USB servo controller and a Stewart Platform

[Patricio] needed a way to control a bunch of servos for his thesis project. He came up with a USB servo controller (Spanish, here’s the translation) powered by a 40-pin PIC 18F microcontroller. The board connects to the USB port of a computer and supports up to 8 servos with 8 additional digital I/Os. Why all this horsepower? It’s for a Stewart Platform [Patricio] and his partner [Natalia] built.

Continuous rotation servos

Standard servos are usually limited to a rotation angle of somewhere between 140 and 160 degrees. Sometimes you need a continuous rotation servo, and those are a little more expensive. Every servo is a continuous rotation servo if you disable a the variable resistor as [Valentin] shows us. It’s a simple, if old, hack. It’s new to someone, though.

Eight servos on a Raspi

[Mikael] made a little board to attach to the GPIO header of his Raspberry Pi and control up to 8 servos. The board is running a serial interface with a small microcontroller on board. There’s nothing in the way of schematics or code, a testament for why you should always use a good email address when sending something into the HaD tip line. It seems [Mikael] is making a proper board, and we’ll more than happily give it a full post when it’s complete.

Chorded Keyboard For Touchscreens

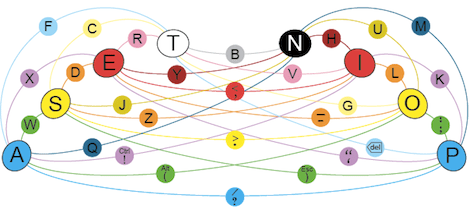
For over a hundred years, good typists didn’t ‘hunt and peck’ but instead relied on keeping their fingers on the home row. This technique relies on physical buttons, but with on-screen keyboards used on tablets and other touch screen devices touch typists have a very hard time. [Zach] is working on a new project to bring a chorded keyboard to these devices called ASETNIOP.

Instead of training a typist where to place their finger – the technique used in most other keyboard replacements, ASETNIOP trains the typist which fingers to press. For example, typing ‘H’ requires the typist to press the index and middle fingers of their right hand against the touchscreen. In addition to touchscreens, ASETNIOP can be used with projection systems, Nintendo Power Glove replicas, and extremely large touchpads that include repurposed nooks and Kindles.

If you’d like to try out ASENTNIOP, there’s a tutorial that allows you to try it out on a physical keyboard as well as one for the iPad. It’s a little weird to try out but surely no more difficult to learn than a Dvorak keyboard.