Build Your Own SMS Chatroom

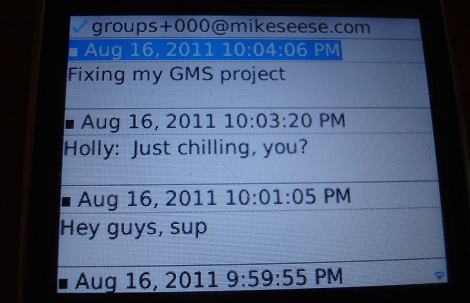
While he was organizing a party, [Mike Seese] hit upon the idea of chatroom that would operate over SMS. Not being content with the ‘reply all’ function, [Mike] built a Group Messaging Service that runs on his home server.

The chat room is initiated by sending a text to a server. Your friends then reply, and the chatroom is then opened. The project was written in C++, and [Mike] put everything on github for your perusal. The software does use libraries from /n software’s IP*Works, but if you have any trouble obtaining those libraries feel free to drop [Mike] a line.

The great thing about this project is the fact that it’s platform independent – as long as a phone can do SMS, it’ll work. Seems like a great thing for those of us still using the old Nokia ‘bar’ phones. An SMS chatroom has been done before but this is the first time we’ve seen a build that will run off your server, and not internet-based services.

While it may not be the best idea for people without unlimited texts on their phone plan, it’s a really great idea and we’re wondering why something like this isn’t available via Google Voice.

Restoring A Jukebox With An Arduino

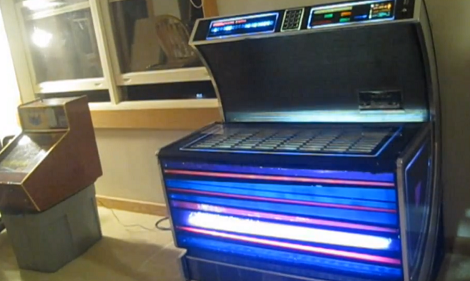
[Jim] just finished restoring an old Seeburg USC1 jukebox for his father using an Arduino, replacing an electromechanical rats nest of wires. The stack of 45 records were replaced with an Arduino Mega 2560 with an Sparkfun MP3 player shield, and he jukebox lights are now controlled with 74595 shift registers. Because his jukebox isn’t taking in money, the dollar bill validator has been modified into a ‘skip song’ button, and when there are no songs in the jukebox queue, there are 500 additional songs on the SD card that will randomly play.

We’ve seen one of [Jim]’s builds before. Earlier this year he repaired a thirty year old Pachinko machine using the same Arduino + MP3 shield setup. It looks like [Jim] is pretty skilled at revitalizing bulky old electronics. The jukebox restoration is great and has a lot more class than the internet-connected touch screen monstrosities that we still pump money into.

Check out the video after the break for a walk through of this restoration.

Continue reading “Restoring A Jukebox With An Arduino”

Electric Longboard Uses DIY Hub Motors

As a student of MIT, [Jed Storey] has access to a ton of machine tools, so he decided to build an electric longboard with hub motors by hand.  He wound up re-doing a lot of his project, so we can commiserate with him on the trials of R&D.

Inspired by the BWD scooter, [Jed]‘s longboard uses hub motors – the wheel is the motor. The rotors were fabricated in-house, and off-the-shelf stators were wound by [Jed] by hand. There’s a lot of work that went into this build, and the build log is really fascinating in this regard.

The board is controlled by a pistol-grip R/C controller that had been modified to include a dev board and an XBee. For power, an aluminum enclosure was fabricated, strapped underneath the deck, and filled with LiPo batteries. While the build is mostly done, [Jeb] is thinking about scrapping it and moving onto version 2, the HeavyBoard. Check out the video of the board in action.

Easy To Build Z80 Single Board Computer

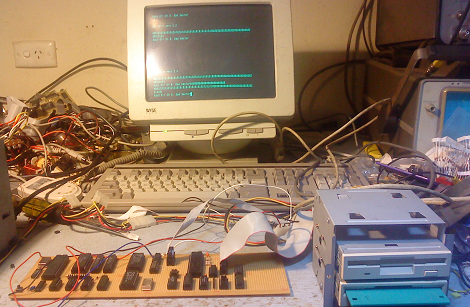
[Alexis] sent in a single board computer he’s been working on. The project goal of his build was making it easily reproducible. From looking at the schematics, it’s one of the simplest fully-functional computers we’ve seen. The build runs CP/M 2.2 off of two 3.5 inch floppies. This opens up a lot of options as to what software is already available. Although it operates over a serial terminal, [Alexis] pretty much duplicated an Osborne I, only at double the speed.

[Alexis] got a little e-fame from his earlier 8088 homebrew computer built from very early 8088’s rescued from an electronics junk shop. These 8088 computers made the blog rounds by playing Still Alive with a SID chip from a Commodore 64 and a YM2151 FM synth chip.

For now, I guess we’ll have to settle for a video of [Alexis]’ Z80 computer running CP/M. Check out a video after the break of his computer running the greatest Infocom adventure, Hitchhiker’s Guide to the Galaxy.

Continue reading “Easy To Build Z80 Single Board Computer”

Hacking A Better Pressure Cooker

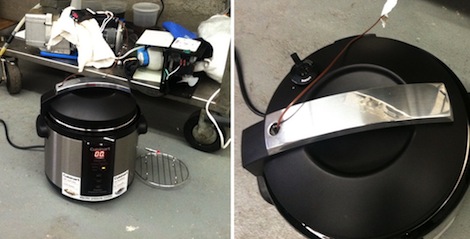
This pressure cooker hack on [Dave Arnold]’s great cooking blog was sent into us (thanks, [techartisan]!). Most pressure cooker recipes are written for pressure cookers that can go up to 15 PSI or 250° F / 121° C. At these temperatures, a lot of interesting chemistry happens in the food. The popular Cuisinart electric pressure cooker doesn’t reach these pressures and temperatures, so [Dave Arnold] set out to make his Cuisinart better.

After measuring the temperature with a thermocouple, [Dave] deduced that the Cuisinart cooker only reached 237° F and 9 PSI. After having a look at the electronics, he realized that adding a resistor to the temperature sensor circuit would give him the pressure he wanted. After soldering in a trim pot, everything went swimmingly and the cooker was able to reach 15 PSI.

[Dave] isn’t sure how his modifications will hold up – he doesn’t know how the cooker will hold up to overheating (and there are a few concerns about non-stick pressure cookers in the first place). That being said, it’s a great mod to get some more capabilities out of a Cuisinart.

Largest LED Cube We’ve Ever Seen Is Still Only Half Complete

[Brendan Vercoelen] is a university student in New Zealand studying engineering. He says his recent gigantic LED cube build, “isn’t very serious” compared to other student projects, but that doesn’t mean it’s not impressive. The original plan for the build was a 16x16x16 tri-color LED cube. After realizing how much soldering that really was, [Brendan] scaled back his design a little to a 16x16x8 cubeoid, but the other half can be attached when the project is complete.

From the cost breakdown, [Brendan] only spent about $550 USD – far less expensive than we expected. The most expensive item was the 4,000+ Red-Green-Orange tri-color LEDs. The largest LED cubes (1, 2, 3) we’ve covered have maxed out at 8x8x8, or 512 total LEDS. Even though [Brendan]’s build is only half done, it’s still four times larger in volume than the largest LED cube we’ve seen.

The gauntlet has been thrown down. This is the one to beat, folks. Check out a video of the cube after the break.

Continue reading “Largest LED Cube We’ve Ever Seen Is Still Only Half Complete”

Playing SNES With An R/C Controller

Normally when we see an R/C transmitter used in a build we’re prepared for robots, quadcopters, or UAVs. [Alex] found a new use for his Futaba radio – hooking it up to his Super Nintendo.

We’ve seen a lot of builds using game controllers as interfaces to other hardware. The N64 media remote comes to mind, as does the NES iPod dock. Outside of a few builds to automatically win in-game currency for you, we haven’t seen much of anything to control a video game with additional electronics. [Alex]’s build happily bucks that trend, and technically gives the SNES an analog controller.

The build uses an mBed microcontroller to capture the radio’s button and stick positions. This is sent through a two shift registers to produce the 16-bit packet required of the SNES controller protocol. [Alex] posted all the software for his build, and from the looks of it the code seems pretty portable. [Alex] says he’s working on getting his Sega Saturn running with his Futaba, so we can’t wait to see some Panzer Dragoon action. Check out [Alex] demoing his controller with Gradius III after the break.

Continue reading “Playing SNES With An R/C Controller”