Halo-style Paintball

paintball buggy

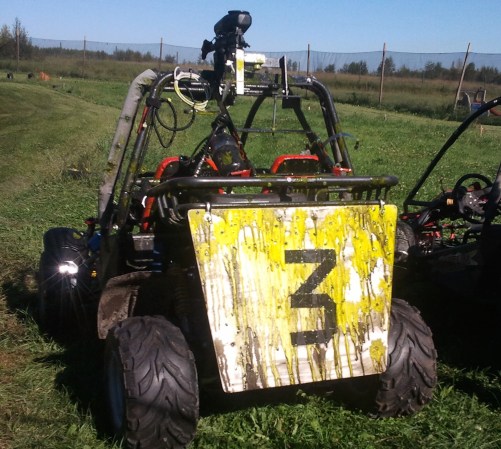
It seems as though [Nathan] has taken some serious inspiration from the Warthog. The iconic armored buggy from Halo video games has a turret mounted to the roof. Although [Nathan]’s buggy only shoots paintballs from its turret.

Mounting paintball markers (guns) to various objects such as vehicles, robots, or other machines isn’t quite as straightforward as it seems. Vibrations from anything can transfer through a clamping system and cause paintballs to break. This, of course, inhibits the functionality of the marker and is a messy cleanup to boot. Then there has to be a way to fire the paintballs, which is usually handled by soldering to the electrical connections in the marker. And the entire rig has to stand up to the normal jostling and sudden turns from the buggy.

[Nathan] has solved these problems first by creating a custom fast-change mount that allows any malfunctioning markers to be changed rapidly. The electronic firing mechanism is handled by an ATtiny microcontroller and there is a custom electrical connection that is automatically made when the marker is bolted to the mount.

The new system allows markers to be changed in about 30 seconds, much better than any other system. Maybe in the future [Nathan] can upgrade the buggy’s turret to accommodate a paintball minigun.
Speedy Drinkmaker Keeps Party Guests Hydrated

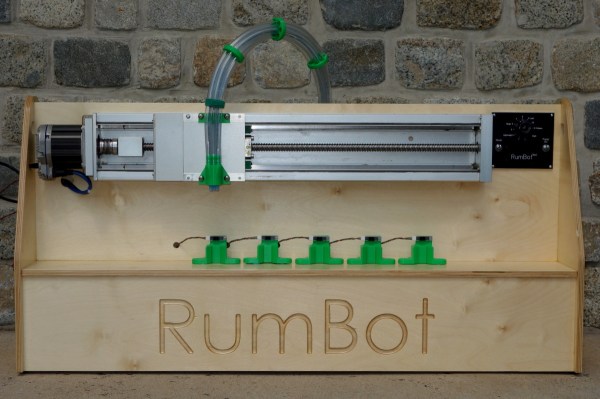
After five weekends of work, [Alex] completed his automatic drink maker, the RumBot. What makes this automated bartender different from others is the fact that it is fast. VERY fast. It can serve drinks to five different locations in as little as 3 seconds per drink. By [Alex]’s estimation, this could keep a party of 100 people going without anyone waiting on a drink.

The RumBot can make either of five pre-programmed drinks at varying levels of alcoholic intensity, ranging from 1 (“Virgin”) to 10. And for that extra push over the cliff, you can turn the knob to 11 (“Problem”).

Drink selection itself is handled by a simple digital I/O on an Arduino with a 1950s-styled user interface. The frame is built out of wood and uses 3D Printed plastic parts. It houses a very robust servo on a belt screw-driven stage to move the drink nozzle, and special sensors placed at either of the five drink locations detect a cup ready to be filled. Any cup placed at any of the positions will automatically be filled based on the RumBot’s settings at any particular time.

Based on the quality of the build and the increased speed of this automatic drink maker, this should be a huge hit at any party. With all the knobs turned to 11 though, it might be a good idea to have a breathalyzer on hand! All of the code and schematics for the project are available at the project site as well.

Continue reading “Speedy Drinkmaker Keeps Party Guests Hydrated”

The Most Basic BASIC Computer

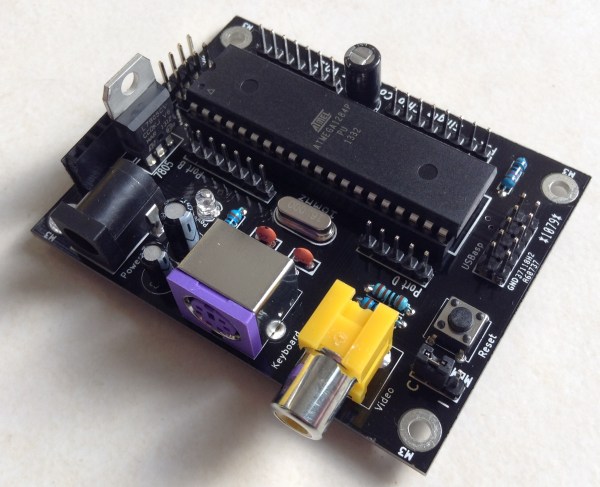
AVR microcontrollers can do pretty much anything nowadays. Blinking LEDs, handling sensor inputs, engine control modules, and now, thanks to [Dan], a small single chip BASIC computer with only ten parts (and four of them are capacitors).

[Dan]’s homebrew computer has it all. The ATmega 1284P microcontroller outputs a composite video signal and handles inputs from a PS/2 keyboard. The microcontroller runs at 16 MHz, has 7 kB of memory for programs, and can use a separate EEPROM to store data. It also has an array of GPIO pins for interacting with the physical world.

For software, the microcontroller runs a version of BASIC called Tiny BASIC plus, which is a stripped-down language that can fit in 3 kB of memory. This is crucial if you’re in the 1970s or if you’re programming on an AVR microcontroller in the 21st century.

We’ve seen other Arduinos and AVR-type microcontrollers that can run BASIC, but this one has a great form factor and clean look. It’s also a great way to get familiar with homebrew computing and the BASIC programming language!

LEGO And Arduino Meet Han Solo

lego blaster gif

This full-size replica blaster from Star Wars, most iconically used by Han Solo and Princess Leia, has everything. Flashing LEDs, blaster noises, LEGO, and yes, even an Arduino. Not bad for [Baron von Brunk]’s first project to use an Arduino!

The blaster was based on electronics and LEGO that were lying around and was intended for use for Star Wars Day 2014. (May the Fourth be with you.) “Lying around” in this sense might be a bit of an understatement for [Baron von Brunk], as the design of the blaster required the use of the LEGO Digital Designer and 400 blocks, some of which are quite rare.

The electronics for the project are tied to a moving trigger mechanism (also made from LEGO). The trigger mechanism hits a momentary pushbutton which tells the Arduino to activate the LEDs and a separate 555 timer and sound recording/playback device which handles the classic blaster sounds. The whole thing is powered by a 9V battery and housed in the front of the blaster, and all of the code (and the LEGO schematics) are available on the project’s site.

This is quite an impressive replica, and the craftsmanship that went into the build shows, especially in the LEGO parts. We think Han Solo would indeed be proud! If you’re ready to go even further with Star Wars and LEGO, you might want to check out this barrel organ that plays the Star Wars theme.

Bluetooth Low Energy Beacons In A Flock Of Birds

birds_ready

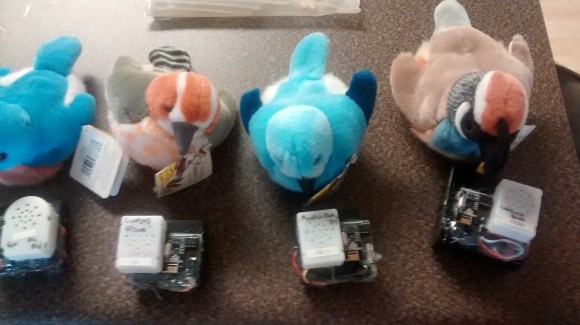
No, not real birds! [Kyle] works in operations at a web company and needed a way to send alerts to his fellow coworkers, so he modified a flock of Audubon Society plush birds to respond to a Bluetooth beacon.

Using NRF24L01+ Bluetooth Low Energy modules, [Kyle] installed one each in these battery-powered singing birds. The devices are presumably powered off of the battery that comes with the birds, but the use of the BTLE module means the batteries won’t discharge as rapidly.

[Kyle] also built an API that works over HTTP or IRC, which means that the employees in the office can activate everyone else’s birds over a simple and intuitive interface. The birds can be activated one at a time, or all together in “panic” mode as one giant flock (in case of an emergency in the office). They can also be activated one at a time on a specific hour to simulate the Audubon Society’s bird call clock.

He calls the device equail and it’s a very unique notification system with a lot of applications. All of [Kyle]’s code and documentation of his project are available on his github site. He also used this primer on BTLE to get started, and this guide on sending data over BTLE to help get the project in the air.

Hacking VGA For Trippy Video Effects

RGB.VGA.VOLT

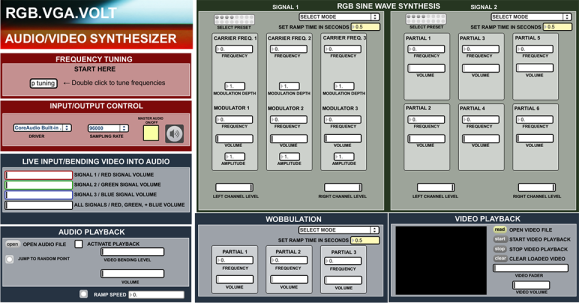
Ever since flat panel LCD monitors came on the scene, most old CRTs have found their ways into the garbage or into the backs of closets. For this project, it might be a good idea to pull out the old monitor or TV out and dust it off! [James] has found a way to hack the VGA input to these devices to get them to display vivid visualizations based on an audio input.

The legacy hardware-based project is called RGB.VGA.VOLT and works by taking an audio signal as an input, crossing some wires, and sending the signal through a synthesizer. The circuit then creates a high-frequency waveform that works especially well for being displayed on VGA. The video can also be channeled back through an audio waveform generator to create a unique sound to go along with the brilliant colors.

[James]’s goals with this project are to generate an aesthetic feeling with his form of art and to encourage others to build upon his work. To that end, he has released the project under an open license, and the project is thoroughly documented on his project site.

There have been plenty of hacks in the past that have implemented other protocols with VGA or implemented VGA on microcontrollers, but none that have hacked the interface entirely to create something that looks like the Star Gate sequence from 2001: A Space Odyssey. We think it’s a great piece of modern art and a novel use of VGA!

Thanks for the tip, [Kyle]!

A Homemade Bubble Robot For The Kids

bubbles-machine

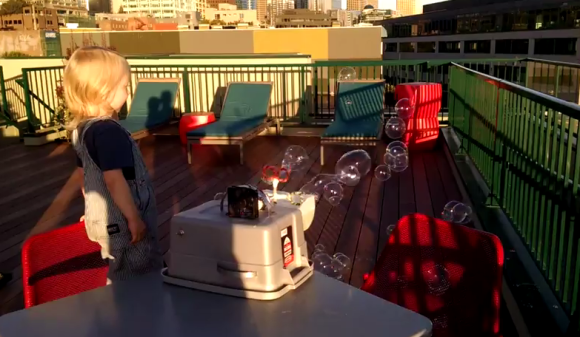
Kids generally can be amused pretty easily, but when jangling keys stop holding their interest you might want to take a look at [drenehtsral]’s new project. He’s created an automatic bubble robot (YouTube link) that keeps the kids endlessly entertained!

The project started as an idea at a festival where one of [drenehtsral]’s kids took great interest at a bubble machine. [drenehtsral] had never heard of a bubble machine before, but it turns out that it’s pretty simple in practice. All that’s required is a tank of soapy water, a motor to turn the bubble wands, and a fan to form the bubbles and make them waft gently through the air.

[drenehtsral] also used a 12V battery for power, some other hardware to hold it all together, and a 5V regulator and some other control electronics for the fan and the motor. He notes that he could have bought a bubble machine but in true hacker style found it fun to build himself. The next step in this project could be something to vary the size of the bubbles, or perhaps a set of wheels for the robot so it can entertain the kids on the move!

Continue reading “A Homemade Bubble Robot For The Kids”