Feeding The Fire By Robot

It might seem a little bit counterintuitive, but one of the more carbon-neutral ways of heating one’s home is by burning wood. Since the carbon for the trees came out of the air a geologically insignificant amount of time ago, it’s in effect solar energy with extra steps. And with modern stoves and well-seasoned wood, air pollution is minimized as well. The only downside is needing to feed the fire frequently, which [Anders] solved by building a robot.

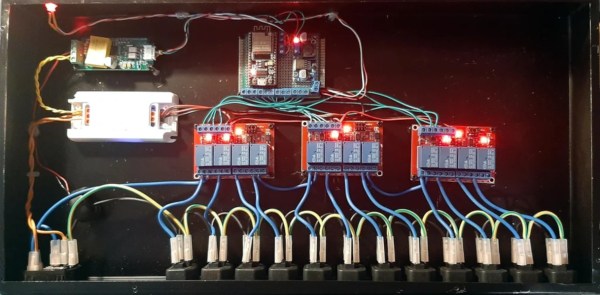
[Anders]’ system is centered around a boiler, a system which typically sits in a utility area like a basement and directs its heat to the home via another system, usually hot water. An Arduino Mega controls the system of old boat winches and various motors, with a grabber arm mounted at the end. The arm pinches each log from end to end, allowing it to grab the uneven logs one at a time. The robot also opens the boiler door and closes it again when the log is added, and then the system waits for the correct set of temperature conditions before grabbing another log and adding it. And everything can be monitored remotely with the help of an ESP32.

The robot is reportedly low-maintenance as well, thanks to its low speed and relatively low need for precision. The low speed also makes it fairly safe to work around, which was an important consideration because wood still needs to be added to a series of channels every so often to feed the robot, but this is much less often than one would have to feed logs into a boiler if doing this chore manually. It also improves on other automated wood-burning systems like pellet stoves, since you can skip the pellet-producing middleman step. It also eliminates the need to heat your home by burning fossil fuels, much like this semi-automated wood stove.

Continue reading “Feeding The Fire By Robot”

Vroomba Gets Upgrades And A Spoiler

[Electrosync] is the creator and driver of the world’s fastest robotic vaccum cleaner, the Vroomba. It’s a heavily modified roomba capable of speeds of around 60 kph, well beyond the pedaling speed of most bicyclists. Despite being rejected by Guinness for a world record, we’re fairly confident that no other vacuum cleaners have gotten up to these speeds since the Vroomba first hit the streets. That’s not going to stop [electrosync] from trying to top his own record, though, and he’s brought the Vroomba some much needed upgrades.

The first, and perhaps most important, upgrades are to some of the structural components and wheels. The robot is much heavier than comparable RC vehicles and is under much greater strain than typical parts are meant to endure, so he’s 3D printed some parts of the chassis and some new wheels using a nylon-carbon fiber filament for improved strength. The wheels get a custom polyurethane coating similar to last time.

Continue reading “Vroomba Gets Upgrades And A Spoiler”

Simulating A Time-Keeping Radio Signal

As far as timekeeping goes, there’s nothing more accurate and precise than an atomic clock. Unfortunately, we can’t all have blocks of cesium in our basements, so various agencies around the world have maintained radio stations which, combined with an on-site atomic clock, send out timekeeping signals over the air. In the United States, this is the WWVB station located in Colorado which is generally receivable anywhere in the US but can be hard to hear on the East Coast. That’s why [JonMackey], who lives in northern New Hampshire, built this WWVB simulator.

Normally, clocks built to synchronize with the WWVB station include a small radio antenna to receive the 60 kHz signal and the 1-bit-per-second data transmission which is then decoded and used to update the time shown on the clock. Most of these clocks have internal (but much less precise) timekeeping circuitry to keep themselves going if they lose this signal, but [JonMackey] can go several days without his clocks hearing it. To make up for that he built a small transmitter that generates the proper timekeeping code for his clocks. The system is based on an STM32 which receives its time from GPS and broadcasts it on the correct frequency so that these clocks can get updates.

The small radio transmitter is built using one of the pins on the STM32 using PWM to get its frequency exactly at 60 kHz, which then can have the data modulated onto it. The radiating area is much less than a meter, so this isn’t likely to upset any neighbors, NIST, or the FCC, and the clocks need to be right beside it to update. Part of the reason why range is so limited is that very low frequency (VLF) radios typically require enormous antennas to be useful, so if you want to listen to more than timekeeping standards you’ll need a little bit of gear.

Laptop Memory Upgradable Again

For some computing components, the bottleneck to improved speed and performance hasn’t been power consumption or clock speed but physical space. But a new memory standard may provide all of the power and space-saving benefits of soldered memory modules without losing any upgradability.

The standard is called compression attached memory modules (CAMM) and provides a way for small form factor computers to have upgradable memory without needing dual in-line memory module (DIMM) slots. Unlike DIMM, though, CAMM modules allow for modern high-speed low-power memory to be used and can take advantage of dual-channel properties even if only one memory module is installed. CAMM modules are held in place with small screws, similar to modern M.2 drives, and don’t have the massive footprint of a DIMM slot. This allows laptop manufacturers to save nearly as much space as having soldered memory.

While this won’t solve the problem of computer manufacturers offering only soldered memory as a cash-grab, hopefully, some take the new standard under their wing for those of us who value the upgradability of our hardware. There are of course some problems with newer standards, but right now it seems like the only other viable option is soldered modules or slower, heavier computers. Some may argue that these soldered-on modules can be upgraded in theory, but not without considerable effort.

Saving PIC Microcontrollers With DIY Programmer

When working on a project, plenty of us will reach for an Atmel microcontroller because of the widespread prevalence of the Arduino platform. A few hackers would opt for a bit more modern part like an ESP32. But these Arduino-compatible platforms are far from the only microcontrollers available. The flash-based PIC family of microcontrollers is another popular choice. Since they aren’t quite as beginner or user-friendly, setting up a programmer for them is not as straightforward. [Tahmid] needed to program some old PIC microcontrollers and found the Pi Pico to be an ideal programmer.

The reason for reaching for the Pico in the first place was that [Tahmid] had rediscovered these decade-old microcontrollers in a parts bin but couldn’t find the original programmer. Thanks to advances in technology in the last ten years, including the advent of micropython, the Pico turned out to be the ideal programmer. Micropython also enables a fairly simple drag-and-drop way of sending the .hex file to the PIC, so the only thing the software has to do is detect the PIC, erase it, and flash the .hex file. The only physical limitation is that the voltages needed for the PIC are much higher than the Pico can offer, but this problem is easily solved with a boost converter (controlled by the Pico) and a level shifter.

[Tahmid] notes that there’s plenty of room for speed and performance optimization, since this project optimized development time instead. He also notes that since the software side is relatively simple, it could be used for other microcontrollers as well. To this end, he made the code available on his GitHub page. Even if you’re more familiar with the Arduino platform, though, there’s more than one way to program a microcontroller like this project which uses the Scratch language to program an ESP32.

A Dashboard Outside The Car

One of the biggest upsides of open communications standards such as CAN or SPI is that a whole world of vehicle hacking becomes available, from simple projects like adding sensors or computers to a car or even building a complete engine control unit from the ground up. The reverse is true as well; sensors and gauges using one of these protocols can be removed from a car and put to work in other projects. That’s the idea that [John] had when he set about using a vehicle’s dashboard as a information cluster for his home.

The core of the build is an Astra GTE dashboard cluster, removed from its host vehicle, and wired to an Arduino-compatible board, in this case an ESP32. The code that [John] wrote bit-bangs an SPI bus and after some probing is able to address all of the instrument gauges on the dashboard. For his own use at home, he’s also configured it to work with Home Assistant, where each of the gauges is configured to represent something his home automation system is monitoring using a bit mask to send data to specific dials.

While this specific gauge cluster has a lot of vehicle-specific instrumentation and needs a legend or good memory to tie into a home automation system without any other modification, plenty of vehicle gauges are more intuitive and as long as they have SPI they’d be perfect targets for builds that use this underlying software. This project takes a similar tack and repurposes a few analog voltmeters for home automation, adding a paper background to the meters to make them easier to read.

Continue reading “A Dashboard Outside The Car”

Pico-Sized Ham Radio

There are plenty of hobbies around with huge price tags, and ham radio can certainly be one of them. Experienced hams might have radios that cost thousands of dollars, with huge, steerable antennas on masts that can be similarly priced. But there’s also a side to the hobby that throws all of this out of the window in favor of the simplest, lowest-cost radios and antennas that still can get the job done. Software-defined radio (SDR) turned this practice up to 11 as well, and this radio module uses almost nothing more than a microcontroller to get on the air.

The design uses the capabilities of the Raspberry Pi Pico to handle almost all of the radio’s capabilities. The RF oscillator is driven by one of the Pico’s programmable I/O (PIO) pins, which takes some load off of the processor. For AM and SSB, where amplitude needs to be controlled as well, a PWM signal is generated on another PIO which is then mixed with the RF oscillator using an analog multiplexer. The design also includes a microphone with a preamplifier which can be fed into a third PIO; alternatively it can receive audio from a computer via the USB interface. More processor resources are needed when generating phase-modulated signals like RF, but the Pico is still quite capable of doing all of these tasks without jitter larger than a clock cycle.

Of course this only outputs a signal with a few milliwatts of power, so for making any useful radio contacts with this circuit an amplifier is almost certainly needed. With the heavy lifting done by the Pico, though, the amplifier doesn’t need to be complicated or expensive. While the design is simple and low-cost, it’s not the simplest radio possible. This transmitter sends out radio waves using only a single transistor but you will be limited to Morse code only.

Continue reading “Pico-Sized Ham Radio”