Banish Early Morning Zombification With The Zom-b-gone!

[Applied Procrastination] aka [Simen E. Sørensen] has a simple project to help those of us that struggle with early-morning zombification. By leveraging the backlight optics from a broken LCD monitor, it is possible to create an excellent diffused light source to simulate daylight, before your chosen waking time. The theory is that it is less shocking to the brain to be woken more gradually than an alarm may do. The increasing light level is to prepare the brain with a slowly increasing light level, reminiscent of daybreak, before being properly awoken by an alarm, regardless of the actual light level outdoors. This particularly useful for those of us in more northern regions, such as [Simen]’s native Norway, where mornings are very dark in the winter months.

Daylight is not purely a diffuse source however, it depends on the degree of atmospheric scattering, local reflections and such, but as far as we’re concerned here, we can just aim for as diffuse a light source a possible.

Source: DOI:10.1117/12.797854

The implementation makes use of the existing LCD metal frame, the light guide panel (usually a big hunk of acrylic covered in etched markings on one side) the diffuser/brightener sheet, and the prism sheet. A white LED strip mounted around the frame edge directs light into the light guide, which with a combination of total internal reflection and scattering on one side only, effectively turns the light through 90 degrees, and spreads it out evenly across that surface. The result of this optical sandwich is flat, even light, exactly what you want for a display, and also for simulating daylight.

Nestled beneath the expected 3D printed frame, is a custom PCB derived by smooshing together the designs from the Adafruit DS3231 RTC module and the Arduino Nano, an additional push button and rotary encoder complete the minimalistic UI, and allow the device to double up as general purpose lamp during the day. Despite a few wobbles with assembling the frame, and some incorrect PCB footprinting, the whole thing came together pretty nicely. This is a perfect thing to do with broken LCD monitors, eeking out a new life and keeping the amount of landfill to a minimum.

For further details of the hardware and codes, see the Zom-b-Gone Github.

Continue reading “Banish Early Morning Zombification With The Zom-b-gone!”

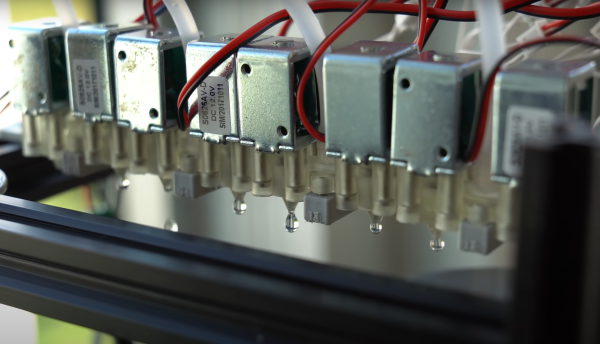
Continuous Resin Printer Shows The Speed

Redditor [No-Championship-8520] aka [Eric Potempa] has come up with an interesting DIY take on the Continuous Liquid Interface Production (CLIP) process currently owned and developed by Carbon Inc.

The usual resin 3D printer you may be familiar with is quite a simple machine. The machine has only one axis, which is the vertically moving build platform. A light exposes a photosensitive resin that cures on and is then pulled up off of a transparent window, before the next layer is exposed.

Typical resin printer setup

CLIP is a continuous resin printing process that speeds up printing by removing this peeling process. It utilises a bottom membrane that is permeable to oxygen. This tiny amount of oxygen right at the boundary prevents the solidified resin from sticking to the bottom, allowing the Z axis to be moved up continuously, speeding up printing significantly.

The method [Eric] is using is based around a continuously rotating bath to keep the resin moving, replenishing the resin in the active polymerisation zone. The bottom of the bath is made from a rigid PDMS surface, which is continuously wiped with a squeegee to replenish the oxygen layer. He notes the issues Carbon are still having with getting enough oxygen into the build layer, which he reckons is why they only show prints of smaller or latticed structures. His method should fix that issue. The build platform is moved up slowly, with the part appearing in one long, continuous movement. He reports the printing speed as 280 mm/hour which is quite rapid to say the least. More details are very scarce, and the embedded video a little unclear, but as one commentator said “I think we just saw resin printing evolve!” the next snarky comment changed the “evolve” to “revolve” which made us giggle.

Now, we all know that 3D printing is not at all new, and only the expiration of patents and the timely work by [Adrian Bowyer] and the reprap team kickstarted the current explosion of FDM printers. Resin printers will likely be hampered by the same issues until something completely new kickstarts the next evolution. Maybe this is that evolution? We really hope that [Eric] decides to write up his project with some details, and we will be sitting tight waiting to pore over all the gory details. Fingers crossed!

ClOCkTAL: For When Reading A Clock Is Just Too Easy

Over on Hackaday.io, [danjovic] presents clOCkTAL, a simple LED clock for those of us who struggle with the very concept of making it easy to read the time. Move aside binary clocks, you’re easy, let’s talk binary coded octal. Yes, it is a thing. We’ll leave it to [danjovic] to describe how to read the time from it:

Do not try to do the math using 6 bits. The trick to read this clock is to read every 3-bit digit in binary and multiply the MSBs by 8 before summing to the LSBs.

Simple. If you’re awake enough, that is. Anyway, we’re a big fan of the stripped-down raw build method using perf board, and scrap wood. No details hidden here. The circuit is straightforward, being based on a minimal configuration needed to drive the PIC16F688 and a handful of LEDs arranged in a 3×4 matrix.

An interesting detail is the use of Bresenham’s Algorithm to derive the one event-per-second needed to keep track of time. And no, this isn’t the more famous Bresenham’s line algorithm you may be more familiar with, it’s much simpler, but does work on the same principle of replacing expensive arithmetic division operations with incremental errors. The original Bresenham’s Algorithm was devised for using with X-Y plotters, which had limited resolution, and was intended to allow movements that were in an imperfect ratio to that resolution. It was developed into a method for approximating lines, then extended to cover circles, ellipses and other types of drawables.

Continue reading “ClOCkTAL: For When Reading A Clock Is Just Too Easy”

3D Printed Hat Blasts The Rain Away

Some ideas are so bad that we just try them anyway, at least that seems to be [Ivan Miranda]’s philosophy. No stranger to just totally ignoring the general consensus on what you can (or at least should) or can’t make with a 3D printer, and just getting on with it, [Ivan] may have gone a little too far this time. Since umbrellas are, well, boring, why not try to keep dry with an air-curtain hat?

As you’ll see from the video, attempting to 3D print an impeller to run from a BLDC motor didn’t exactly go well. The imbalance due to imperfections in the printing process (and lack of an easy way balance it post-print) caused incredibly unpleasant (and possibly damaging) vibrations directly into his skull, not to mention the thing self-disassembling in a short time.

Not to be discouraged, he presses on regardless, substituting an electrical ducted fan (EDF), increasing the silliness-factor oh-so-little, after all as he says “I think I have a solution for all the issues — more power!”

EDFs and other kinds of ducted fans are used in many applications nowadays. Thanks to advances in rare-earth magnets enabling more powerful brushless motors, combined with cheap and accessible control systems, there has never been a better time to drop an EDF into your latest madcap idea. We have covered many ducted fan projects over the years, including this great video about how ducted fans work, which we think is well worth a watch if you’ve not already done so.

The “rain in spain, stays mainly in the plain” doesn’t actually reflect reality, as most rainfall is actually recorded in the mountainous north, rather than the central ‘plain’, But regardless, it never rains when you want it to, certainly in the Basque country where [Ivan] is based. Initial testing was done with a hose pipe, in the shop, which shows a certain dedication to the task in hand to say the least.

He does demonstrate it appearing to actually work, but we’re pretty sure there is still plenty of room for improvement. Although, maybe it’s safer to just shelve it and move on the next mad-cap idea?

Continue reading “3D Printed Hat Blasts The Rain Away”

Flamethrower weedkiller mounted on a robot arm riding a tank tracked base

Don’t Sleep On The Lawn, There’s An AI-Powered, Flamethrower-Wielding Robot About

You know how it goes, you’re just hanging out in the yard, there aren’t enough hours in the day, and weeding the lawn is just such a drag. Then an idea just pops into your head. How about we attach a gas powered flamethrower to a robot arm, drive it around on a tank-tracked robotic base, and have it operate autonomously with an AI brain? Yes, that sounds like a good idea. Let’s do that. And so, [Dave Niewinski] did exactly that with his Ultimate Weed Killing Robot.

And you thought the robot overlords might take a more subtle approach and take over the world one coffee machine at a time? No, straight for the fully-autonomous flamethrower it is then.

This build uses a Kinova Robots Gen 3 six-axis arm, mounted to an Agile-X Robotics Bunker base. Control is via a Connect Tech Rudi-NX box which contains an Nvidia Jetson Xavier NX Edge AI computing engine. Wow that was a mouthful!

Connectivity from the controller to the base is via CAN bus, but, sadly no mention of how the robot arm controller is hooked up. At least this particular model sports an effector mount camera system, which can feed straight into the Jetson, simplifying the build somewhat.

To start the software side of things, [Dave] took a video using his mobile phone while walking his lawn. Next he used RoboFlow to highlight image stills containing weeds, which were in turn used to help train a vision AI system. The actual AI training was written in Python using Google Collaboratory, which is itself based on the awesome Jupyter Notebook (see also Jupyter Lab on the main site. If you haven’t tried that yet, and if you do any data science at all, you’ll kick yourself for not doing so!) Collaboratory would not be all that useful for this by itself, except that it gives you direct, free GPU access, via the cloud, so you can use it for AI workloads without needing fancy (and currently hard to get) GPU hardware on your desk.

Details of the hardware may be a little sparse, but at least the software required can be found on the WeedBot GitHub. It’s not like most of us will have this exact hardware lying around anyway. For a more complete description of this terrifying contraption, checkout the video after the break.

Continue reading “Don’t Sleep On The Lawn, There’s An AI-Powered, Flamethrower-Wielding Robot About”

Breadboard containing speech synthesis chip

RPi Python Library Has Retro Chiptunes And Speech Covered

The classic SP0256-AL2 speech chip has featured a few times on these pages, and if you’ve not seen the actual part before, you almost certainly have heard the resulting audio output. The latest Python library from prolific retrocomputing enthusiast [Nick Bild] brings the joy of the old chip to the Raspberry Pi platform, with an added extra trick; support for the venerable AY-3-8910 sound generator as well.

The SP0256-AL2 chip generates vaguely recognisable speech using the allophone system. Allophones are kind of like small chunks of speech audio which when reproduced sequentially, result in intelligible phonemes that form the basis of speech. The chip requires an external device to feed it the allophones at a regular rate, which is the job of his Gi-Pi library.

This speech synthesis technology is based on Linear-predictive coding, which is used to implement a human vocal tract model. This is the same coding method utilized by the first generation of GSM digital mobile phones, implementing a system known as Full-Rate. Both an LPC encoder and an LPC decoder are present on the handset. The LPC encoder takes audio in from the user, breaks it into the tiny constituent parts of speech, and then simply sends a code representing the audio block, but not the actual audio. Obviously there are a few more parameters sent as well to adjust the model at the receiving side. The actual decoding side is therefore not all that dissimilar to what the AY-3-8910 and related devices are doing, except you the user have to create the list of audio blocks up-front and feed the chip at the rate it demands.

Continue reading “RPi Python Library Has Retro Chiptunes And Speech Covered”

Espresso maker with added nixie flair

AI Powered Coffee Maker Knows A Bit Too Much About You

People keep warning that Skynet and the great robot uprising is not that far away, what with all this recent AI and machine-learning malarky getting all the attention lately. But we think going straight for a terminator robot army is not a very smart approach, not least due to a lack of subtlety. We think that it’s a much better bet to take over the world one home appliance at a time, and this AI Powered coffee maker might just well be part of that master plan.

Raspberry Pi Zero sitting atop the custom nixie tube driver PCB
PCB stackup with Pi Zero sat atop the driver / PSU PCBs

[Mark Smith] has taken a standard semi-auto espresso maker and jazzed it up a bit, with a sweet bar graph nixie tube the only obvious addition, at least from the front of the unit. Inside, a Raspberry Pi Zero sits atop his own nixie tube hat and associated power supply. The whole assembly is dropped into a 3D printed case and lives snuggled up to the water pump.

The Pi is running a web application written with the excellent Flask framework, and also an additional control application written in python. This allows the user to connect to the machine via Ethernet and see its status. The smarts are in the form of a simple self-grading machine learning algorithm, that takes a time series as an input (in this case when you take your shots of espresso) and after a few weeks of data, is able to make a reasonable prediction as to when you might want it in the future. It then automatically heats up in time for you to use the machine, when you usually do, then cools back down to save energy. No more pointless wandering around to see if the machine is hot enough yet – as you can just check the web page and see from the comfort of your desk.

But that’s not all [Mark] has done. He also improved the temperature control of the water boiler, and added an interlock that prevents the machine from producing a shot until the water temperature is just so. Water level is indicated by the glorious bar graph nixie tube, which also serves a few other user indication duties when appropriate. All in all a pretty sweet build, but we do add a word of caution: If your toaster starts making an unreasonable number of offers of toasted teacakes, give it a wide berth.