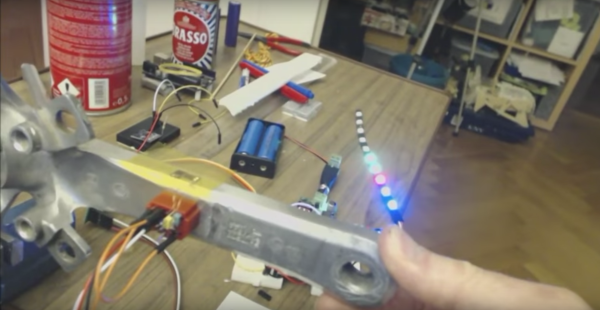
Bike Power Meter With Crank-mounted WiFi Strain Gauges

In any motorsport, the more you know about how the engine is performing, the better a driver is likely to do in a race. That holds for bicycles, too, where the driver just happens to also be the engine. There are plenty of cheap bike computers on the market, but the high-end meters that measure power output are a bit pricey. [chiprobot] is looking to change that with a home-brew, low-cost bike power meter.

The project still appears to be in the proof-of-concept phase, but it’s an interesting concept for sure. The stock crank arms are carefully fitted with two pairs of tiny strain gauges. The gauges are wired in a Wheatstone bridge arrangement, with one gauge in each pair mounted perpendicular to the force on the crank to serve as a static reference. Output from the bridge is fed to an HX711 instrumentation amplifier. The demo video below shows how sensitive the bridge and 24-bit amp are.

The goal is to send crank data to a handlebar-mounted UI via WiFi with a pair of ESP8266 modules. We like the idea of a bicycle area network, but [chiprobot] has his work cut out for him in terms of ruggedizing and weatherproofing all this gear. We’ll be sure to keep an eye on this project. In the meantime, there’s plenty to learn from this bike power meter project we covered last year.

Continue reading “Bike Power Meter With Crank-mounted WiFi Strain Gauges”
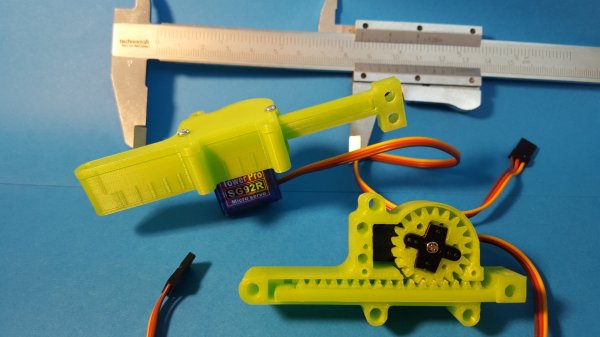
3D-Printed Case Turns Servo Into Quality Linear Actuator

Micro servomotors are a hacker staple. You’ll find maybe four or five in an RC plane, while a hexbot build could soak up a dozen or more of the cheap and readily available devices. Unfortunately, long-throw linear actuators are a little harder to come by, so it’s nice to know you can 3D-print linear gearing for standard micro RC servos and roll your own.

Currently on revision 2, [Roger Rabbit]’s design is not just a quick and dirty solution. He’s really thought through the problems he observed with his first revision, and the result is a robust, powerful linear actuator. The pinion fits a trimmed servo crank arm, the mating rack is stout and stiff, and early backlash problems have been solved. The whole case is easy to assemble, and as the video below shows, the completed actuator can lift 300 grams.

We like [Roger]’s build process, especially the iterative approach to improving the design. We’ll stay tuned to see where it goes next – a continuous rotation servo for extra-long throws? While we wait, you might want to check out [Richard Baguley]’s recent primer on servos if you want a little background on the underlying mechanism.

Continue reading “3D-Printed Case Turns Servo Into Quality Linear Actuator”

Car Idle Alarm Helps You Stop Wasting Gas While Tweeting

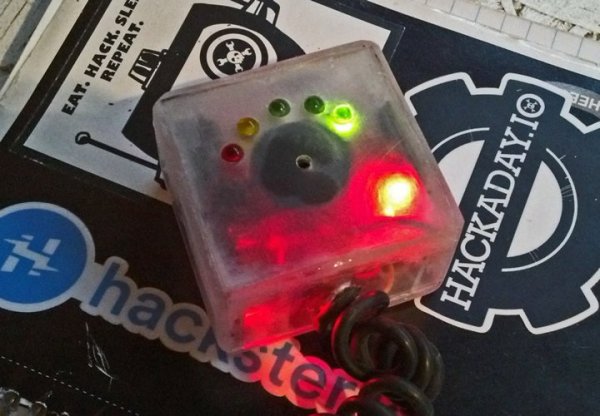
[TVMiller] has a bone to pick with you if you let your car idle while you chat or text on your phone. He doesn’t like it, and he wants to break you of this wasteful habit – thus the idle-deterrence system he built that he seems to want on every car dashboard.

In the video below, the target of his efforts is clear – those who start the car then spend time updating Twitter or Instagram. His alarm is just an Arduino Nano that starts a timer when the car is started. Color-coded LEDs mark the time, and when the light goes red, an annoying beep starts to remind you to get on with the business of driving. The device also includes an accelerometer that resets the timer when the vehicle is in motion; the two-minute timeout should keep even the longest stop light from triggering the alarm.

[TVMiller] plans an amped-up version of the device built around an MKR1000 that will dump idle to moving ratios and other stats to the cloud. That’s a little too Big Brother for our tastes, but we can see his point about how wasteful just a few minutes of idling can be when spread over a huge population of vehicles. This hack might make a nice personal reminder to correct wasteful behavior. It could even be rolled into something that reads the acceleration and throttle position directly from the OBD port, like this Internet of Cars hack we featured a while back.

Continue reading “Car Idle Alarm Helps You Stop Wasting Gas While Tweeting”

Spark Gap And Coherer Meet Beagle Bone

Getting back to basics is a great way to teach yourself about a technology. We see it all the time with computers built from NAND gates or even discrete transistors. It’s the same for radio – stripping it back to the 19th century can really let you own the technology. But if an old-school wireless setup still needs a 21st-century twist to light your fire, try this spark gap transmitter and coherer receiver with a Beagle Bone Morse decoder.

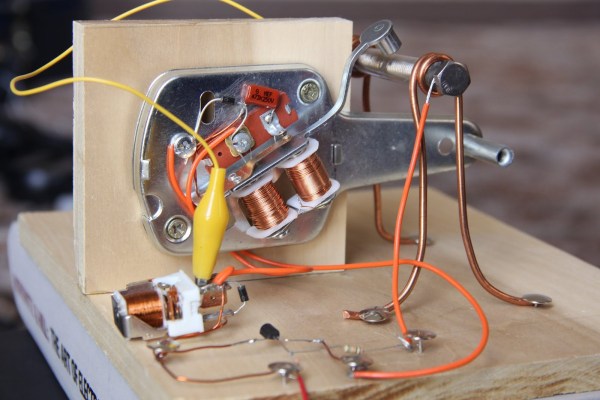
At its heart, a spark gap transmitter is just a broadband RF noise generator, and as such is pretty illegal to operate these days. [Ashish Derhgawen]’s version, which lacks an LC tuning circuit, would be especially obnoxious if it had an antenna. But even without one, the 100% electromechanical transmitter is good for a couple of feet – more than enough for experimentation without incurring the wrath of local hams.

The receiver is based on a coherer, a device that conducts electricity only when a passing radio wave disturbs it. [Ashish]’s coherer is a slug of iron filings between two bolts in a plastic tube. To reset the coherer, [Ashish] added a decoherer built from an electromagnetic doorbell ringer to tap the tube and jostle the filings back into the nonconductive state. He also added an optoisolator to condition the receiver’s output for an IO pin on the Beagle, and a Python script to decode the incoming Morse. You can see it in action in the video below.

If this build looks familiar, it’s because we’ve covered [Ashish]’s efforts before. But this project keeps evolving, and it’s nice to see where he’s taken it and what he’s learned – like that MOSFETs don’t like inductive kickback much.

Continue reading “Spark Gap And Coherer Meet Beagle Bone”

Start Your Poultry Brood With This DIY Egg Incubator

You’d think that hatching chicks from eggs would be easy – after all, birds do it. But it turns out to be a fussy business for humans, and what momma bird does naturally isn’t necessarily easy for us. If your goal is to raise your own brood of peeps, fear not – this DIY egg incubator makes the process much easier.

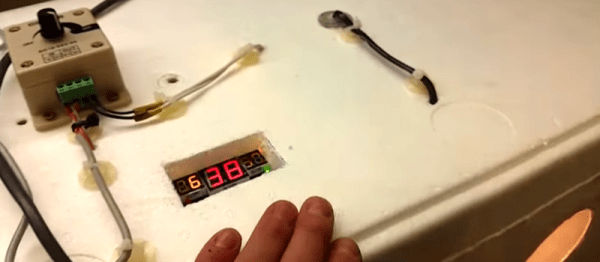
While [Chris Raynerd]’s incubator was built for quail eggs, pretty much any domestic fowl – chickens, turkeys, ducks, pheasants – will work. The key is temperature control – momma bird’s rump is a natural heat source, and her downy feathers keep the eggs insulated and toasty. That’s a little hard to replicate in a free-air incubator, so [Chris] started with a polystyrene box for insulation. A halogen lamp on a digital thermostat provides most of the heat and keeps the temperature within a degree or two of 37°C. As a backup, a 12 volt halogen bulb on a dimmer keeps the chamber at a minimum of 36°, just in case the main lamp burns out. A small fan and a pan for humidifying water complete the atmospheric controls, although personally we’d arrange the fan to blow across the water to aid evaporation. And a simple grid lets [Chris] turn the eggs regularly, which is another vital service mom provides to her brood.

Sure, it could be Arduino-fied and servo driven, but why bother? This is a simple yet thoughtful build that should see a clutch through to hatching. We’ve seen a few egg incubators before, but even if you’re not interested in raising fowl, the techniques here could easily apply to incubators for biohacking or yogurt making, too.

Continue reading “Start Your Poultry Brood With This DIY Egg Incubator”

Metal Magic: Heat Bluing Steel Clock Hands

Metalwork of any kind is fascinating stuff to watch. When the metalwork in question is in service of the clockmaker’s art, the ballgame changes completely. Tiny screws and precision gears are created with benchtop lathes and milling machines, and techniques for treating metals border on alchemy – like heat-bluing of steel clock hands for a custom-built clock.

If you have even a passing interest in metalwork and haven’t followed [Clickspring]’s YouTube channel, you don’t know what you’re missing. [Chris] has been documenting a museum-quality open-body clock build, and the amount of metalworking skill on display is amazing. In his latest video, he covers how he heat-blues steel to achieve a wonderful contrast to the brass and steel workings. The process is simple in principle but difficult in practice – as steel is heated, a thin layer of oxides forms on the surface, enough to differentially refract the light and cause a color change. The higher the heat, the thicker the layer, and the bluer the color. [Chris] uses a custom-built tray filled with brass shavings to even out the heat of a propane torch, but even then it took several tries to get the color just right. As a bonus, [Chris] gives us a primer on heat-treating the steel hands – the boric acid and methylated spirits bath, propane torch flame job and oil bath quenching all seems like something out of a wizard’s workshop.

We’ve covered [Chris]’ build before, and we encourage everyone to tune in and watch what it means to be a craftsman. We only hope that when he finally finishes this clock he starts another project right away.

Continue reading “Metal Magic: Heat Bluing Steel Clock Hands”

Quick And Easy Pressure Forming Makes Plexiglas Domes

Thermoplastics are amazingly versatile materials. Apply some heat, add a little force, and within seconds you’ve got a part. It’s not always quite that simple, but as [maxelrad] discovered, sometimes thermoforming can be as easy as blowing up a balloon.

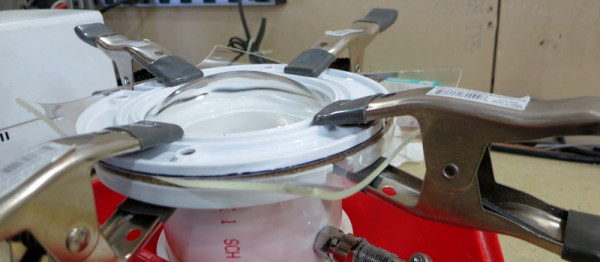
In need of a cowling for an exterior light fixture on an experimental aircraft, [maxelrad] turned to pressure forming of Plexiglas for the hemispherical shape he needed. His DIY forming rig was a plumbing-aisle special: PVC pipe and caps, some air hose and fittings, and a toilet flange for the pressure chamber. The Plexiglas was softened in a toaster oven, clamped over the business end of the chamber, and a few puffs of air inflated the plastic to form a dome. [maxelrad] points out that a template could be applied over the plastic sheet to create the streamlined teardrop shape he needs, and he notes that the rig would likely work just as well for vacuum forming. Of course, a mold could be substituted for the template to make this a true blow-molding outfit, but that would take away from the simplicity of this solution.

There have been a fair number of thermoforming projects featured on Hackaday before, from this DIY vacuum former to a scratch-built blow molder. And while we really like the simplicity of [maxelrad]’s technique, what we’d really love to see is some details on that airplane build.