Getting kids interested in programming is all the rage right now, and the UK is certainly taking pole position with its BBC micro:bit, just recently distributed to every seventh-grader in the land. Germany, proud of its education system and technological prowess, is caught playing catch-up. Until now.
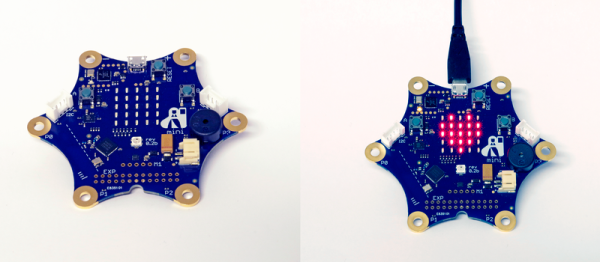
The Calliope Mini (translated here) is essentially a micro:bit clone, but one that has learned from the experience of its spiritual forefather — the connection points are spread around the outside of the board where the crocodile clips won’t accidentally touch each other.
Not content to simply copy, the Calliope also adds additional functionality. A microphone and speaker are integrated onboard, as is a Grove-style I2C connector. They’ve even added a TI DRV8837 H-bridge motor driver, so students could make a rolling robot straight out of the box.