Happily the right to repair movement is slowly gaining ground, and recently they’ve scored a major success in the European Parliament that includes a requirement that products be labelled with expected lifetime and repairability information, long-term availability of parts, and numerous measures aimed at preventing waste.
… including by requiring improved product information through mandatory labelling on the durability and reparability of a product (expected lifetime, availability of spare parts, etc.), defining durability and reparability as the main characteristics of a product…
Even the UK, whose path is diverging from the EU due to Brexit, appears to have a moment of harmony on this front. This builds upon existing rights to repair in that devices sold in Europe will eventually have to carry a clearly visible repair score to communicate the ease of repairability and supply of spare parts, making a clear incentive for manufacturers to strive for the highest score possible.
We live in an age in which our machines, appliances, and devices are becoming ever more complex, while at the same time ever more difficult to repair. Our community are the masters of fixing things, but even we are becoming increasingly stumped in the face of the latest flashy kitchen appliance or iDevice. The right to repair movement, and this measure in particular, seeks to improve the ability of all consumers, not just us hackers, to makebuying decisions for better products and lower environmental impact.
With a population of around 450 million people spread across 27 member countries, the EU represents a colossal market that no manufacturer can afford to ignore. Therefore while plenty of other regions of the planet have no such legislation this move will have a knock-on effect across the whole planet. Since the same products are routinely sold worldwide it is to be expected that an improvement in repairability for European markets will propagate also to the rest of the world. So when your next phone has a replaceable battery and easier spares availability, thank the EU-based right to repair campaigners and some European lawmakers for that convenience.
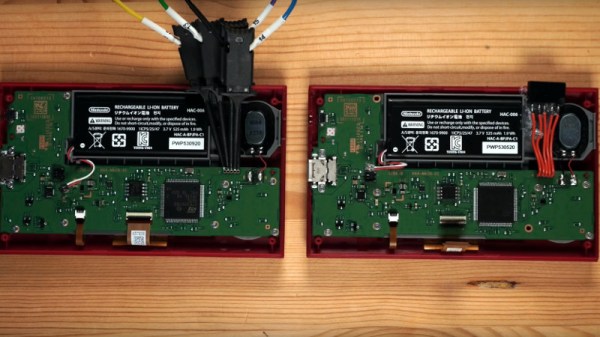
Nintendo’s reborn tiny handheld game has certainly attracted the attention of hardware hackers, and we’ve been treated to a succession of exploits as its secrets have been one by one unlocked. With relatively straightforward hardware it conceals potential far beyond a simple Mario game or two, and it’s now at the stage of having a path to dumping both its SPI Flash and internal Flash, unlocking its processor, and running arbitrary code. The process of unlocking it is now atraightforward enough to warrant a HOWTO video, to which [stacksmashing] has treated us. It’s early days and this is still touted as for developers rather than gamers, but it serves to show where work on this console is going.
The console’s STM32 architecture means that programming hardware is straightforward enough to find, though we’re cautioned against using the cheap AliExpress type we might use with a Blue Pill or similar. Instead the snap-off programmer that comes with an STM Nucleo board is a safer choice that many people are likely to have already.
The relative simplicity of the process as seen in the video below must conceal an immense amount of work from multiple people. It’s a succession of scripts to sequentially unlock and back up the various firmwares with STM payloads for each step. Finally the STM32 itself is unlocked, and the backed-up Nintendo firmware can be returned to the device or instead a custom firmware can be created. Aside from the DOOM we’ve already seen there are work-in-progress NES and Game Boy emulators, and fascinatingly also work on bare-metal games.
Given the lack of custom chips in this console it is easily possible that its hardware could be directly cloned and that Nintendo might have unintentionally created a new general purpose hacker’s handheld gaming platform. There are a few hardware works-in-progress such as increasing the SPI Flash size and finding the unconnected USB pins, so we look forward to more exciting news from this quarter.
Sure, the SpaceX crew made it safely to the ISS, but there’s plenty happening beyond just that particular horizon. The Chinese National Space Administration have launched their Chang’e 5 mission to collect and return lunar rock samples, a collaboration between NASA and ESA to do the same with samples from Mars has passed its review, and a pair of satellites came uncomfortably close to each other in a near-miss that could have had significant orbital debris consequences. It’s time for Spacing Out!
Bringing Alien Rocks to Earth
The Chang’e 5 mission on the launch pad. China News Service, CC BY 3.0.
Ever since the NASA and Soviet lunar launches at the height of the Space Race, there have been no new missions to collect material from the Lunar surface and return it to Earth. That changed last week.
Not to be outdone in the field of ambitious sample return missions, NASA and ESA’s joint plan to collect and return rock core samples from Mars has met with the approval of the independent review board set up to examine it. This will involve multiple craft from both agencies, with NASA’s already launched Perseverance rover collecting and containing the samples before leaving them on the surface for eventual collection by a future ESA rover. This will then pass them to a NASA ascent craft which will take them to Martian orbit and rendezvous with an ESA craft that will return them to Earth. We space-watchers are in for an exciting decade.
That Was a Close One!
Anyone who has seen the film Gravity will be familiar with the Kessler syndrome, in which collisions between spacecraft and or debris could create a chain reaction of further collisions and render entire orbital spheres unusable to future craft because of the collision hazard presented by the resulting cloud of space debris. Because of this, spacecraft operators devote considerable resources towards avoiding such collisions, and it is not uncommon for slight orbital adjustments to be made to avoid proximity with other orbiting man-made objects.
On the 27th of November it seems that these efforts failed, with a terse announcement from Roscosmos of a near-miss between their Kanopus-V craft and the Indian CARTOSAT 2F. The two remote-imaging satellites passed as close as 224 metres from each other, which in space terms given their likely closing speeds would have been significantly too close for comfort. The announcement appears worded to suggest that the Indian craft was at fault, however it’s probably a fairer conclusion that both space agencies should have seen the other’s satellite coming. Fortunately we escaped a catastrophe this time, but it is to be hoped that all operators of such satellites will take note.
RocketLab Joins the Reusable Booster Club
Other recent launches that might excite the interest of readers are the New Zealand-based RocketLab launching their Electron rocket with 30 small satellites on board before for the first time retrieving their booster stage, and the Japanese Mitsubish Electric sending their JDRS-1 satellite to geosynchronous orbit. This last craft is of interest because it carries an optical data link rather than the more usual RF, and could prove the technology for future launches.
The coming weeks should be full of news from China on Chang’e 5’s progress. Getting a craft to the moon and returning it will be a huge achievement, and we hope nothing fails and we’ll see pictures of the first new Moon rocks on Earth since the 1970s. We don’t know how to say “Good luck and a successful mission!” in Chinese, so we’ll say it in English.
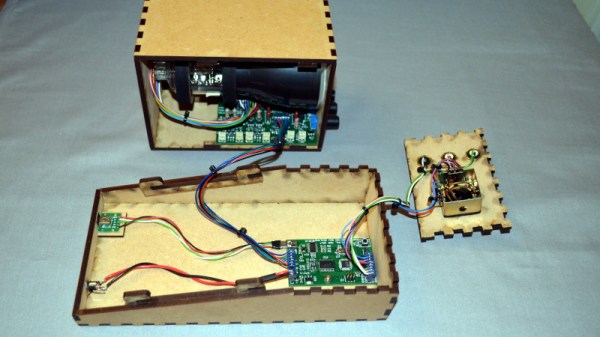
Over the years we’ve seen quite a few projects involving vector graphics, but the spaceship game created by [Mark Aren] especially caught our eye because in it he has tackled building a vector display from scratch rather than simply using a ready-made one such as an oscilloscope. As if the vector game itself wasn’t interesting enough, the process of designing the electronics required to drive a CRT is something that might have been commonplace decades ago but which few electronics enthusiasts in 2020 will have seen.
In his write-up he goes into detail on the path that took him to his component choices, and given the unusual nature of the design for 2020 it;s a fascinating opportunity to see the job done with components that would have been unheard of in the 1950s or 1960s. He eventually settled on a high voltage long-tailed pair of bipolar transistors, driven by a single op-amp to provide the differential signal required by the deflection electrodes. The mix of old and new also required a custom-fabricated socket for the CRT. On the game side meanwhile, an ATmega328 does the heavy lifting, through a DAC. He goes into some detail on DAC selection, having found some chips gave significant distortion.
All in all this is an impressive project from all angles, and we’re bowled over by it. Of course, if you fancy a play with vector graphics, perhaps there’s a simpler way.
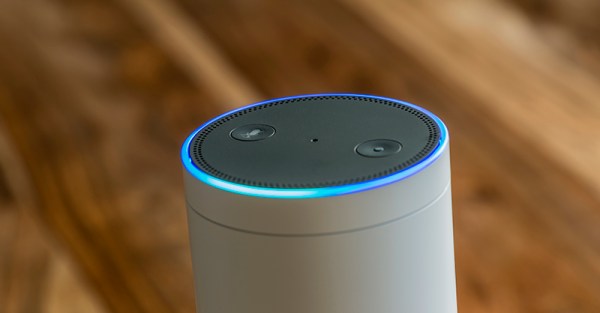
WiFi just isn’t very good at going through buildings. It’s fine for the main living areas of an average home, but once we venture towards the periphery of our domains it starts to become less reliable. For connected devices outside the core of a home, this presents a problem, and it’s one Amazon hope to solve with their Sidewalk product.
It’s a low-bandwidth networking system that uses capability already built into some Echo and Ring devices, plus a portion of the owner’s broadband connection to the Internet. The idea is to provide basic connectivity over longer distances to compatible devices even when the WiFi network is not available, but of most interest and concern is that it will also expose itself to devices owned by other people. If your Internet connection goes down, then your Ring devices will still provide a basic version of their functionality via a local low-bandwidth wide-area wireless network provided by the Amazon devices owned by your neighbours. Continue reading “Amazon Sidewalk: Should You Be Co-Opted Into A Private Neighbourhood LoRa Network?”→
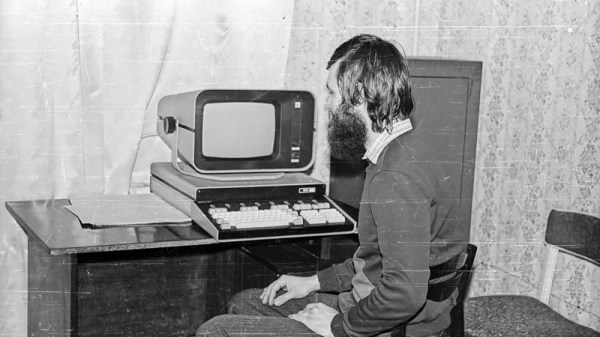
It’s probably a dream most of us share, to stumble upon a dusty hall full of fascinating abandoned tech frozen in time as though its operators walked away one day and simply never returned. It’s something documented by some Russian urban explorers who found an unremarkable office building with one of its floors frozen sometime around the transition from Soviet Union to Russian Federation. In it they found their abandoned tech, in the form of a cross-section of Soviet-era computers from the 1970s onwards.
As you might expect, in a manner it mirrors the development of civilian computing on the capitalist side of the Iron Curtain over a similar period, starting with minicomputers the size of several large refrigerators and ending with desktop microcomputers. The minis seem to all be Soviet clones of contemporary DEC machines. with some parts of them even looking vaguely familiar. The oldest is a Saratov-2, a PDP/8 clone which we’re told is rare enough for no examples to have been believed to have survived until this discovery. We then see a succession of PDP/11 clones each of which becomes ever smaller with advancements in semiconductor integration, starting with the fridge-sized units and eventually ending up with desktop versions that resemble 1980s PCs.
While mass-market Western desktop machines followed the path of adopting newer architectures such as the Z80 or the 8086 the Soviets instead took their minicomputer technology to that level. It would be interesting to speculate how these machines might further have developed over the 1990s had history been different. Meanwhile we all have a tangible legacy of Soviet PDP/11 microcomputers in the form of Tetris, which was first written on an Elektronika 60.
We know that among our readers there is likely to be a few who encountered similar machines in their heyday, and we hope they’ll share their recollections in the comments. Meanwhile we hope that somehow this collection can be preserved one day. If your thirst for dusty mincomputers knows no bounds, read about the collectors who bought an IBM machine on eBay and got more than they bargained for.
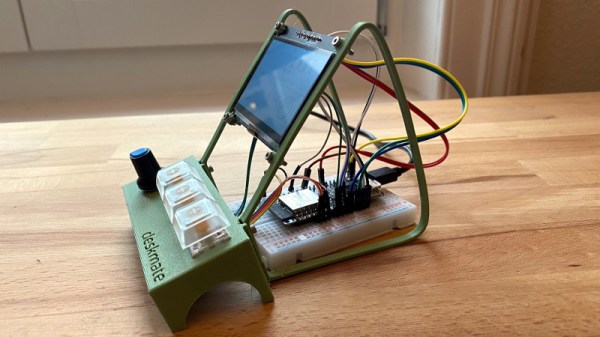
One of the more interesting display technologies of the moment comes from Sharp, their memory display devices share the low power advantages of an e-ink display with the much faster updates we would expect from an LCD or similar. We’ve not seen much of them in our community due to cost, so it’s good to see one used in an MQTT dashboard project from [Raphael Baron].
The hardware puts the display at the top of a relatively minimalist 3D printed encloseure with the LOLIN32 ESP32 development board behind it, and with a plinth containing a small rotary encoder and three clicky key switches in front. The most interesting part of the project is surprisingly not the display though, because despite being based upon an ESP32 development board he’s written its software with the aim of being as platform- and display-independent as possible. To demonstrate this he’s produced it as a desktop application as well as the standalone hardware. A simple graphical user interface allows the selection of a range of available sources to monitor, with the graphical results on the right.
All code and other assets for the project can be found in a handy GitHub repository, and to put the thing through its paces he’s even provided a video that we’ve placed below the break. User interfaces for MQTT-connected devices can talk as well as listen, for example this MQTT remote control.