Everything You Want To Know About The Cheapest Processors Available

Those of us who use microprocessors in our work will be familiar with their cost, whether we are buying one or two for a project or ten million on reels for a production run. We’re used to paying tens of cents or maybe even a dollar for a little microcontroller in single quantities, and these are probably the cheapest that we might expect to find.

There is a stratum of cheaper devices though, usually from Chinese manufacturers with scant data in English and difficult to source in Europe or the Americas. These chips cost under ten cents each, a figure which seems barely credible. To shed some light upon this world, [cpldcpu] has produced a run-down of some of the available families that even if you will never work with such an inexpensive option still makes for a fascinating read.

These processors are not the type of component you would use for high intensity tasks so it’s probable that you will not be mining cryptocurrency on a brace of them. Thus their architecture is hardly cutting-edge, with the venerable PIC12 being their inspiration and in some cases their direct copy. These are all write-once devices and some of their toolchains are variable in accessibility, but perhaps they aren’t as terrible as some would have you believe. If you are looking for inspiration, we’ve featured one of them before.

TL;DR: the Padauk PFS173, at just under $0.09, has an open-source toolchain and a decent set of peripherals.

Thanks [WilkoL] for the tip.

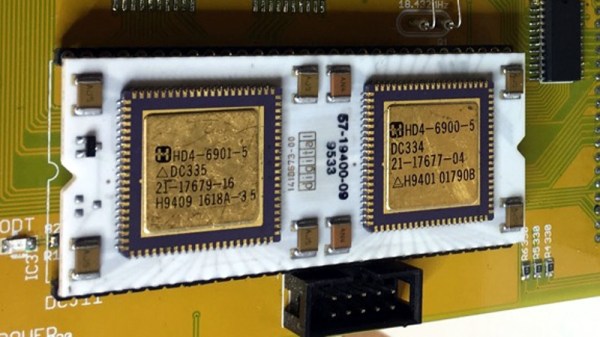
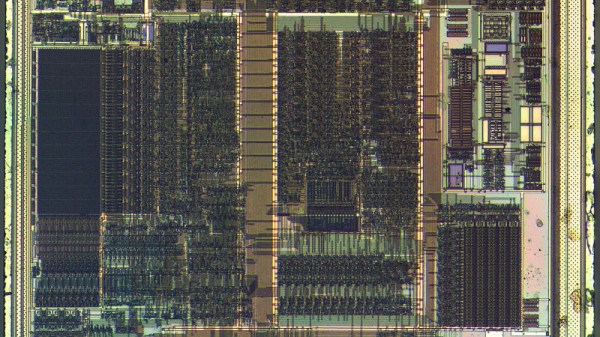
Image: A real PIC12 die shot. ZeptoBars [CC BY 3.0]

The Danish Internet Of Hot Tubs

Every hacker camp has its own flavor, and BornHack 2019 in the Danish countryside gave us the opportunity to sample some hacker relaxation, Scandinavian style. Among the attractions was a wood-fired hot tub of gargantuan proportions, in which the tired attendee could rejuvenate themselves at 40 Celcius in the middle of the forest. A wood-fired hot tub is not the easiest of appliances to control, so to tame it [richard42graham] and a group of Danish hackerspace friends took it upon themselves to give it an internet-connected temperature sensor.

The starting point was a TMP112 temperature sensor and an ESP8266 module, which initially exposed the temperature reading via a web interface, but then collapsed under too much load. The solution was to make the raw data available via MQTT, and from that create a web interface for the event bar, Twitter and IRC bots. There was even an interface to display hot tub temperature on the ubiquitous OHMlights dotted around the camp.

It’s more normal to control a hot tub via an electric heater, but since the wood fire on this one has to be tended by a camp volunteer it made sense to use the IRC system as an alert. It will be back at BornHack 2020, so we’ll have to do our job here at Hackaday and spend a long time lounging in the hot tub in the name of journalistic research to see how well it works.

An Entire PDP-11 On Your Bench

A PDP-11 at The National Museum Of Computing, Bletchley, UK.

The DEC PDP series of minicomputers occupy a special place in computing history for us, because as the workhorses of commercial computing from the 1960s through to some time in the 1990s they provided the bedrock upon which so many of the computing technologies we take for granted today were built. If we think of any PDP, the chances are we’ll be imagining fridge-sized units with panels of blinkenlights that have become iconic in their own right. But that wasn’t the sum of PDP hardware, for at the end of the series of machines there were produced PDP-11s containing what had previously needed those fridge-sized units on a single chip-sized module. [Peter Schranz] had one of these modules, a DCJ11 that he’d salvaged in the 1990s, and he set to with it in making a modern desktop version of a PDP-11.

The PDP-11/hack is a PDP-11 as a set of daughter cards on a lightly modified Q-bus backplane. The DCJ11 and its memory sit on one, an emulated disc controller on another, and finally a multifunction board brings together clock and serial functions. Where the original would have had acres of 74 logic the PDP-11/hack uses more modern CPLDs and microcontrollers to provide glue logic and to emulate now-obsolete components. Given a serial terminal it will boot and run PDP operating systems and software, though it lacks a set of blinkenlights to display its status.

This isn’t the first PDP-11 using this chip we’ve shown you.

Perfect Cheese Every Time With This Temperature Controller

Anyone who is from a background in which cheesemaking is a feature will tell you that it is an exact science in which small differences in parameters can make a huge difference in the resulting cheese, to the extent that entire batches can be rendered inedible. In particular the temperature at which the milk is held can be crucial to the production of individual styles of cheese. A friend of [William Dudley]’s had this problem, as a dairy farmer and artisinal cheesemaker they had to carefully control their vat with a set of profiles depending upon the recipe in use. This was achieved using an Arduino Mega 2650 and a thermocouple to control the heat source for the hot water in the outer wall of the vat.

A cheap K-type thermocouple amplifier proved unsatisfactory, so a Sparkfun item was substituted. A relay, Ethernet adaptor, and LCD display provided power control, access to a web interface, and user feedback respectively. Four buttons to select programs were added, and the whole was neatly boxed up to survive the dairy and put to work. In tests with a saucepan it was configured as a PID controller, but the real vat proved to have a much greater thermal inertia so a simpler bang-bang home thermostat style approach was used. Temperatures are logged in an eeprom for later retrieval via the web interface.

We don’t see the cheeses produced, but we’re sure they must be worth the effort. Blessed may be the cheesemakers, but doubly blessed are they who have a little help from an Arduino.

Hello: A Mini Badge For CCCamp

Badgelife culture is our community’s very own art form, with a plethora of designs coming forth featuring stunning artwork, impressive hardware, and clever software tricks. But sometimes a badge doesn’t need a brace of LEDs or a meme-inspired appearance to be a success, it just needs to be very good at what it does.

A perfect example is [Gavan Fantom]’s Hello mini badge. The hardware is fairly straightforward, it’s just a small square PCB sporting a LPC1115 microcontroller, 8Mb Flash chip, piezo speaker, and an OLED display. Its functionality is pretty simple as well, in that it exists to display text, images, or short animations. But the badge hides a very well-executed firmware that provides a serial terminal and zmodem file upload capability as well as an on-device interface via a small joystick. Power comes from a 500 mAh lithium-polymer cell, for which the badge integrates the usual charger and power management hardware.

There’s a variety of possibilities for the badge, but we’d guess that most owners will simply use it to display their name with perhaps a little animation. A bit of nifty processing of some video could perhaps get something approaching watchable video on it though, opening up the entertaining possibility of displaying demos or other video content.

[Gavan] will have some of the Hello badges at the upcoming CCCamp hacker camp in Germany if you’re interested, and should be easy enough to find in the EMF village.

An All-In-One Conference Video Streaming Box

When running a hacker camp or other event, one of the many challenges faced by the organisers concerns the production and distribution of event videos. As the talks are recorded they must be put online, and with a load of talks to be processed it quickly becomes impractical to upload them one by one through a web interface such as that provided by YouTube. At the BornHack 2019 hacker camp in Denmark they were using a particularly well-integrated unit to do the video uploading in real time, and its creator [Mikkel Mikjær Christensen]  was good enough to share the video we’ve put below the break, a talk he gave about it at The Camp 2017, a Danish open source software camp.

It takes the viewer through the evolution over several years, from simple camcorders with integrated microphones and post-event processing, through a first-generation system with a laptop and rack-mount monitors, and into a final system in a rugged portable case with a significantly powerful laptop running OBS with a hardware MPEG encoder. Careful choice of power supplies and the use of good quality wireless microphones now give instantaneous video streaming to events such as BornHack without the need for extensive infrastructure.

If you were wondering where you might have heard that name before, [Mikkel] is the [Mike] from the Retrocomputing with Mike YouTube channel. It’s being honest to say that more of our conversation was about retrocomputers than the video box.

Continue reading “An All-In-One Conference Video Streaming Box”

Turning Scrap Metal Into Something To Work With

Blacksmiths will frequently work to a customer’s commission, and sometimes those commissions can be somewhat unusual. [Copperrein] had just such a piece of work come his way, a ceremonial sword to be made from a supplied collection of iron and steel items. To render them into something useful he had to melt them together, and the story of how he did that is particularly interesting.

We’re introduced to the Aristotle furnace, a fairly simple top-fed air blast charcoal furnace capable of melting almost any ferrous scrap into a so-called “bloom”, a lump of iron with some slag and carbon inclusions. These furnaces are often built as holes in the ground, but he’s made his atop a portable forge at working height to save bending over it for seven hours.

The source material was a very mixed bag, so the first order was to strip it in an acid bath of any coatings which might contaminate the resulting bloom. The parts, including things as diverse as a huge wrought-iton bolt, a scythe blade, and a pair of dividers, were then cut into small pieces one by one and fed into the furnace. They melt as they progress down through the furnace, resulting in a bloom of iron. The bloom is impure and will need significant working to expel any inclusions, but the final result will be something like the wrought iron of old. Let’s hope he has a power hammer, working the bloom would be hard work by hand!

If this catches your attention, you may be interested in a bit of blast furnace iron smelting. And of course, there is also our ongoing blacksmithing series to get you going at the anvil. You could even make a nail.

Via Reddit.

Thanks [Mike] for the tip.