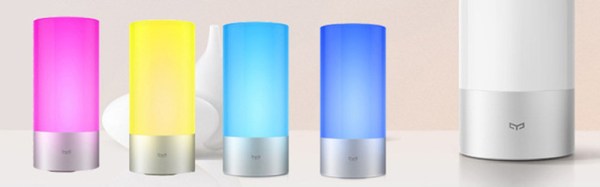
It was a tweet from an online friend in the world of amateur radio, featuring a transmitter design published in Sprat, the journal of the G-QRP club for British enthusiasts of low-power radio. The transmitter was very simple, but seriously flawed: keying the power supply line would cause it to exhibit key clicks and frequency instability. It would probably have been far better leaving the oscillator connected full-time and keying the supply to the amplifier, with of course a suitable key click filter.
[M0CVO]’s Tweet that started it allWe’ve all probably made projects that get the job done at the expense of a bit of performance and economy, and from one angle this circuit is a fantastic example of that art. But it’s not the shortcomings of direct PSU keying a small transmitter that has brought it here, but observation instead of what it represents. Perhaps my social group of radio amateurs differs from the masses, but among them the universal lament is that there is nothing new in a simple transistor transmitter that could just as well have been published in 1977 as 2017.
To explain why this represents a problem, it’s worth giving some background. Any radio amateur will tell you that amateur radio is a wonderful and diverse pastime, in fact a multitude of pastimes rolled into one. Working DX? Got you covered. Contesting? UR 599 OM QRZ? Digital modes pushing the envelope of atmospheric propagation? Satellites? SDRs? GHz radio engineering? All these and many more can be yours for a modest fee and an examination pass. There was a time when radio was electronics, to all intents and purposes, and radio amateurs were at the vanguard of technology. And though electronics has moved on from those days of purely analogue communications and now stretches far beyond anything you’d need a licence and a callsign to investigate for yourself, there are still plenty of places in which an amateur can place themselves at the cutting edge. Software defined radio, for instance, or digital data transmission modes. With an inexpensive single board computer and a few components it is now possible to create a software-defined digital radio station with an extremely low power output, that can be copied on the other side of the world. That’s progress, it’s not so long ago that you would have required a lot of dollars and a lot of watts to do that. Continue reading “Radio Amateuring Like It’s 1975”→
If you have a car parked outside as you are reading this, the overwhelming probability is that it has a reciprocating piston engine powered by either petrol(gasoline), or diesel fuel. A few of the more forward-looking among you may own a hybrid or even an electric car, and fewer still may have a piston engine car powered by LPG or methane, but that is likely to be the sum of the Hackaday reader motoring experience.
We have become used to understanding that perhaps the era of the petroleum-fueled piston engine will draw to a close and that in future decades we’ll be driving electric, or maybe hydrogen. But visions of the future do not always materialize as we expect them. For proof of that, we only need to cast our minds back to the 1950s. Motorists in the decade following the Second World War would have confidently predicted a future of driving cars powered by jet engines. For a while, as manufacturers produced a series of prototypes, it looked like a safe bet.
The Chrysler gas turbine car from [Bryan]’s article. CZmarlin [Public domain].Back in August, my colleague [Bryan] wrote a feature: “The Last Interesting Chrysler Had A Gas Turbine Engine“, in which he detailed the story of one of the more famous gas turbine cars. But the beautifully styled Chrysler was not the only gas turbine car making waves at the time, because meanwhile on the other side of the Atlantic a series of prototypes were taking the gas turbine in a slightly different direction.
Rover was a British carmaker that was known for making sensible and respectable saloon cars. They passed through a series of incarnations into the nationalized British Leyland empire, eventually passing into the hands of British Aerospace, then BMW, and finally a consortium of businessmen under whose ownership they met an ignominious end. If you have ever wondered why the BMW 1-series has such ungainly styling cues, you are looking at the vestiges of a Rover that never made it to the forecourt. The very successful Land Rover marque was originally a Rover product, but beyond that sector, they are not remembered as particularly exciting or technically advanced.
The Rover JET1 prototype. Allen Watkin [CC BY-SA 2.0].At the close of the Second World War though, Rover found themselves in an interesting position. One of their contributions to war production had been the gas turbine engines found in the first generation of British jet aircraft, and as part of their transition to peacetime production they began to investigate civilian applications for the technology. Thus the first ever gas turbine car was a Rover, the 1950 JET1. Bearing the staid and respectable styling of a 1950s bank manager’s transport rather than the space-age look you might expect of the first ever gas turbine car, it nonetheless became the first holder of the world speed record for a gas turbine powered car when in 1952 it achieved a speed of 152.691 MPH.
The JET1 was soon followed by a series of further jet-powered prototypes culminating in 1956’s T3 and 1961’s T4. Both of these were practical everyday cars, the T3, a sports coupé, and the T4, an executive saloon car whose styling would appear in the 1963 petrol-engined P6 model. There was also an experimental BMC truck fitted with the engine. The P6 executive car was produced until 1977, and all models were designed to have space for a future gas turbine option by having a very unusual front suspension layout with a pivot allowing the spring and damper to be placed longitudinally in the front wing.
The Rover-BRM racing car at Gaydon. David Merrett [CC BY 2.0].It was not only prototypes for production cars with gas turbines that came from Rover in the 1960s though, for in 1963 they put their gas turbine into a BRM racing chassis and entered it into the Le Mans 24 hour endurance race. It returned in the 1964 season fitted with a novel rotating ceramic honeycomb heat exchanger to improve its efficiency, racing for a final season in 1965.
The fate of the gas-turbine Rovers would follow that of their equivalent cars from other manufacturers including the Chrysler covered by [Bryan]. Technical difficulties were never fully overcome, the increasing cost of fuel made gas turbine cars uneconomic to run, and meanwhile by the 1960s the piston engine had improved immeasurably over what had been available when the JET1 had been produced. The Rover P6 never received its gas turbine, and the entire programme was abandoned. Today all the surviving cars are in museums, the JET1 prototype in the Science Museum in London, and the T3, T4, and Rover-BRM racing car at the Heritage Motor Centre at Gaydon. The truck survives in private hands, having been restored, and is a regular sight at summer time shows.
As a footnote to the Rover story, in response to the development of JET1 at the start of the 1950s, their rival and later British Leyland stablemate Austin developed their own gas turbine car. If international readers find Jet1’s styling a bit quaint compared to the American jet cars, it is positively space-age when compared to the stately home styling of the Sheerline limousine to which Austin fitted their gas turbine.
As a British voter with some interest in the matter, I decided to write to my Member of Parliament about it, and since my letter says what I would have written to cover the story anyway it stands below in lieu of the normal Hackaday article format. If you are a British multirotor flier this is an issue you need to be aware of, and if you have any concerns you should consider raising them with your MP as well. Continue reading “The British Drone Law Reaches Parliament”→
A few months ago the Raspberry Pi magazine The MagPi gave away a piece of hardware, the Google AIY voice control kit. Subscribers all received one, but as always the eBay scalpers cleaned up all the in-store copies and very few lucky enthusiasts scored a kit of their own.
Among these frustrated Pi owners was [Circuitbeard], who decided instead to make his own kit. And since a cardboard case lacked style, he decided to do so in the shell of a 1980s Tomy Mr. Money toy novelty bank. Into it went a Raspberry Pi Zero W and an audio pHat, with a servo to operate the head and a microswitch connected to the toy’s arm as a trigger.
The Python code to run everything is all included in the write-up, and he’s posted a video of the device in operation which we’ve placed below the break.
If you have ever been to a hacker camp, you’ll know the problem of transporting all your stuff to your hackerspace village, or to wherever you’ll be basing yourself for the duration. The car park is always too far away, whatever trolley you’ve brought along is never big enough, and the terrain you have to drag everything over feels more like the Chilkoot Trail than a city sidewalk.
[Jana Marie Hemsing] and [Lucy Fauth] have an effective solution to all your hacker camp transport woes, in the form of a motorized platform designed to carry a storage box. Underneath the platform are a pair of hoverboard motors and their controller board reflashed with a custom firmware.
You might be now looking at it and thinking “So what?”, for a single platform is handy but hardly a comprehensive transport solution. What makes this one impressive though is that it’s not a single board, instead there is a swarm of them for which they appear to have implemented some form of optical following system which is teased through the video we’ve placed below the break and with this Tweet, but not in detail yet in the wiki page. A neat train of platforms follows the lead one, transporting everything with minimum fuss. What can we say, except “We want one too!”. There is some code to be found in a GitHub repository, should you be interested in having a go for yourself.
A popular purchase from the usual stockists of imported electronic modules is a digital panel meter. A very small amount of money secures a module with a seven-segment display that you can stick on the front of your power supply or project for an easy readout. Even before the advent of these ultra-cheap Chinese products there have been readily available digital meters, in a line stretching back to the 1970s with chips such as the Intersil 7106.
[Marcus Taciuc] is eschewing the off-the-shelf parts, and creating his own digital panel meter. He’s using an MSP430 microprocessor as the brain of his device, and a Hitachi HD44780 compatible LCD display at the front end. The appropriate combinations of resistors and op-amps feeding the MSP’s ADC inputs allow his meter to be used to measure up to 40 VDV, and up to 10A.
He’s put up a video which we’ve included below the break, showing the use to which this meter has been put: replacing the moving-coil meter in what looks like a classic piece of Heathkit equipment. A 3D printed bracket allows the new meter to fit the circular hole of the original meter, with the LCD on the front. You might still order a prefab meter module, but you can’t deny this looks good.
The BBC micro:bit has been with us for about eighteen months now, and while the little ARM-based board has made a name for itself in its intended market of education, we haven’t seen as much of it in our community as we might have expected.
If you or a youngster in your life have a micro:bit, you may have created code for it using one of the several web-based IDEs, a graphical programming system, TypeScript, or MicroPython. But these high level languages are only part of the board’s software stack, as [Matt Warren] shows us with his detailed examination of its various layers.
The top layer of the micro:bit sandwich is of course your code. This is turned into a hex file by the web-based IDE’s compiler, which you then place on your device. Interestingly only the Microsoft TypeScript IDE compiles the TypeScript into native code, while the others bundle your code up with an interpreter.
Below that is the micro:bit’s hardware abstraction layer, and below that in turn is ARM’s Mbed OS layer, because the micro:bit is at heart simply another Mbed board. [Matt] goes into some detail about how the device’s memory map accommodates all these components, something essential given that there is only a paltry 16 kB of RAM in hand.
You might wish to program a micro:bit somewhat closer to the metal with the Mbed toolchain, but even if that is the case it’s still of interest to read a dissection of its official stack. Meanwhile, have a look at our review of the board, from summer 2016.