Antique Pocket Watch Project Updates Antique Pocket Watch

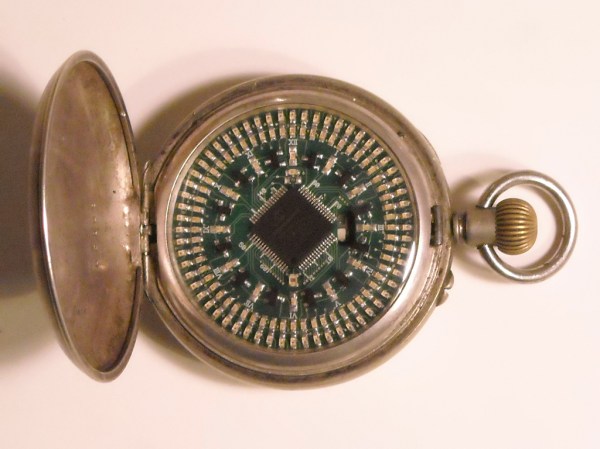
Here at Hackaday we have a bit of a preoccupation with timepieces. Maybe it’s the deeply personal connection to an object you wear on your body, or the need for ultimate reliability. Perhaps it’s just a fascination with the notion of time itself. Whatever the case, we don’t seem to be alone as there is a constant stream of time-related projects coming through our virtual doors. For this article we’ve unearthed the LED Pocketwatch 1.0 by [Dr. Pauline Pounds] from way back in 2009 (ironically via a post about a wristwatch from last year!). Fortunately for us the Internet Archive has saved this heirloom nouveau from the internet dustbin so we can appreciate the craftsmanship involved in [Dr. Pounds]’ work.
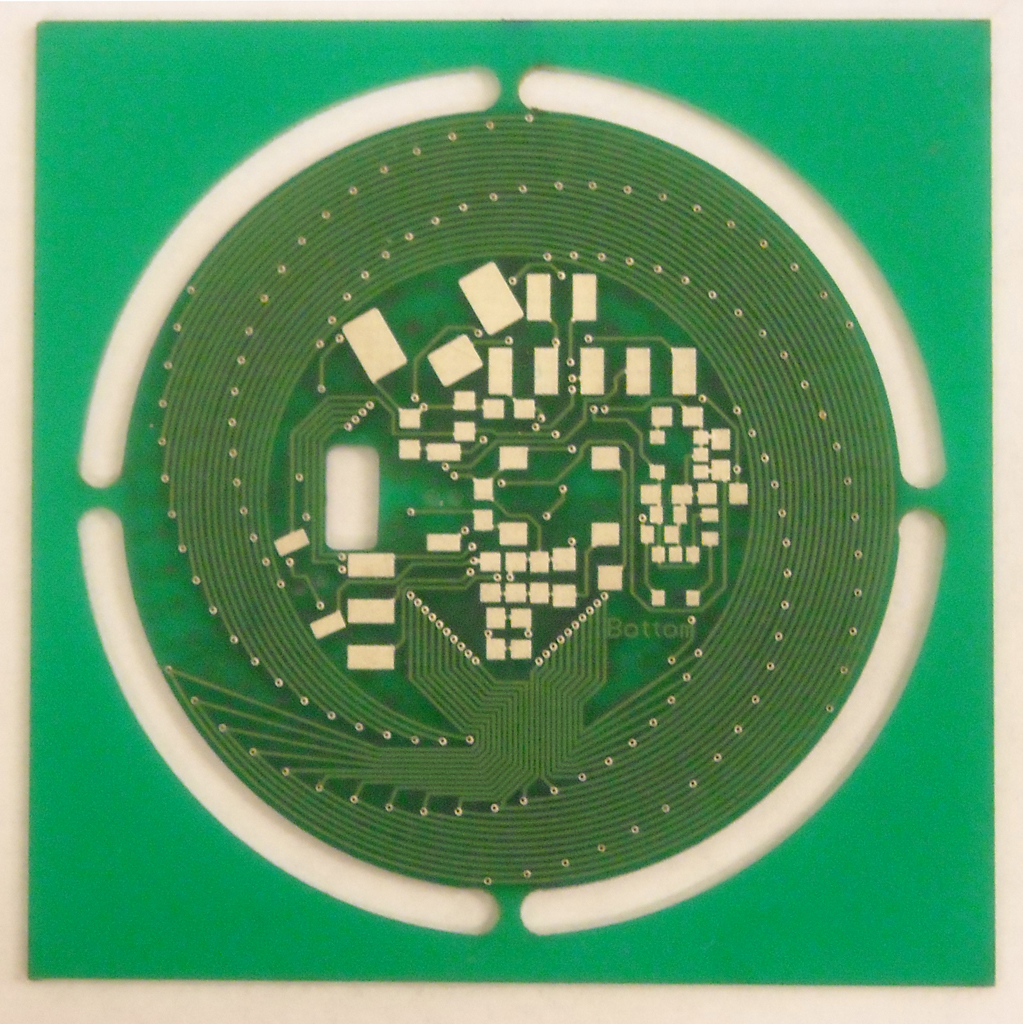
Check out the wonderful, spiral routing!

My how far we’ve come; a decade after this project was posted a hacker might choose to 3d print a case for a new wearable, but in 2009 that would have been an entire project by itself! [Dr. Pounds] chose to use the casing from an antique Elgin pocket watch. Even through the mists of a grainy demo video we can imagine how soft the well-worn casing must be from heavy use. This particular unit was chosen because it was a hefty 50mm in diameter, leaving plenty of room inside for a 44mm double sided PCBA with 133 0603 LEDs (60 seconds, 60 minutes, 12 hours), a PIC 16F946, an ERM, and a 110mAh LiPo. But what really sets the LED Pocketwatch 1.0 apart is the user interface.

The ERM is attached directly to the rear of the case in order to best conduct vibration to the outside world. For maximum authenticity it blips on the second, to give a sense that the digital watch is mechanically ticking like the original. The original pocket watch was designed with a closing lid which is released when the stem is pressed. [Dr. Pounds] integrated a button and encoder with the end of the stem (on the PCBA) so the device can be aware of this interaction; on lid open it wakes the device to display the time on the LEDs. The real pièce de résistance is that he also integrated a minuscule rotary encoder, so when the stem is pressed you can rotate it to set the time. It’s all quite elegantly integrated and imminently usable.
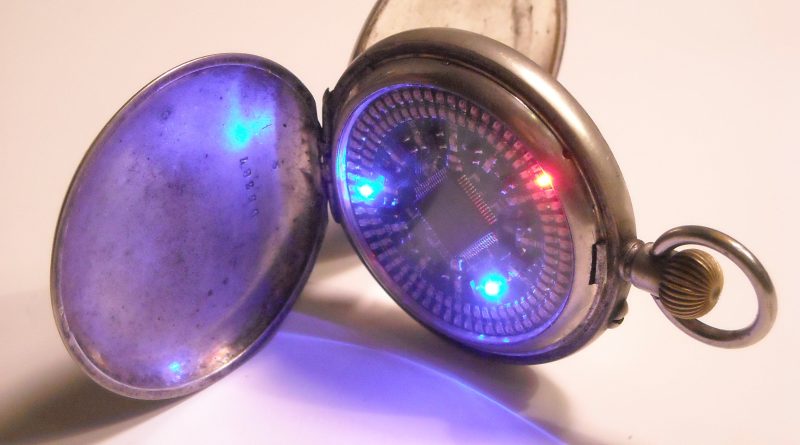
At this point we’d love to link to sources, detailed drawings, or CAD files, but unfortunately we haven’t found any. If this has you inspired check out some of the other pocket watches we’ve posted about in the past. If you’re interested in a live demo of the LED Pocketwatch 1.0, check out the original video after the break.

Continue reading “Antique Pocket Watch Project Updates Antique Pocket Watch”

Saintcon Badge Is An Enigma No More

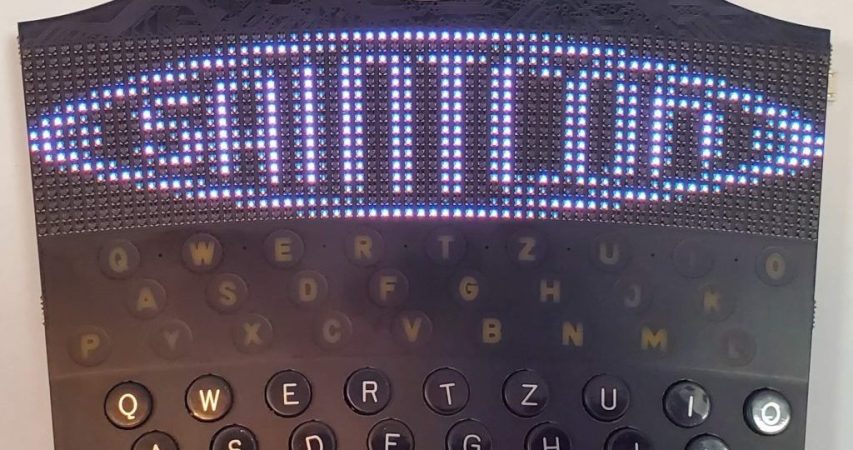
Through the weekend Twitter has been a-titter with news coming out of Saintcon, the annual security conference in Provo, Utah. Now that the weekend is over we can finally get our hands on full hardware and software sources for the curvy, LED-covered badge we’ve been salivating over and a write up by its creators [compukidmike] and [bashNinja]. Let’s dive in and see what’s waiting!

Design

This year’s badge is designed to represent a single tooth on a single rotor of an Enigma machine. The full function of an Enigma machine is quite complex, but an individual device has three rotors with 26 teeth each (one for each letter) as well as a keypad for input and a character display to show each enciphered letter. For reference, the back of the badge has a handy diagram of a badge’s place in the Enigma system.

Reminiscent of the WWII device which the badge design recalls, each unit includes a full QWERTZ keyboard (with labeled keys!) and RGB “lampboard” for individual character output, but unlike the original there’s also a curved 16 x 64 RGB LED display made from those beguiling little ~1mm x 1mm LEDs. All in, the device includes 1051 LEDs! Combined with the unusually non-rectilinear shape of the badge and the Enigma-style Saintcon logo it makes for an attractive, cohesive look.

Continue reading “Saintcon Badge Is An Enigma No More”

Tiny Cube Hosts A Hearty Tube

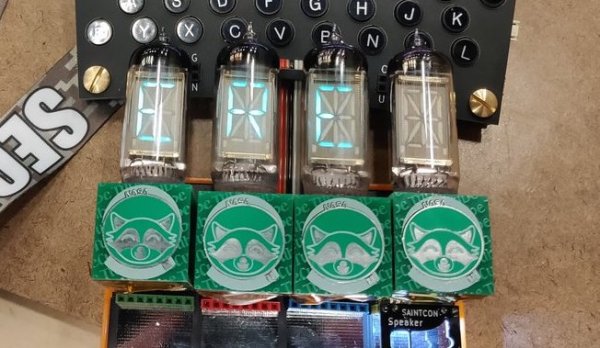
Tiny PCBAs and glowy VFD tubes are like catnip to a Hackaday writer, so when we saw [hamster]’s TubeCube tube segment driver we had to dig in to learn more. We won’t bury the lede here; let’s enjoy a video of glowing tubes before we go further:

The TubeCube is built to fit the MiniBadge badge addon standard, which is primarily used to host modules on the SAINTCON conference badge. A single TubeCube hosts a VFD tube, hardware to provide a 70 V supply, and a microcontroller for communication and control. Each TubeCube is designed to accept ASCII characters via UART to display on it’s display, but they can also be chained together for even more excitement. We’re not sure how [hamster] would be able to physically wear the beast in the video above, but if he can find a way, they all work together. If you’re interested in seeing the dead simple UART communication scheme take a look at this file.

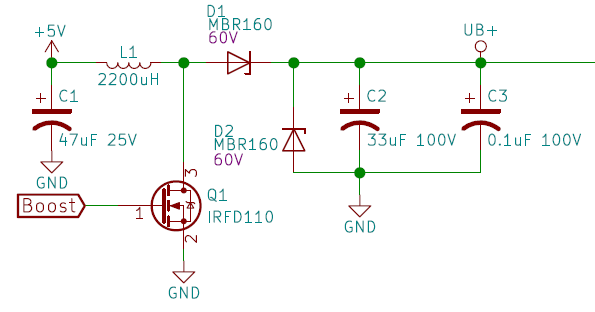
We think it’s also worth pointing about the high voltage supply. To the software or mechanically minded among us it’s easy to get trapped thinking about switching power supplies as a magical construct which can only be built using all-in-one control ICs. But [hamster]’s supply is a great reminder that a switching supply, even a high voltage one, isn’t as complex as all that. His design (which he says was cribbed from Adafruit’s lovely Ice Tube Clock) is essentially composed of the standard primitives. A big low voltage capacitor C1 to source the burst of energy which will be boosted, the necessary inductor/high voltage cap C2 which ends up at the target voltage, and a smoothing cap C3 to make the output a little nicer. It’s controlled by the microcontroller toggling Q1 to control the current flow through L1. The side effect is that by controlling the PWM frequency [hamster] can vary the brightness of the tubes.

Right now it looks like the repository has a schematic and sources, which should be enough to build a small tube driver of your own. If you can’t get enough TubeCubes, there’s one more video (of a single module) after the break.

Continue reading “Tiny Cube Hosts A Hearty Tube”

The Price Of Domestic Just In Time Manufacturing

Hardware is hard, manufacturing only happens in China, accurate pricing is a dark art. Facts which are Known To Be True. And all things which can be hard to conquer as an independent hardware company, especially if you want to subvert the tropes. You may have heard of [Spencer Wright] via his superb mailing list The Prepared, but he has also been selling an unusual FM radio as Centerline Labs for a few years. Two years ago they relaunched their product, and last year the price was bumped up by a third. Why? Well, the answer involves more than just a hand wave about tariffs.

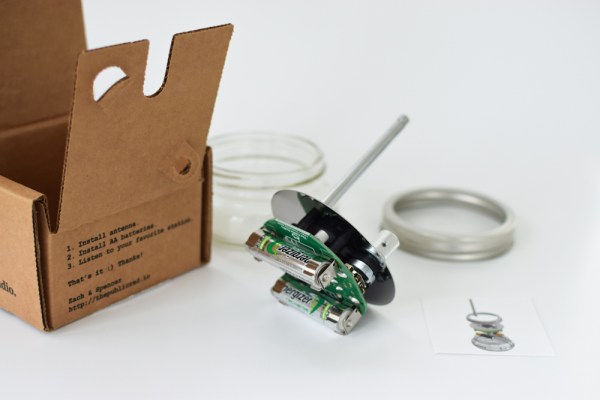
The Public Radio is a single-station FM radio in a mason jar. It’s a seemingly simple single purpose hardware product. No big mechanical assemblies, no complex packaging, not even any tangential accessories to include. In some sense it’s an archetypically atomic hardware product. So what changed? A normal product is manufactured in bulk, tested and packaged, then stored in a warehouse ready to ship. But TPR is factory programmed to a specific radio station, so unless Centerline wanted one SKU for each possible radio station (there are 300) this doesn’t work. The solution was domestic (US) just in time manufacturing. When a customer hits the buy button, a unit is programmed, tested, packed, and shipped.

As with any business, there is a lot more to things than that! The post gives the reader a fascinating look at all the math related to Centerline Labs’ pricing and expenses; in other words, what makes the business tick (or not) including discussion of the pricing tradeoffs between manufacturing different components in Asia. I won’t spoil the logical path that led to the pricing change, go check out the post for more detail on every part. 

We love hearing about the cottage hardware world. Got any stories? Drop them in the comments!

Magnets Make This Panda Move

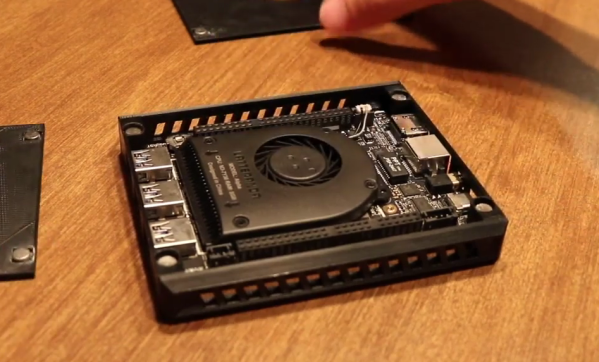
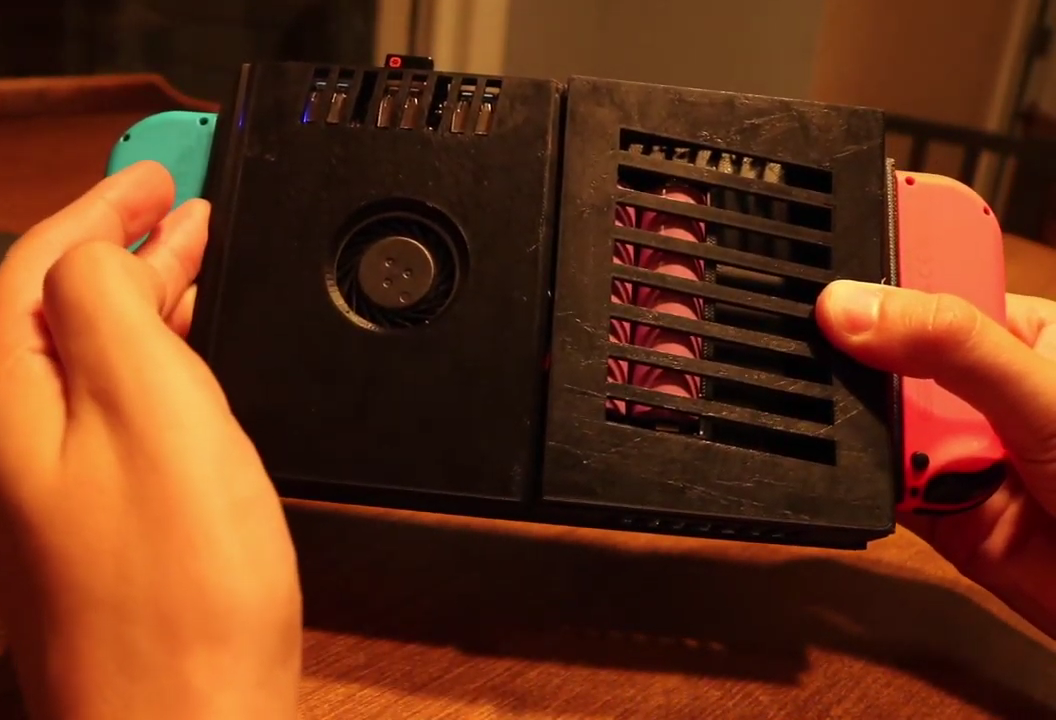
A single board computer on a desk is fine for quick demos but for taking it into the wild (or even the rest of the house) you’re going to want a little more safety from debris, ESD, and drops. As SBCs get more useful this becomes an increasingly relevant problem to solve, plus a slick enclosure can be the difference between a nice benchtop hack and something that looks ready to sell as a product. [Chris] (as ProjectSBC) has been working on a series of adaptable cases called the MagClick Case System for the LattePanda Alpha SBC which are definitely worth a look.

The LattePanda Alpha isn’t a run-of-the-mill SBC; it’s essentially the mainboard from a low power ultrabook and contains up to an Intel Core M series processor, 8GB RAM, and 64GB of eMMC. Not to mention an onboard Atmega32u4, WiFi, Gigabit Ethernet, and more. It has more than enough horsepower to be used as an everyday desktop computer or even a light gaming system if you break PCIe out of one the m.2 card slots. But [Chris] realized that such adaptability was becoming a pain as he had to move it from case-to-case as his use needs changed. Thus the MagClick Case System was born.

Continue reading “Magnets Make This Panda Move”

Pan And Tilt To A New 3D Printed Business Model

When shooting video, an easy way to get buttery smooth panning and tracking is to use a mechanical device like a rail to literally slide the camera side to side. These range from what is essentially a skateboard to incredible programmable multi-axis industrial robots, a wide variety of which have been visible in the backgrounds of Youtuber’s sets for years. But even the “low end” devices can run hundreds of dollars (all that anodized aluminum doesn’t come cheap!). Edelkrone has been building lust worthy professional (read, pricey) motion setups for a decade. But in the last year they’ve started something pretty unusual; lowering prices with their Ortak series of 3D printed equipment. But this time, you do the printing.

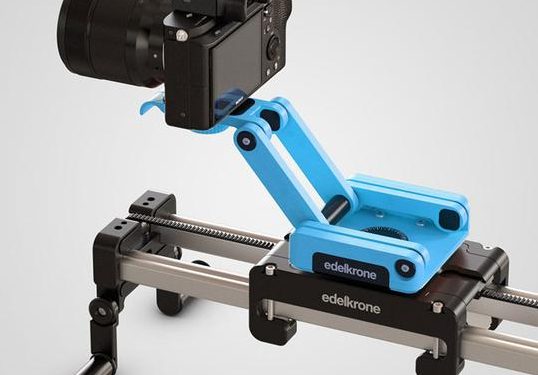
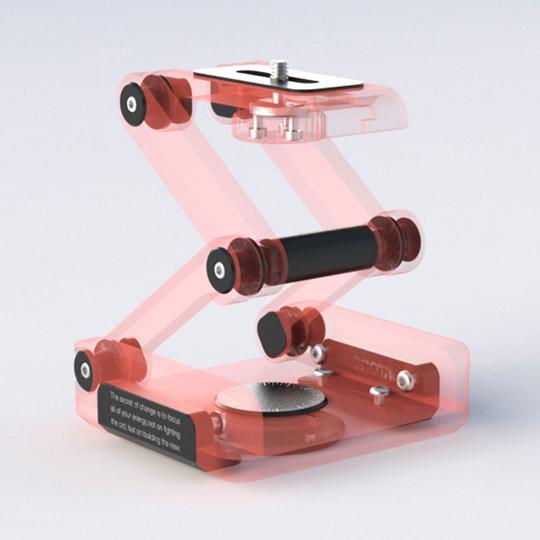
In the FlexTILT Head 3D, everything in red is printed at home

Since the RepRap we’ve been excited about the future of democratized at home manufacturing, but to a large extent that dream hasn’t materialized. Printers are much more useful now than in the early days but you can’t buy a new mug from Starbucks and print it at home. But maybe that’s changing with Edelkrone’s offering.

When you buy an Ortak product you get one thing: all the fasteners and hardware. So the final product is more durable and appears more finished than what would pop out of your Prusa unaided. What about the rest of the device? That’s free. Seriously. Edelkrone freely provides STLs (including print setting recommendations) with detailed step-by-step assembly instructions and videos (sample after the break). Nice hack to avoid piracy, isn’t it?

Why choose the do-it-at-home style product? A significant price reduction of course! The Ortak line currently includes two products, the FlexTILT head you see above, and a skateboard-style slide called the SKATER 3D. Both of these were sold fully finished before making it to the DIY scene. The FlexTILT Head 2 comes in at $149 when you buy it whole. And when the PocketSKATER 2 was for sale, it included a FlexTILT Head and came to $249. Now? Each hardware kit is just $29.

So is this it? Have we hit the artisanal DIY micro-manufactured utopian dream? Not yet, but maybe we’re a little closer. Edelkrone is a real company which is really selling these as products, right there on their website along with everything else. They refer to it as “co-manufacturing” which we think is a clever name, and talk about expanding the program to include electronics. We can’t wait to see how the experiment goes!

Continue reading “Pan And Tilt To A New 3D Printed Business Model”

Tiny LED Cube Packs Six Meters Of Madness

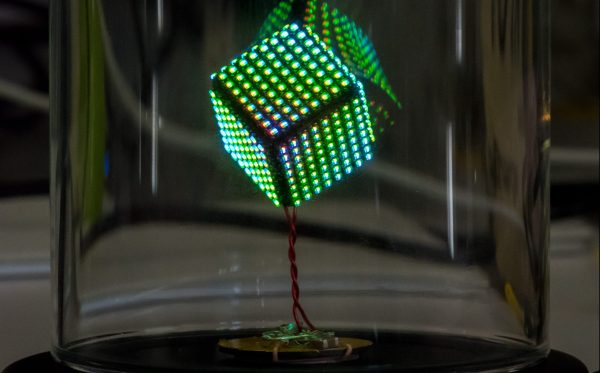
When [Freddie] was faced with the challenge of building a sendoff gift for an an LED-loving coworker he hatched a plan. Instead of making a display from existing video wall LED panels he would make a cube. But not just any cube, a miniature desk sized one that wasn’t short of features or performance. We’d be over the moon if someone gifted us with this itty-bitty Qi coil-powered masterpiece of an RGB cube.

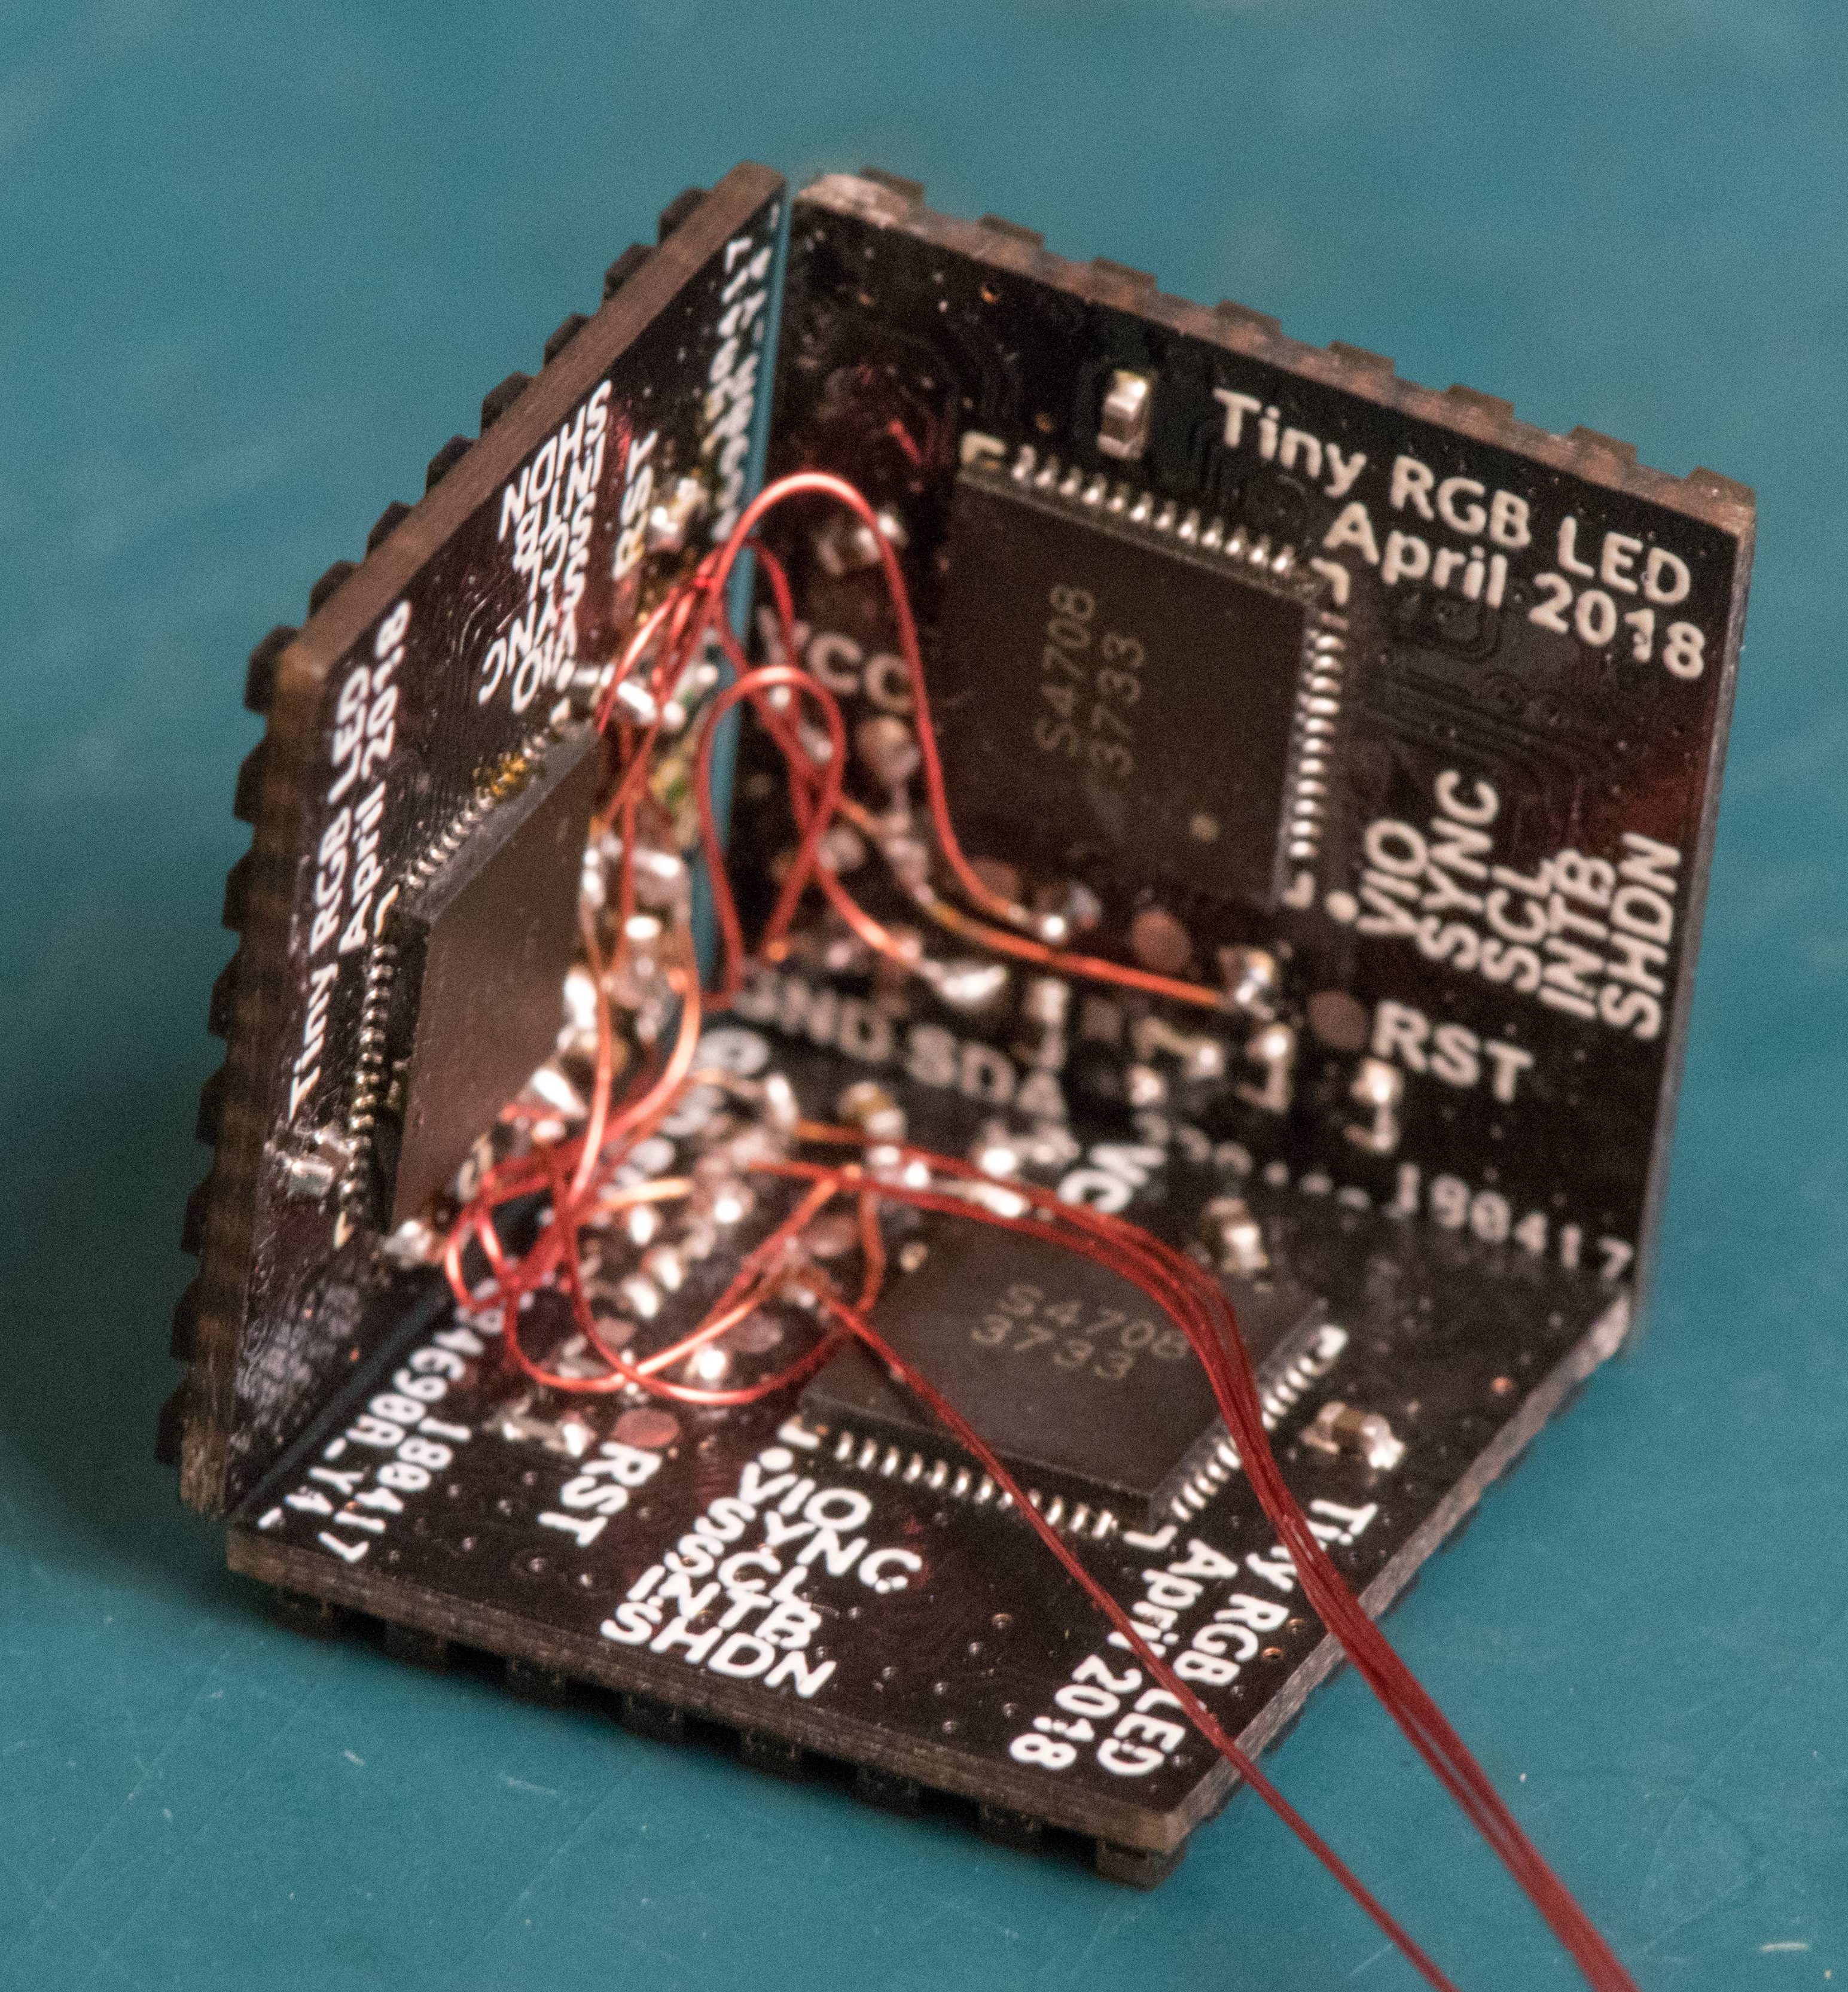
Recently we’ve been blessed with a bevy of beautiful, animated RGB cubes but none hit quite this intersection of size and function. The key ingredient here is tiny but affordable RGB LEDs which measure 1 mm on a side. But LEDs this small are dwarfed by the otherwise minuscule “2020” package WS2812’s and APA102s of the world. Pushing his layout capabilities to the max [Freddie] squeezed each package together into a grid with elements separated by less than 1 mm, resulting in a 64 LED panel that is only 16 mm x 16 mm panel (with test points and controller mounted to the back). Each of these four-layer PCBs that makes up the completed cube contains an astonishing 950 mm of tracking, meaning the entire cube has nearly six meters of traces!

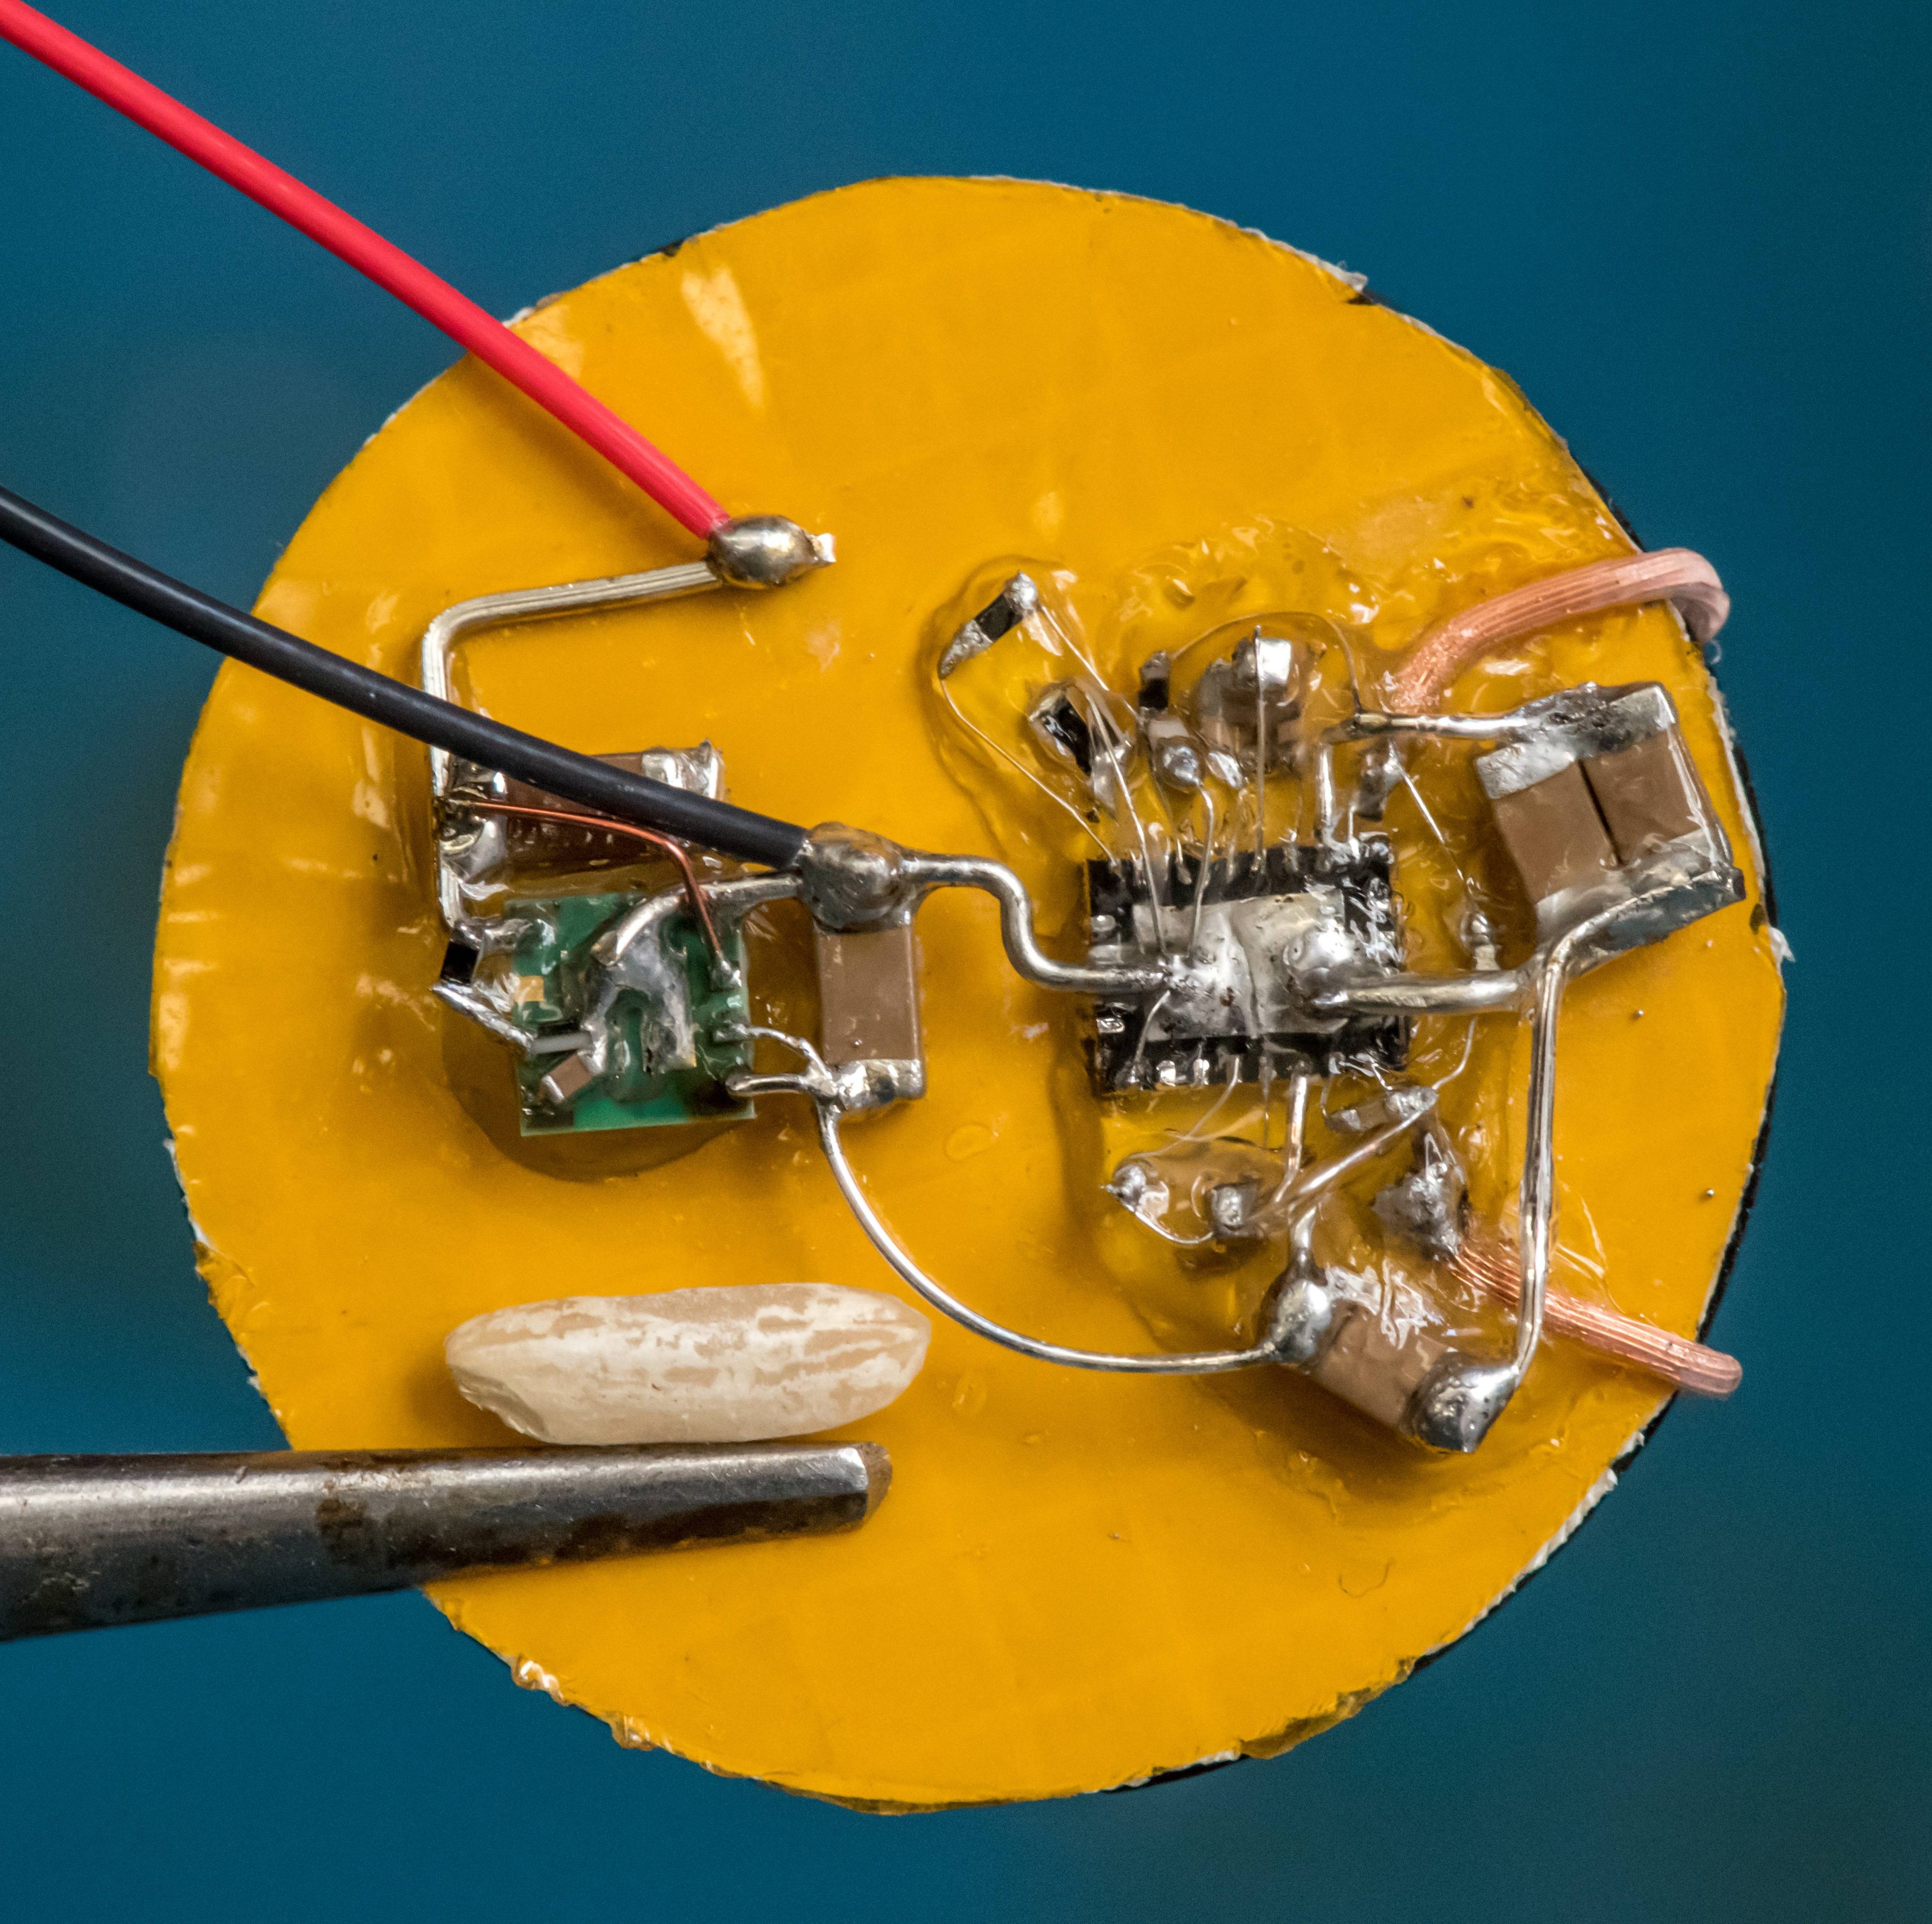
How do you power such a small device with no obvious places to locate a connector? By running magnet wire through a corner and down to a Qi coil of course. Not to let the cube itself outshine the power supply [Freddie] managed to deadbug a suitably impressive supply on the back of the coil itself. Notice the grain of rice in the photo to the left! The only downside here is that the processor – which hangs diagonally in the cube on a tiny motherboard – cannot be reprogrammed. Hopefully future versions will run programming lines out as well.

Check out the video of the cube in action after the break, and the linked photo album for much higher resolution macro photos of the build. While you’re there take a moment to admire the layout sample from one of the panels! If this sets the tone, we’re hoping to see more of [Freddie]’s going-away hacks in the future!

Continue reading “Tiny LED Cube Packs Six Meters Of Madness”