Dallas Makerspace Tour

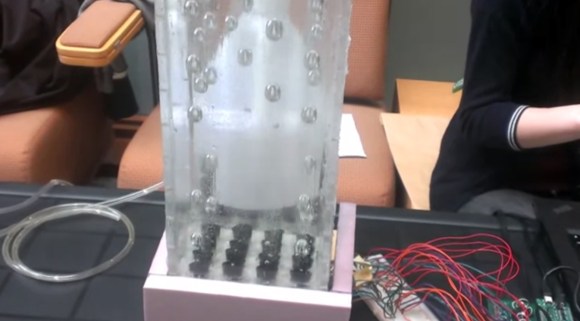
[Paul] sent us this video tour of the Dallas Makerspace made by member [Andrew Floyd], who walks us around and provides narration for a very impressive space. Once inside the 6000 sq ft facility, he takes us past the entrance lounge and into the electronics room, which has more electronics component storage than visible wall space, and down the hall to show off some laser-cut and 3d-printed creations.

Every makerspace has its specialties, and the Dallas gang shows off their awesome darkroom (complete with creepy, lurking Nic Cage) and blacksmith/forge work areas. They even have bi-weekly blacksmithing classes from a local master blacksmith. The space has since expanded, conquering their next-door-neighbors to expand project storage, add a biolab, a second classroom, a conference room, and more.

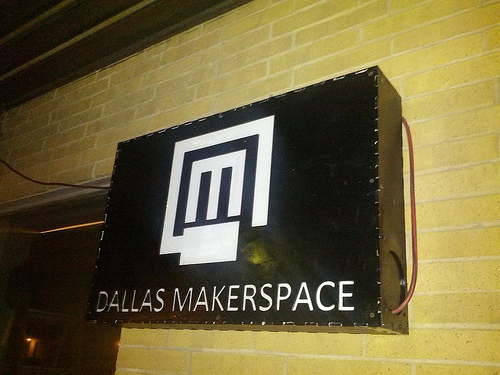
Enjoy the video after the break, and then head over to their website for more info: dallasmakerspace.org.

Continue reading “Dallas Makerspace Tour”

Built-in Coffee Table Lightbox

diydollarstorelightbox

[Flyingpuppy] sent us this tip about her cleverly-concealed pull-out lightbox drawer. Her resolution for the new year was to make more art, so she filled this coffee table with art supplies and decided she’d draw while relaxing in front of the television. She also wanted a lightbox nearby, which originally involved hacking the entire tabletop with some acrylic, but she eventually opted for a simpler build: and it’s portable, too! The drawer’s lights are battery-powered, so you can pull the entire thing out of the table and drag it onto your lap, if that makes drawing more comfortable.

[Flyingpuppy] sourced seven inexpensive LED units from her local dollar store, which she mounted to the back of the drawer with some screws. The rest of the drawer was lined with white foam board, the bottom section angled to bounce light up onto the acrylic drawing surface. Because she needs to open the case to manually flip on the lights, she secured the acrylic top magnetically, gluing a magnet to the underside of the foam board and affixing a small piece of steel to the acrylic. A simple tug on the steel bit frees the surface, providing access underneath. Stick around for a video below.

Continue reading “Built-in Coffee Table Lightbox”

AxCut: An Open Source Laser Cutter

If you’ve always wanted a laser cutter and you have £1500 lying around (approx. $2500 as of today) — and you have access to a 3D printer — then you’ll want to take a look at [Damian’s] open source laser cutter: axCut. The project has evolved over the last few months from some mockups in OpenSCAD to a working prototype.

You’ll want to dig through his blog posts as well as his YouTube channel for all the juicy details, but from what we can gather, [Damian] is on the home stretch. The current implementation includes a 40W CO2 laser with functioning laser control and an impressively quiet watercooling system. Although the build’s wiring remains a bit of a tangle, the prototype cuts (almost) as expected. His next hurdle is ironing out the air assist, which should prevent some fire hazard issues and keep the lens free of debris.

Check out a couple of videos after the break, and if you’re interested in getting into laser cutting but want to start smaller, have a look at the MicroSlice from a few months ago.

Continue reading “AxCut: An Open Source Laser Cutter”

A Light-Up Dress For A New Year’s Dance Party

wearableLedress

Don’t let the above picture’s lack of blinking colors fool you, the light-up dress [Sam] fashioned for his girlfriend is rather eye-catching; we’d just rather talk about it than edit the gifs he’s provided. [Sam’s] been a busy guy. His last project was a Raspberry Pi digital photo frame, which we featured just over a week ago, but wearable hacks allow him to combine his favored hobbies of sewing and electronics.

If you’re looking to get started with wearable electronics, then this project provides a great entry point. The bulk of the build is what you’d expect: some individually-addressable RGB LEDs, the ever-popular FLORA board from Adafruit, and a simple battery holder. [Sam] decided to only use around 40 of the LEDs, but the strips come 60 to a meter, so he simply tucked the extra away inside the dress and set his desired limits in the software, which will allow him to preserve the entire strip for future projects. If you’ve ever attempted a wearable hack, you’re probably familiar with how delicate the connections can be and how easily the slightest bend in the wiring can leave you stranded. Most opt for a conductive thread solution, but [Sam] tried something different and used 30 AWG wire, which was thin enough to be sewn into the fabric. As an added bonus, the 30 AWG wire is insulated, which permits him to run the wires close to (or perhaps over) each other while avoiding shorts. [Sam’s] guide is detailed and approachable, so head over to his project page if you think you’ve caught wearables fever, and check out his GitHub for the source code.

A Vibrating Timepiece

vibratingWatch

It may not look like much, but the above pictured device is [qquuiinn’s] handy little watch that indicates time through pulsed vibrations. Perhaps we should refrain from labeling it as a “watch,” however, considering it’s [qquuiinn’s] intention to remove the need to actually look at the thing. Vibrations occur in grandfather clock format, with one long vibration for each hour, accompanied by one, two, or three short pulses for the quarter-hour increments.

The design is straightforward, using an ATTiny85 for the brains along with a few analog components. The vibration motor sticks to the protoboard with some glue, joining the microcontroller, a coin cell battery, and a pushbutton on a small protoboard. The button allows for manual time requests; one press responds with the current time (approximated, probably) in vibrations. The build is a work in progress, and [qquuiinn] acknowledges the lack of an RTC (real-time clock) causes some drift in the timepiece’s accuracy. We suspect, however, that you’d address that problem—twice daily—when you replace the battery: it only lasts ten hours.

Drawing With Legos

WritingMachineFrontLarge

There are a number of elaborate Lego creations out there, but you probably haven’t seen something quite like [Andrew Carol’s] Lego drawing machine. He drew inspiration from the film Hugo and from automata of the 1800’s, specifically [Jaquet-Droz]’s Draughtsman, which we featured in a Retrotechtacular article not too long ago.

[Andrew’s] hand-cranked creation is divided into three components: a plotter, an “encoded pen stroke program”—which stores messages in links of pieces—and a reader that translates the links into pen strokes. The plotter moves the pen in the Y axis and moves the paper in the X to mark on the page, and also has a simple lift mechanism that temporarily raises the pen on the Z axis to interrupt pen strokes between letters (or drawings).

[Andrew] describes the chain reader by comparing it to a film projector, feeding the message through the mechanism. Although you won’t find a detailed how-to guide explaining the devices’ inner-workings on his site, there are some clues describing basic components and a couple of videos, both of which are embedded below.

Continue reading “Drawing With Legos”

3D Bubble Display

3dbubbledisplay

[Craig Shultz], a mechatronics grad student at Northwestern University, sent us a video of his group’s project from last winter: a 3D bubble display. We’ve seen some pretty impressive and innovative bubble displays around here—most recently the 60-tube RGB LED build—but [Craig’s] is the first we’ve seen that adds some depth to the project.

For the most part, its construction is what you’d expect: an acrylic case enclosing the 4×4 arrangement of tubes, 16 valves 16 individually controlled solenoids, and some small air pumps; all driven by a PIC microcontroller. In the video, however, you’ll have to strain your eyes if you want to see the tubes, which is a clever design choice on [Craig’s] part to showcase the display’s depth. Each of the bubbles was visually separated by pairing glycerin with a tubing material that had a similar index of refraction, Pyrex. As a result, the tubes blend seamlessly into the fluid. Check out the video after the break.

Continue reading “3D Bubble Display”