Automatic Beverage Delivery System

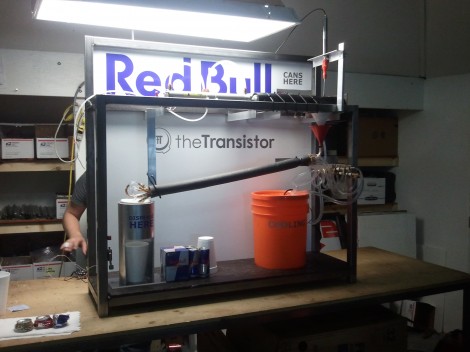
Members of theTransistor, a Provo, Utah based Hackerspace, are showing off their entry in the Red Bull Creation contest. This is an all-in-one energy drink delivery system. It can take a warm can of Red Bull from a reserve rack and turn it into a chilled cup of goodness in no time. And it (kind of) cleans up after itself too!

The process starts when a can is opened by lancing it through the side walls. At the upper right corner of the rig you can see the apparatus that is responsible for this beverage extraction technique. The drink drains from the newly created openings into a funnel below. It then enters a heat exchanger the team built by surrounding an aluminum pipe with several copper pipes. The copper has ice water circulating through them from the orange bucket that serves as the reservoir. By the time the drink gets to the cup on the bottom left it is ready to drink. The empty can is crush, falling into a bin and making space for the next in the 16-can backup supply.

Continue reading “Automatic Beverage Delivery System”

F/stop Printer For Analog Printing Black And White Photos

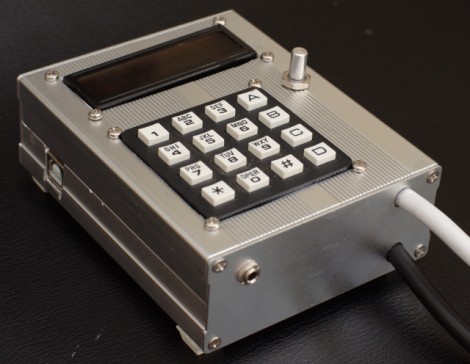
This beautifully crafted device is a timer used for getting the perfect exposure when making film prints of photos. But in addition to keeping time, it also does logarithmic calculations that are based on the f-stop values used for each exposure. It does this in 1/100th of a stop increments. While he was at it, [William] also decided to pack in a bunch of other features like dry down correction, and support for making test strips. This is a little hard to understand when discussed in the abstract, but just take a look at his video after the break where [William] walks us through an example exposure and all will become clear.

You can see from the construction page that the device is basically an Arduino shield. It provides a relay for controlling the exposure lamp, a keypad, rotary encoder, and character LCD. Slap it in a fancy case, connect it to the equipment you’re using, and you’ll be creating perfect prints in no time flat!

Continue reading “F/stop Printer For Analog Printing Black And White Photos”

Flimsy Pi Case Still Provides A Level Of Protection

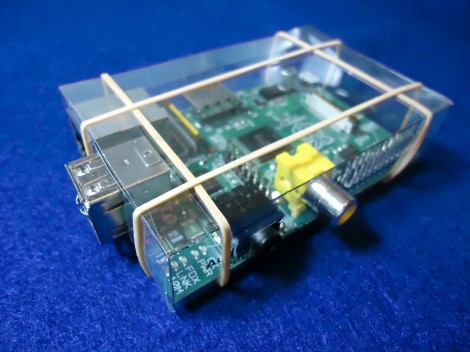
This flimsy case isn’t going to protect your Raspberry Pi if you knock it off the workbench. It will provide a level of protection against shorting out from contact with metal objects, or from liquids spilled in the near vicinity. [CGPatterson] ended up making this case from a single sheet of transparency film.

The project is basically papercraft. He started with the dimensions published on the Raspberry Pi FAQ, which turned out to be wrong. Not having a caliper available to help with the precision of the measurements, he grabbed his ruler and did the best he could. The first two cases were a poor fit, but as you can see the third is like a glove. Luckily you don’t have to go through this same trial and error as he release the design. Both A4 and US Letter sized PDFs are available for download. Print them out on the transparency, cut along the lines, apply transparent double-sided tape to the tabs and you’re in business. If you wish to alter the design he has also posted the SVG source he made in Inkscape.

This is certainly a good option for those of us without the ability to produce laser cut parts.

Arduino Rover Evolves To A Trike Design

[Eduard Ros] wrote in to show off the latest version of his Arduino powered autonomous rover (translated). You may remember seeing the first version of the build back in June. It started with a remote control truck body, adding an Arduino and some ultrasonic sensors for obstacle avoidance.

The two big wheels and the pair of sensors look familiar, but most of the other components are a different from that version. The biggest change is the transition from four wheels to just three. This let him drop the servo motor which controlled steering. At first glance we though this thing was going to pop some mad wheelies, but the direction of travel actually drags the third wheel being the larger two. The motors themselves are different, this time depending on gear-reduced DC motors. The motor H-bridge is the same, but [Eduard] used a simple transistor-based inverter to reduce the number of pins needed to activate it from two down to just one. He also moved from an Arduino Uno to a Nano to reduce the footprint of the controller.

Interfacing SNES Controllers With Your Raspberry Pi

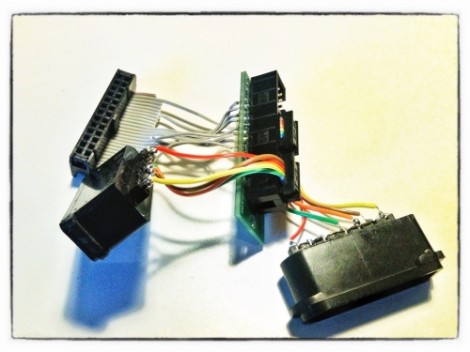
This lovely set of wires lets [Florian] connect stock Super Nintendo controllers to his Raspberry Pi. The IDC connector in the upper left plugs into the GPIO header on the RPi rather than going the route of using an intermediary USB converter.

The setup lets you connect two controllers at once, so you’ll have no trouble going head-to-head on Mario Kart as seen in the clip after the break. The ports themselves were pulled from a pair of SNES extension cables. Since button signals are pushed to the console via a shift register there’s just five wires needed for each (voltage, ground, data, clock, and latch). As far was we know the Raspberry Pi pins are not 5V tolerant so you probably want to add some level conversion to this circuit if you build it yourself.

[Florian] wrote a C program which shifts in data from the controllers and converts it to HID keyboard inputs. This should make it extremely flexible when it comes to emulator setup, and using the technique for different styles of controllers should also be pretty easy.

Continue reading “Interfacing SNES Controllers With Your Raspberry Pi”

Library For Driving SSD1289 LCD Displays With Small Microcontrollers

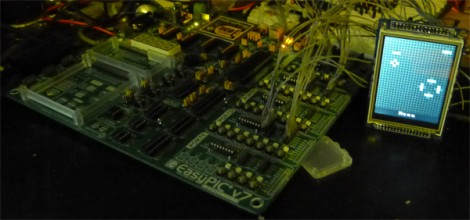
[H. Smeitink] got his hands on a 320×240 color TFT LCD screen. He set out to drive it with a small PIC microcontroller but didn’t find a lot of help out there to get up and running quickly. This is surprising since it’s a really nice display for quite a low price (under $16 delivered on eBay at the time of writing). He decided to write his own library and support tools to help others.

The display includes an SPI touch screen, but since that works separately from the LCD controller, touch input is not supported in this package. The driver that he wrote is coming from a mikroC toolchain point of view, but it shouldn’t be too hard to port to your platform of choice. We took a quick look at the code and it seems all you need to do is tweak the defines to match your hardware registers, and implement your own delay_ms() function.

But he didn’t stop with the driver. You’ll also find a C# program which converts images to an array for easy use on the display. Incidentally, this is the same display which [Sprite_TM] got working with the Raspberry Pi.

TI Chronos Watch Monitor Your Sleeping Infant

[Bill] wants a little piece of mind when his infant is sleeping in the other room. For him, the audio-only baby monitor could use some improvement. His proof-of-concept is that blue patch Velcroed on the swaddled infant. It monitors movement, orientation, and temperature and alerts you when something’s amiss.

Inside the pouch you’ll find a TI Chronos eZ430 wristwatch with the band removed. It’s a nice hardware choice because it includes an accelerometer, temperature sensor, and RF link to a USB dongle. [Bill’s] code sends a data packet to the PC about once a second. The PC watches to make sure there’s slight motion, indicating the baby is breathing. This part doesn’t work all that well as the accelerometer doesn’t pick up tiny movements all too well, but it does have potential. In the video after the break you can see the functions which make sure the baby doesn’t roll onto its belly, and that she’s not too cold do work extremely well.

We wonder if the accelerometer would pick up more motion if the watch was hung from a string inside of a small enclosure. This way it would swing back and forth with small movements. But perhaps that would make the whole thing too bulky?

Continue reading “TI Chronos Watch Monitor Your Sleeping Infant”