AlienFX

Simple Terminal Hack Is Fit For Hollywood

We’ve all seen the cheesy hacker scenes in movies and on TV. Three dimensional file system browsers, computer chip cityscapes, and other ridiculous visualizations to make the dull act of sitting at a keyboard look pretty on the silver screen. While real hackers know those things are often silly and impractical, sometimes we do go out of our way to pretty things up a bit.

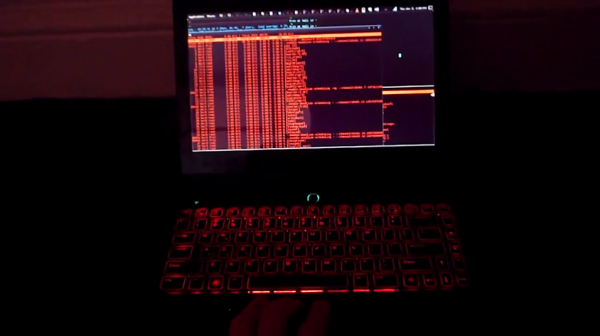
Hollywood might be able to learn a thing or two from this latest hack. [Yuri] modified his Linux terminal to change the color of the back lights on his laptop’s keyboard. It’s the kind of thing that actually would look good in a modern hacker movie, and [Yuri] is living proof that it’s something that a real-life hacker would actually use!

[Yuri] has been running Simple Terminal. The Simple Terminal project aims to build a replacement for the default xterm program that removes all of the unnecessary features and simplifies the source code. It also aims to make your terminal experience prettier. Part of making things prettier means that you can choose the font color for your terminals, and of course each terminal window can have its own color if you so choose.

[Yuri] happens to own an Alienware laptop. This laptop comes with RGB LEDs behind the keyboard, allowing you to light them up just about any color you could ever want. [Yuri] thought it would be cool if his keyboard color matched the font color of his terminal windows. Thanks to AlienFX, he was able to write a simple patch for Simple Terminal that does exactly this. Now whenever he selects a terminal window, the keyboard automatically switches colors to match the text in that window. Be sure to check out the video below. Continue reading “Simple Terminal Hack Is Fit For Hollywood”

IP camera hack

How To Backup And Restore Your IP Camera Firmware

[Filipe] has been playing around with custom firmware for inexpensive IP cameras. Specifically, he has been using cameras based on a common HI3815 chip. When you are playing around with firmware like this, a major concern is that you may end up bricking the device and rendering it useless. [Filipe] has documented a relatively simple way to backup and restore the firmware on these cameras so you can hack to your heart’s content.

The first part of this hack is hardware oriented. [Filipe] cracked open the camera to reveal the PCB. The board has labeled serial TX and RX pads. After soldering a couple of wires to these pads, [Filipe] used a USB to serial dongle to hook his computer up to the camera’s serial port.

Any terminal program should now be able to connect to the camera at 115200 baud while the camera is booting up. The trick is to press “enter” during the boot phase. This allows you to log in as root with no password. Next you can reset the root password and reboot the camera. From now on you can simply connect to the phone via telnet and log in as root.

From here, [Filipe] copies all of the camera’s partitions over to an NFS share using the dd command. He mentions that you can also use FTP for this if you prefer. At this point, the firmware backup is completed.

Knowing how to restore the backup is just as important as knowing how to create it. [Filipe] built a simple TFTP server and copied the firmware image to it in two chunks, each less than 5MB. The final step is to tell the camera how to find the image. First you need to use the serial port to get the camera back to the U-Boot prompt. Then you configure the camera’s IP address and the TFTP server’s IP address. Finally, you copy each partition into RAM via TFTP and then copy that into flash memory. Once all five partitions are copied, your backup is safely restored and your camera can live to be hacked another day.

Watering circuit

Solar Powered Circuit Waters Your Plants


If you want your plants to stay healthy, you need to make sure they stay watered. [Dimbit] decided to build his own solar powered circuit to help automatically keep his plants healthy. Like many things, there is more than one way to skin this cat. [Dimbit] had seen other similar projects before, but he wanted to make his smarter than the average watering project. He also wanted it to use very little energy.

[Dimbit] first tackled the power supply. He suspected he wouldn’t need much more than 5V for his project. He was able to build his own solar power supply by using four off-the-shelf solar garden lamps. These lamps each have their own low quality solar panel and AAA NiMH cell. [Dimbit] designed and 3D printed his own plastic stand to hold all of the solar cells in place. All of the cells and batteries are connected in series to increase the voltage.

Next [Dimbit] needed an electronically controllable water valve. He looked around but was unable to find anything readily available that would work with very little energy. He tried all different combinations of custom parts and off-the-shelf parts but just couldn’t make something with a perfect seal. The solution came from an unlikely source.

One day, when [Dimbit] ran out of laundry detergent, he noticed that the detergent bottle cap had a perfect hole that should be sealable with a steel ball bearing. He then designed his own electromagnet using a bolt, some magnet wire, and a custom 3D printed housing. This all fit together with the detergent cap to make a functional low power water valve.

The actual circuit runs on a Microchip PIC microcontroller. The system is designed to sleep for approximately nine minutes at a time. After the sleep cycle, it wakes up and tests a probe that sits in the soil. If the resistance is low enough, the PIC knows that the plants need water. It then opens the custom valve to release about two teaspoons of water from a gravity-fed system. After a few cycles, even very dry soil can reach the correct moisture level. Be sure to watch the video of the functioning system below. Continue reading “Solar Powered Circuit Waters Your Plants”

Tesla Truck

Tesla Truck Wants To Bring The Makerspace To The Children

With so many budget cuts, many public schools find themselves having to cut “unnecessary” programs such as shop, art, and music classes. They simply can’t afford to keep those things running and also teach other important concepts like math, language, and history. The obvious side effect is that kids don’t have a safe place to be creative and learn to make things with their hands.

Luckily, the maker movement has been rapidly growing over the last few years with makerspaces popping up all over the globe. These places are picking up the slack left behind by the budget cuts that hurt our public schools. But while makerspaces are getting more and more common, they still don’t exist everywhere. Even in those places lucky enough to have a makerspace, not everyone is aware that they exist and not everyone can afford to be a full-time member. This is where Tesla Truck comes in.

The Tesla Truck’s mission statement is “to provide a cutting-edge, mobile, hands-on STEM lab, where students, teachers, and makers can teach, learn, collaborate, create, and innovate.” It’s a noble cause for sure, but how do they plan to do this? This group intends to outfit a truck with the kinds of tools every maker dreams of. These would include a 3D printer, laser cutter, CNC plasma cutter, mill and lathe, electronics bench, and more.

Obviously just having a bunch of high-end tools is not going to cut it. Someone is going to have to teach people how to properly use these tools. The group behind the Tesla Truck is made up of educators, engineers, and published researches who have been doing this kind of thing for a while now. This group has been packing up their own personal tools into their hatchbacks and setting up shop in school classrooms around New York City, only to have to break down at the end of the day and bring them all home again. Together with the students, this group has built things like robots, quadcopters, and water purifiers. The Tesla Truck will give them the ability to reach more people much more easily.

The Tesla Truck is looking to raise a total of $62,804.01 to make their dream a reality. They have raised more than half of that outside of crowd funding. They’ve now turned to Indiegogo to raise the last $24,300. They have ten days left and they are almost halfway to their goal. You can watch their campaign video below to get a better feel for what they are all about. Continue reading “Tesla Truck Wants To Bring The Makerspace To The Children”

AVR Programmer

Inexpensive AVR Programmer Made From Five Components

If you want to program an AVR chip as inexpensively as possible, then [Ian’s] solution might just be for you. He built an AVR programmer using only four components. This design is based on the vusbtiny AVR programmer design, with a few components left out.

[Ian’s] design leaves out two of the resistors and two diodes, leaving just four components. These include a 1.5k resistor, a small capacitor, a USB connector, a six pin header, and an ATtiny45. He admits that this may not be exactly up to USB spec, but it does work.

This is one of those projects that is really an exercise in “will it work?” more than anything else. The fact that you need to first program an AVR chip means that this wouldn’t be useful in a pinch, because you would already have to have a working programmer. Nonetheless, it’s always fun to see what can be done with as little as possible.

jackolantern

Simple LED Project To Spice Up Your Halloween Party

[Paul’s] project is a great example of how you can take a simple project and turn it into something more interesting. He built himself a jack-o-lantern with an Internet controlled RGB LED embedded inside.

[Paul] first wired up an RGB LED to a Raspberry Pi. He was sure to wire up each color using a 100ohm resistor to prevent the LED from burning out. The web interface was written in Python. The interface is pretty simple. It consists of three text fields. The user enters a value between 0 and 255 for each of the three LED colors. The program then lights up the LED accordingly.

[Paul] realized he would need a diffuser for the LED in order to really see the blended colors properly. Instead of using a common solution like a ping-pong ball, he opted to get festive and use a plastic jack-o-lantern. [Paul] removed the original incandescent bulb from the lantern and mounted the LED inside instead. The inside of the pumpkin is painted white, so it easily diffuses the light. The result is a jack-o-lantern that glows different colors as defined by his party guests. Be sure to check out the demonstration video below.

Garage Door Opener

Capacitive Garage Door Opener Hides Behind Your Dash

[Pyrow] wanted to upgrade his garage door opener remote. It worked just fine, but changing those tiny batteries out can be an inconvenience. Plus, the remote control was taking up valuable storage space and would always rattle around while driving. [Pyrow] decided to make use of an Omron E2K-F10MC2 capacitive touch sensor to fix these issues.

[Pyrow’s] circuit still makes use of the original remote control. He just added some of his own components to get it to do what he wanted. The circuit is powered by the car’s battery, so it never needs a battery replacement. The circuit is protected with a fuse and the power is regulated to prevent electrical spikes from burning up the original remote control. The actual circuit is pretty simple and uses mostly discrete components. It’s all soldered onto proto board to keep it together. He only had to solder to three places on the original remote control in order to provide power and simulate a button press.

Next, [Pyrow] took his dash apart. He used double-sided tape to attach the touch sensor to the back of the dash.  After securing the electronics in place with tape, he now has a working hidden garage door opener. Full schematics are available in the writeup linked above. Also, be sure to watch the demonstration video below.

Continue reading “Capacitive Garage Door Opener Hides Behind Your Dash”