AM ultrasonic transmitter and receiver

AM Ultrasonic Transmitter And Receiver

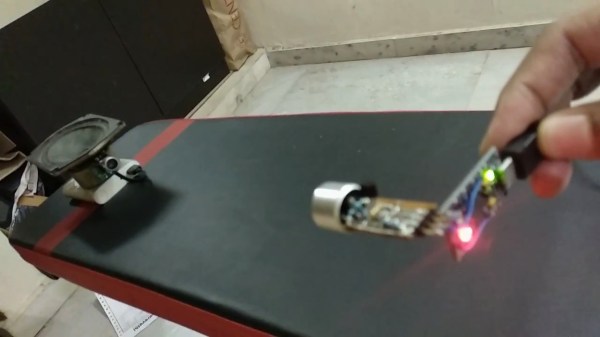
Most often ultrasonic transducers are used for distance measurements, and in the DIY world, usually as a way for robots to detect obstacles. But for a weekend project, [Vinod.S] took the ultrasonic transmitter and receiver from a distance-meter module and used amplitude modulation to send music ultrasonically from his laptop to a speaker, essentially transmitting and receiving silent, modulated sounds waves.
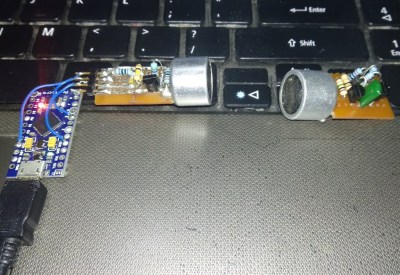
The transmitter and receiver

For the transmitter, he turned an Arduino Pro Micro into a USB sound card which he could plug into his laptop. That outputs both the audio signal and a 40 kHz carrier signal, implemented using the Arduino’s Timer1. Those go to a circuit board he designed which modulates the carrier with the audio signal using a single transistor and then sends the result out the ultrasonic transmitter.

He took care to transmit a clear signal by watching the modulated wave on an oscilloscope, looking for over-modulation and clipping while adjusting the values of resistors located between the transistor, a 5 V from the Arduino and the transmitter.

He designed the receiver side with equal care. Conceptually the circuit there is simple, consisting of the ultrasonic receiver, followed by a transistor amplifier for the modulated wave, then a diode for demodulation, another transistor amplifier, and lastly a class-D amplifier before going to a speaker.

Due to the low 40 kHz carrier frequency, the sound lacks the higher audio frequencies. But as a result of the effort he put into tuning the circuits, the sound is loud and clear. Check out the video below for an overview and to listen to the sound for yourself. Warning: Before there’s a storm of comments, yes the video’s shaky, but we think the quality of the hack more than makes up for it.

Continue reading “AM Ultrasonic Transmitter And Receiver”

Katherine Johnson: Computer To The Stars

In 1962, John Glenn sat in his capsule waiting for his rocket engines to light-up and lift him to space. But first, he insisted that Katherine Johnson double-check the electronic computer’s trajectory calculations. While that’s the dramatic version of events given in the recent movie, Hidden Figures, the reality isn’t very far off. Glenn wasn’t sitting on the launchpad at the time, but during the weeks prior to launch, he did insist that Johnson double-check the computer’s calculations.

So who is this woman who played an important but largely unknown part of such a well-known historical event? During her long life, she was a wife, a mother, an African-American, a teacher, and a human computer, a term rarely used these days. Her calculations played a part in much of early spaceflight and in 2015, she was awarded the Presidential Medal of Freedom by President Obama. She also has a building named after her at the Langley Research Center in Hampton, Virginia.

Continue reading “Katherine Johnson: Computer To The Stars”

x86 emulation running DOS on ESP8266

PC-XT Emulator On ESP8266

Do you remember the simpler times when you had a DOS command line, a handful of commands, and you talked to the hardware through a few BIOS and DOS interrupts? Okay, maybe it was a little limited, but nostalgia doesn’t care. Now [mcuhacker] is working on bringing some of those memories back by getting a PC-XT emulator running on an ESP8266.

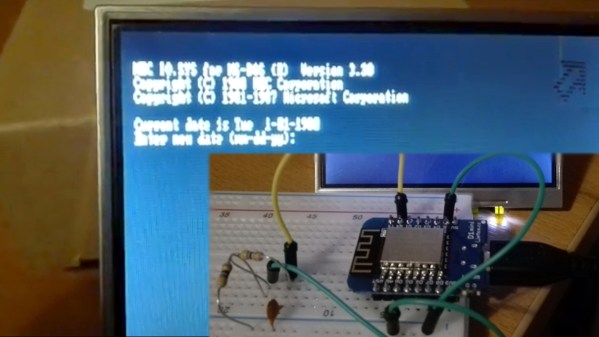
For the x86 CPU emulator, he ported Fake86 which is written in C, and created an Arduino IDE environment for it. The MS-DOS 3.3 bootdisk image is stored in flash and is accessed as the A: drive. There’s no keyboard yet but he has 640×200 CGA working with 80×25 characters on a 3.5″ TFT display with the help of a low pass filter circuit. In the video below he shows it booting to the point where it asks for the date.

Continue reading “PC-XT Emulator On ESP8266”

Mechanical/electrical jet engine model

Delightful Electromechanical Build Of A Jet Engine Model

[InterlinkKnight]’s jet engine model is a delight to behold and to puzzle out. Many of us have been there before. We know how to build something, we know it’s not the most up-to-date approach, but we just can’t help ourselves and so we go for it anyway. The result is often a fun and ingenious mix of the mechanical and the electrical. His electric jet engine model is just that.

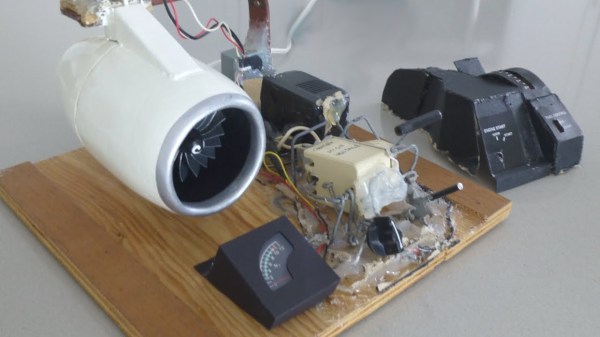
Being a model, this one isn’t required to produce any useful thrust. But he’s made plenty of effort to make it behave as it should, right down to adding a piece of plastic to rub against a flywheel gear in order to produce the perfect high-pitched sound, not to forget the inclusion of the flywheel itself to make the turbine blades gradually slow down once the motor’s been turned off. For the N1 gauge (fan speed gauge) he built up his own generator around the motor shaft, sending the output through rectifying diodes to a voltmeter.

But the most delightful of all has to be the mechanical linkages for the controls. The controls consist of an Engine Start switch, Fuel Control switch and a throttle lever and are all built around a rheostat which controls the motor speed. The linkages are not pretty, but you have to admire his cleverness and just-go-for-it attitude. He must have done a lot of head scratching while getting it to all work together. We especially like how flipping the Fuel Control switch from cutoff to run levers the rheostat with respect to its dial just a little, to give a bit of extra power to the engine. See if you can puzzle it out in his Part 3 video below where he removes the cover and walks through it all.

Continue reading “Delightful Electromechanical Build Of A Jet Engine Model”

Cat laser on a pan-tilt robot

Robotic Laser Keeps Cat Entertained While You Hack

Whether it’s our own cat or a neighbor’s, many of us have experienced the friendly feline keeping us company while we work, often contributing on the keyboard, sticking its head where our hands are for a closer look, or sitting on needed parts. So how to keep the crafty kitty busy elsewhere? This roboticized laser on a pan-tilt mechanism from the [circuit.io team] should do the trick.

The laser is a 650 nm laser diode mounted on a 3D printed pan-tilt system which they found on Thingiverse and modified for attaching the diode’s housing. It’s all pretty lightweight so two 9G Micro Servos do the grunt work just fine. The brain is an Arduino UNO running an open-source VarSpeedServo library for smooth movements. Also included are an HC-05 Bluetooth receiver and an Android app for controlling the laser from your phone. Set it to Autoplay or take a break and use the buttons to direct the laser yourself. See the video below for build instructions and of course their cat, [Pepper], looking like a Flamenco dancer chasing the light.

Continue reading “Robotic Laser Keeps Cat Entertained While You Hack”

How the 555 timer IC works

Learning The 555 From The Inside

One way to understand how the 555 timer works and how to use it is by learning what the pins mean and what to connect to them. A far more enjoyable, and arguably a more useful way to learn is by looking at what’s going on inside during each of its modes of operation. [Dejan Nedelkovski] has put together just such a video where he walks through how the 555 timer IC works from the inside.

We especially like how he immediately removes the fear factor by first showing a schematic with all the individual components but then grouping them into what they make up: two comparators, a voltage divider, a flip-flop, a discharge transistor, and an output stage. Having lifted the internals to a higher level, he then walks through examples, with external components attached, for each of the three operating modes: bistable, monostable and astable. If you’re already familiar with the 555 then you’ll enjoy the trip down memory lane. If you’re not familiar with it, then you soon will be. Check out his video below.

Continue reading “Learning The 555 From The Inside”

Car as a computer mouse

Turning A Car Into A Computer Mouse

[William Osman] and [Simone Giertz] have graced our pages before, both with weird, wacky and wonderful hacks so it’s no surprise that when they got together they did so to turn Simone’s car into a computer mouse. It’s trickier than you might think.

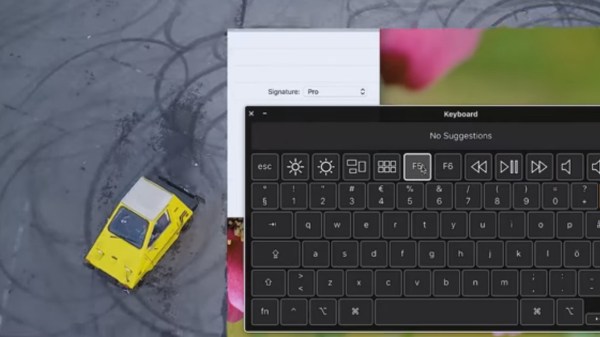
They started by replacing the lens of an optical mouse with a lens normally used for a security camera. Surprisingly, when mounted to the car’s front bumper it worked! But it wasn’t ideal. The problem lies in that to move a mouse cursor sideways you have to move the mouse sideways. However, cars don’t move sideways, they turn by going in an arc. Move your mouse in an arc right now without giving it any sideways motion and see what happens. The mouse cursor on the screen moves vertically up or down the screen, but not left or right. So how to tell if the car is turning? For that, they added a magnetometer. The mouse then gives the distance the car moved and the magnetometer gives the heading, or angle. With some simple trigonometry, they calculate the car’s coordinates.

The mouse click is done using the car’s horn, but details are vague there.

And yes, using the carmouse is as fun as it sounds, though we still don’t recommend texting while driving using this technique. Watch them in the videos below as they write an email and drive a self-portrait of the car.

Continue reading “Turning A Car Into A Computer Mouse”