Making A Servo Tester Just A Bit Better

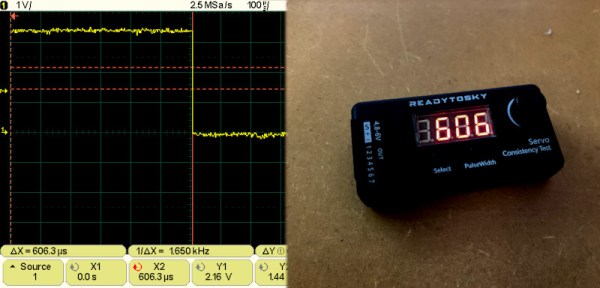
Servo testers are useful devices to have on hand, allowing one to quickly check a given part for proper operation. However, cheaper models can be quite limited, and may not output signals suitable for testing the full range of servos out there. [Buttim] had a few testers laying around, and wanted to see if they could be modified to do more.

Initial experiments with the cheapest model on hand came to naught, revealing nothing but a small IC with its markings scrubbed off. However, going a few more dollars upmarket, [buttim] found a servo tester packing a Nuvoton N75E003. An unfamiliar name to the hobbyist, Nuvoton microcontrollers are often found in mass-production designs due to their low cost.

The N75E003 is a 8051-based device, and [buttim] was able to source a programmer and tutorial resources on how to work with the chip. Armed with the right hardware and knowledge, the servo tester was first programmed with a basic blink sketch. With everything confirmed to be working as expected, [buttim] set about programming a custom firmware for the servo tester that would output a broader range of PWM signals to suit their needs.

It’s a great example of the learning possibilities available by simply cracking open the case of commodity hardware and diving in. Of course, if you need something even more capable, you can always build your own from scratch!
Robot Gets Around On All Fours, Thanks To Many, Many Servos

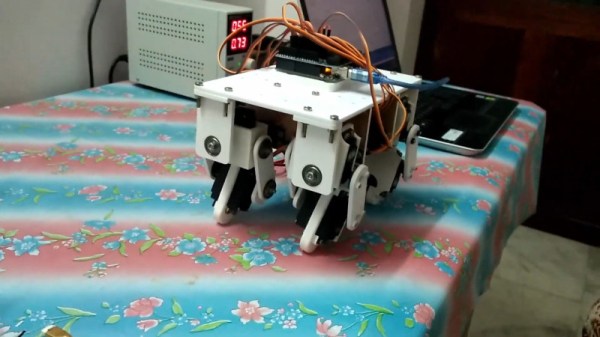
As far as robots are concerned, wheels and tracks are great ways to get around when you’ve got serious work to do. However, if you want to build something that feels more animal than machine, building a walking ‘bot is the way to go. [Technovation] delivers a great example in the form of this quadruped design.

It’s a build executed in the modern style, taking full advantage of contemporary design tools and processes. The entire robot is built around twelve servo motors that provide rotation and translation to the robot’s joints. After importing the servo models into Fusion 360, [Technovation] set about building the rest of the body around them. An Arduino Uno runs the show, which addresses the many servos thanks to a Sensor Shield that has a multitude of useful outputs.

[Technovation] put a specific focus on durability and robustness during the design phase. The platform is intended as a test bed for various walking styles and gaits, and thus any hardware failures would be an unnecessary distraction from the project’s goals. The chassis is a great platform to learn on, and we expect to see further developments in future.

The eerily lifelike robots from Boston Dynamics may have set a high bar, but DIYers are still out there having a crack at building capable walking robots. Video after the break.

Continue reading “Robot Gets Around On All Fours, Thanks To Many, Many Servos” →

Running Way More LED Strips On A Raspberry Pi With DMA

The Raspberry Pi is a powerful computer in a compact form factor, making it highly useful for all manner of projects. However, it lacks some of the IO capabilities you might find on a common microcontroller. This is most apparent when it comes to running addressable LED strings. Normally, this is done using the Pi’s PWM or audio output, and is limited to just a couple of short strings. However, [Jeremy P Bentham] has found a way to leverage the Pi’s hardware to overcome these limitations.

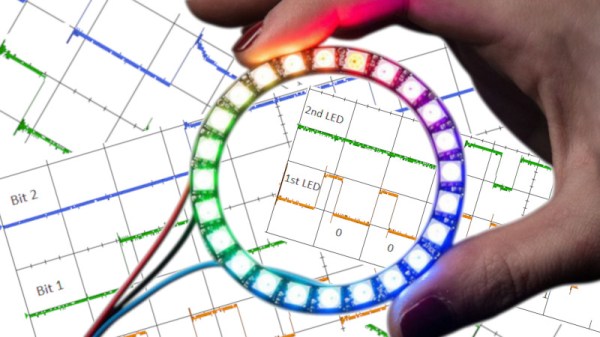
The trick is using the Raspberry Pi’s little-documented Secondary Memory Interface. The SMI hardware allows the Pi to shift out data to 8 or 16 I/O pins in parallel using direct memory access (DMA), with fast and accurate timing. This makes it perfect for generating signals such as those used by WS2812B LEDs, also known as NeoPixels.

With [Jeremy]’s code and the right supporting hardware, it’s possible to run up to 16 LED strips of arbitrary length from the Raspberry Pi. [Jeremy] does a great job outlining how it all works, covering everything from the data format used by WS2812B LEDs to the way cache needs to be handled to avoid garbled data. The hack works on all Pis, from the humble Pi Zero to the powerful Pi 4. Thanks to using DMA, the technique doesn’t overload the CPU, so performance should be good across the board.

Of course, there are other ways to drive a ton of LEDs; we’ve seen 20,000 running on an ESP32, for example.

[Thanks to Petiepooo for the tip!]

UVA Aims To Be More Than Just One Tool

Sometimes, a project is more than it seems on just the surface. The UVA project from [Said Alvarado Marin] is one such example. What started as an attempt to build a single useful tool became the beginning of a broader utility ecosystem.

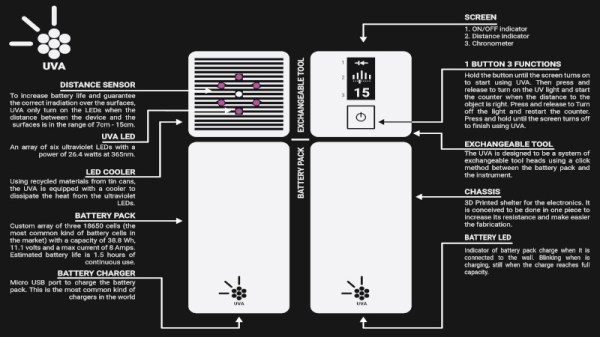
In and of itself, UVA is a project to build a powerful UV flashlight for curing UV-reactive glues. After some serious research, [Said] was able to find the right LEDs, outputting the right wavelengths, and begin the design of this simple tool. However, UVA quickly became a base upon which other tools could be developed. The design of UVA is such that the flashlight head fits onto an interchangable power base, consisting of three 18650 lithium polymer cells and a charging subsystem.

The aim of UVA is to encourage others to produce their own tools to work with this ecosystem. Designed around commonly available parts and DIY build methods like 3D printing, it’s intended to allow the average person to create the tools they need when and as they need them, on location. We look forward to seeing how the project progresses further as we head closer to the finale of the 2020 Hackaday Prize!


How To Shoot A Great Project Video

Creating projects is fun, but the real value, as far as the imaginary Internet points are concerned, is how well you show them off for the clout. Taking a few snaps is fine, but if you want to produce a quality video of your project, it pays to put some thought and effort into the process.

Telling The Story

Before setting out to document your project on video, think about what you’re trying to communicate to the viewer. Are you attempting to create a step-by-step guide on how to recreate what you’ve done, or are you simply trying to show off the awesome finished product? These are two very different types of video, and will require different content and delivery entirely. It also guides how you shoot your video.

If you want to show off your build process, you’ll need to shoot as you go. This can be time consuming, but also a great way to show the reality of what goes into your work. I always like it when people convey the pitfalls and successes they faced along the way, and get people involved in the story. It also means that you’ll end up shooting a lot of footage and you’ll spend plenty of time editing it all together. Continue reading “How To Shoot A Great Project Video” →

Educational Robot Teaches With Magnets And Servos

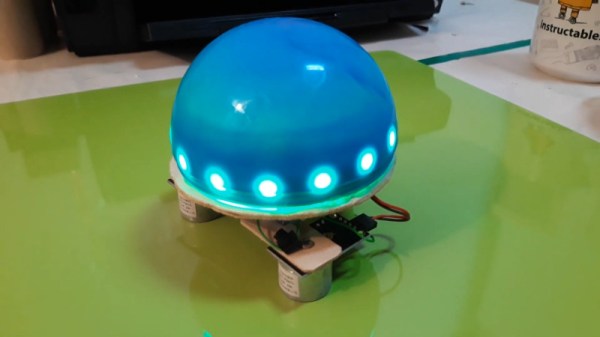
Teaching kids about robotics gives them valuable skills for their futures, and is generally pretty darn fun for all involved, too. However, teaching children often involves taking a bit of a different tack to educating college students, and more of a hand-holding approach is often needed. This robot project is an attempt to do just that, using some classic time-honored techniques and a unique method of propulsion.

The Magnetic Motion Robot, or MMR, is very much a DIY project. Built out of hand-cut plywood and assembled by lacing together individual modules, it’s a low-cost entry into the world of educational robotics. Rather than wheels or motors, it instead uses electromagnets mounted on servo arms to get around. Switching the magnets on and off, and moving the servos in time, allows the robot to pull itself along a ferromagnetic surface.

The robot is outfitted with buzzers and LEDs, and using these features creates further programming challenges for students. Naturally, there’s also a line-following program, which is a great way to begin educating kids about autonomous robot operations. It’s all run from an Arduino Nano, programmed with Makeblock’s special building-block programming software.

While its DIY nature makes assembly a little more involved than the average off-the-shelf kit, it does present its own learning opportunities such as soldering and the integration of hardware. Educational robots will continue to be popular and fun long into the future; we’re a particular fan of sumobots ourselves. Video after the break.

Continue reading “Educational Robot Teaches With Magnets And Servos” →

Light Tracking Robot Relies On LDRs

These days, when doing any sort of optical tracking, our mind immediately leaps towards sophisticated solutions. Raspberry Pis, high end cameras, and machine learning toolchains all come to mind. Of course, if your goals are simpler, you needn’t complicate the issue. PHIL is a light tracking robot who is perfectly happy to do it the old-school way.

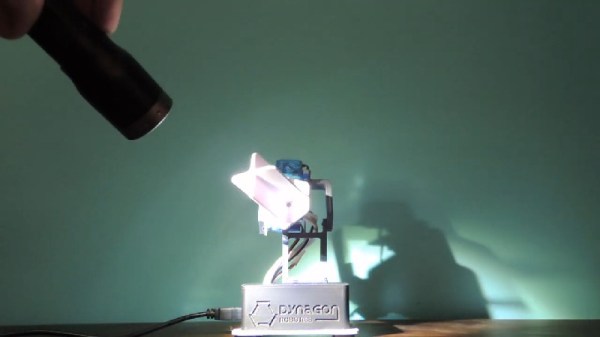
PHIL consists of an Arduino Uno running a twin-servo motion platform, providing the sensor head with pan and tilt functionality. The sensor head itself consists of a 3D-printed cruciform-section shroud that mounts four light-dependent resistors in individual sections. The shroud helps block light to the off-angle sensors, giving a stronger difference between those exposed to the light directly and those on the dark side. This makes for a stronger difference signal, so when the Arduino reads the sensors, it’s much clearer which way PHIL should point the sensor head to follow the light.

The builder, [Sean O’Donovan], notes that PHIL was built with no practical purpose in mind, and is simply a cool project. We certainly agree, and it’s important to note that skills picked up on a project like this will invariably come in handy down the track. Such techniques can be highly useful for tracking the sun, for example. Video after the break.

Continue reading “Light Tracking Robot Relies On LDRs” →