Old Wireless Switches Join The Internet Of Things

Just about any appliance comes in an internet enabled version nowadays. However, even the oldest gear can be switched on and off with an Internet connected power socket. [Bill] is in the process of automating his home, and found some old radio controlled power sockets that badly needed to join the 21st Century. Hacking ensued.

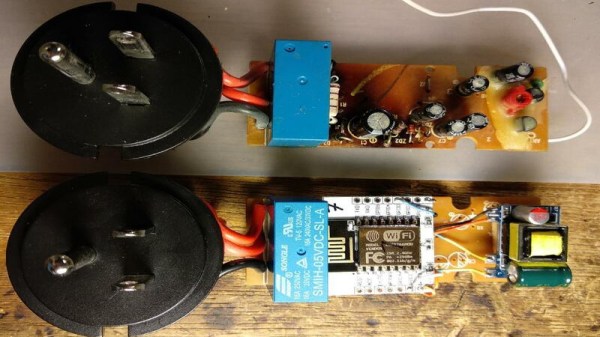
The first set of switches [Bill] came across were easy to work with. Eager to keep things as functional as possible, ESP8266s with Tasmota firmware were wedged into the enclosures. With a bit of circuit sleuthing, [Bill] was able to set up the switches to respond to commands from both the ESP8266 as well as the original push buttons and radio remote.

[Bill] later came across some black switches, which were not up to his standards. These switches were gutted entirely, being used only for their mains plug and enclosure. The relays inside were replaced with 5V versions which were easier to trigger from the ESP8266’s outputs.

[Bill[ readily admits that the cost benefits over buying off-the-shelf Sonoff modules don’t really add up, but good hackers rarely let such concerns get in the way of a fun project. Around these parts, we see plenty of hacks to automate your house – like this zero-intrusion light switch mod. Happy hacking!
3D Printing A Combination Lock

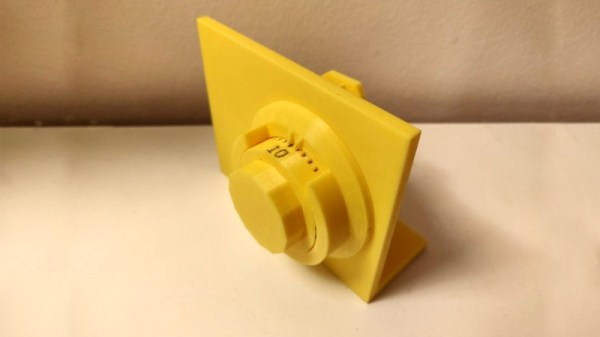
Combination locks! They’re great if you’re skilled at remembering arbitrary strings of numbers, and have a dramatic flair that’s made them a famous part of many a heist movie. They come in a wide variety of styles, and are vulnerable to a different set of attacks than the more typical pin-tumbler locks used on a household basis. If you fancy tinkering with a combination lock, why not 3D print one yourself?

It goes without saying that any lock you 3D print is going to have issues with strength. Such a lock should not be used to protect anything of real value, but it could be handy to prevent the kids getting at the Halloween candy you’re saving for October.

Regardless, 3D printing and assembling your own combination lock is a great way to learn about how they work. It’s a fun project that is also much easier than sourcing and disassembling the real thing. For a greater understanding of the underlying mechanism, this video should make the basic operation clear.

That’s not all 3D printing can offer to the locksport community, of course. You can always print your own keys, too. Video after the break. Continue reading “3D Printing A Combination Lock” →

An FPGA Drives This Antique LCD Screen

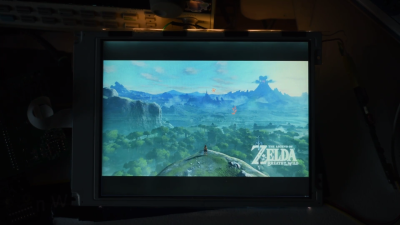
If you’re reading this article on a desktop or laptop computer, you’re probably staring at millions of pixels on a TFT LCD display. TFT became a dominant technology due to its picture quality and fast response times, but it’s not the only way to build an LCD. There are cheaper technologies, such as STN and its color variant, CSTN. They’re rarely used nowadays, but [Wenting Zhang] had one lying around and wanted to take a crack at driving it.

Still scenes aren’t bad, but motion blur is readily apparent on any moving content.

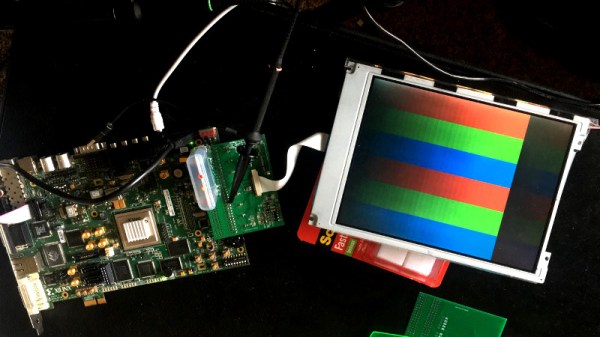
The screen in question came courtesy of a 20th century laptop. It’s a Hitachi SX21V001-Z4, with a resolution of 640×480 pixels. Driver boards for CSTN screens were once readily available, however now such things are difficult to come by.

[Wenting] instead grabbed an FPGA and got to work. Driving displays can be taxing for small microcontrollers, so an FPGA is always a great choice when working on such projects. They’re easily capable of generating whatever weird and wacky signals are required, and can generate many such signals in parallel without breaking a sweat.

[Wenting] successfully got the screen up and running, and hooked up to a VGA input. Image quality is surprisingly passable for still images, though things absolutely go to pieces when motion is introduced. [Wenting]’s demo shows off the screen playing Breath of the Wild, and it’s a great showcase of how far technology has come since the mid-90s.

Driving strange LCDs is a hacker rite of passage, and we see plenty of efforts around these parts. Video after the break.

Continue reading “An FPGA Drives This Antique LCD Screen” →

Cortex M0 Becomes Platform-Game Platform

The Arduino Uno is an incredibly popular microcontroller platform. By virtue of being simple to understand, and having just enough processing power to be dangerous, it’s won fans the world over. In recent times, there have been efforts to replace it with something more powerful. The Arduino Zero is just one such device attempting to take the crown, and [Nicola Wrachien] decided to try game development on the platform.

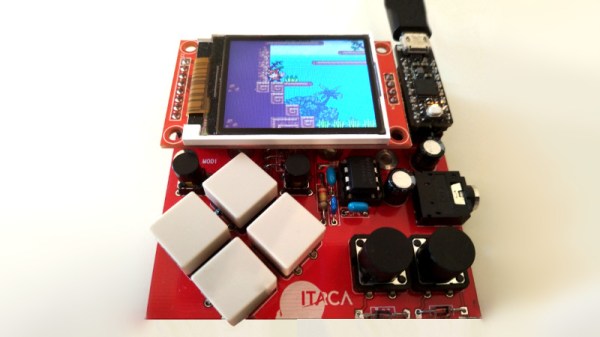
[Nicola] chose to use the uChip, which is a remix of the Arduino Zero into a smaller form factor. This was combined with a 160×128 TFT display and a handful of buttons for control. The uChip module, along with the TFT are fitted to [Nicola]’s custom PCB which ties everything together.

By overclocking the SPI port to 24 MHz, [Nicola] is able to run a basic 2D platformer in excess of 50 frames per second. The frame rate is capped at a round 40 fps to keep things smooth and stable, and the results are impressive. Gameplay is fluid and responsive, and the screen looks vibrant with 16 bits per pixel providing plenty of colors to play with.

We love to see game systems hewn out of raw microcontrollers and displays. [Nicola]’s work goes to show that with a little tinkering, significant performance improvements are yours for the taking. For similarly impressive DIY handheld hacks, check out Star Fox on the Arduboy. Video after the break.

Continue reading “Cortex M0 Becomes Platform-Game Platform” →

Mining Bitcoin On The ESP32 For Fun, Definitely Not Profit

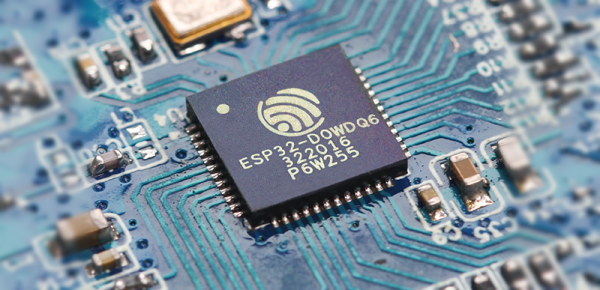
Bitcoin’s great, if you sold at the end of 2017. If you’re still holding, your opinion might be a little more sour. The cost to compete in the great hashing race continues to rise while cryptocurrency values remain underwhelming. While getting involved at the top end is prohibitively expensive, you can still have some fun with the basic concepts – as [Jake] did, by calculating Bitcoin hashes on the ESP32.

It’s a project that is very much done for fun, rather than profit. [Jake] notes that even maxing out both cores, it would take 31 billion years to mine one block at current difficulty levels. Regardless, the underlying maths is nothing too crazy. Double-hashing the right data with the SHA256 algorithm is all that’s required, a task that is well within the ESP32’s capabilities. There’s hardware acceleration available, too – though this is weirdly slower than doing it in software.

Overall, you’re not going to get rich hashing Bitcoin on a cheap microcontroller platform. You might just learn something useful, though. If this isn’t weird enough though, you could always try the same thing on a 1970s Xerox Alto. 


FPGA NES Looks Sharp On Perfboard

FPGAs are wonderful things, packed with logic cells that can be reconfigured as your heart desires. They excel at signal processing, anything requiring speed, and recreating vintage hardware. In that vein, [Jon Thomasson] decided to bring back the original Nintendo Entertainment System, in perfboard form.

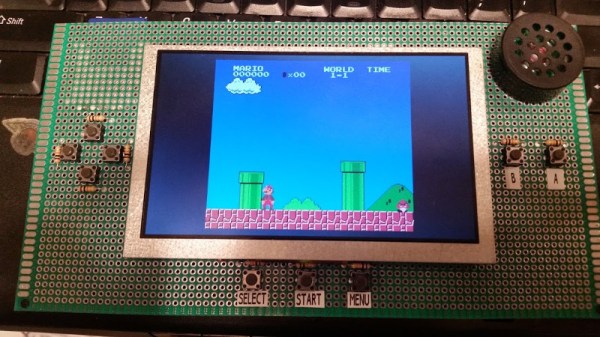
The build uses a Spartan 6 from Xilinx, which [Jon] uses in the form of his own development board design. The NES core is courtesy of code by [Brian Bennett], sourced from Github. Games are loaded from an SD card by a Parallax Propeller, which passes the data to the FPGA over a serial connection. Display is on a sharp 800×480 LCD, with the 4:3 video output of the NES being displayed in a pillarboxed fashion.

The project is assembled on perfboard, with a pleasing handheld formfactor. Control is via tactile pushbuttons in the classic NES layout. Current draw is approximately 400 mA, giving a runtime of around 5 hours when running off four AA batteries.

We’ve seen the venerable NES implemented on FPGA platforms before. As development boards get cheaper and devices get more capable, expect to see ever more complex systems being implemented. Video after the break.

Continue reading “FPGA NES Looks Sharp On Perfboard” →

How To Interface Sega Controllers, And Make Them Wireless

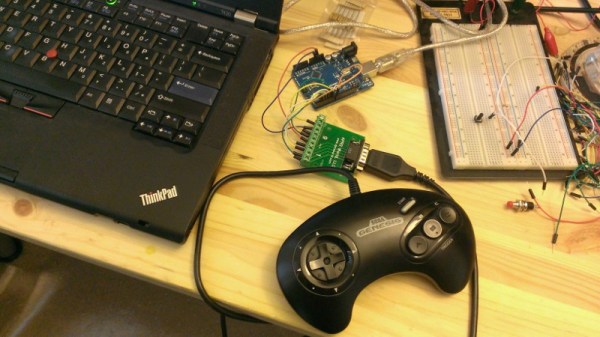
The Sega Genesis, or Mega Drive as it was known outside North America, was a popular console for the simple fact that Sega did what Nintendidn’t. Anachronistic marketing jokes aside, it brought fast scrolling 16-bit games to a home console platform and won many fans over the years. You may find yourself wanting to interface with the old controller hardware, and in that case, [Jon Thysell] is here to help.

[Jon] has done the work required to understand the Sega controller interface, and has shared his work on Github. The interface is an interesting one, and varies depending on the exact console and controller hardware used. The original Master System, with its D-pad and two buttons, simply uses six pins for the six switches on the controller. The 3-button Genesis pad gets a little more advanced, before things get further complicated with the state-machine-esque 6-button pad setup.

[Jon] helpfully breaks down the various interfaces, and makes it possible to interface them with Arduinos relatively easily. Sharing such work allows others to stand on the shoulders of giants and build their own projects. This nets us work such as [Danilo]’s wireless Genesis controller build. By combining the knowledge of the Sega protocol with a few off-the-shelf Arduinos and Bluetooth parts, it makes whipping up a wireless controller easy.

In this day and age, most console controllers can be readily interfaced with a PC with a variety of simple solutions – usually USB. You might feel like trying something harder though, for instance interfacing modern Nintendo controllers to a C64. Video after the break.

Continue reading “How To Interface Sega Controllers, And Make Them Wireless” →