As far as light fittings go, store bought is fine, but it’s hard to beat something you’ve built yourself from the ground up. [Heliox] demonstrates this well, with a 3D-printed workshop lamp that looks the business and is functional, too.
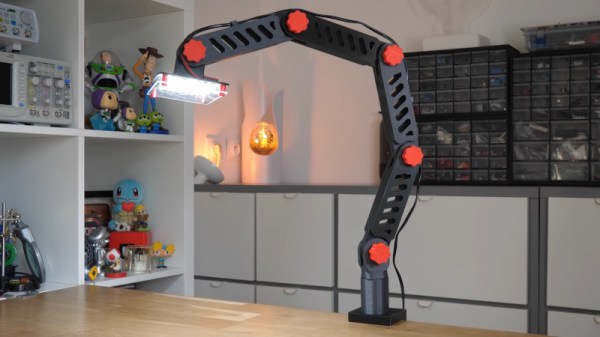
The lamp has plenty of neat design touches that speak to [Heliox]’s experience in the 3D printed arts. The articulating arms are modular, and feature integrated cable guides. The lamp base features nuts inserted mid-print for easy assembly, and the swivel is actually a two-piece mechanism printed as a single assembly. The table clamp uses a large screw, and the benefit of 3D printing means its easy to customise to suit any individual table. Using black and orange filaments gives the lamp a proper industrial look, and the bright LED strips are perfect for illuminating a bench for fine detailed work.
It’s a great addition to [Heliox]’s workspace, and the tall articulated design means it can cast light without getting in the way of what you’re doing. We’ve featured her work before, too – like this glorious infinity cube. Video after the break.
Continue reading “3D Printed Workshop Lamp Uses A Few Neat Tricks”