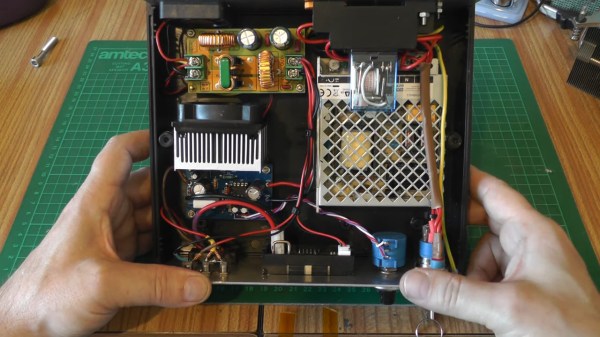
The laser driver's internals, showing the custom PCB, the PSU, connectors and the interlocks.

Laser Driver Design Keeps Safety First

[Les] from [Les’ Lab] has designed a driver for laser diodes up to 10 watts, and decided to show us how it operates, tells us what we should keep in mind when designing such a driver, and talks about laser safety in general. This design is an adjustable current regulator based on the LM350A, able to provide up to 10 watts of power at about 2 volts – which is what his diode needs. Such obscure requirements aren’t easily fulfilled by commonly available PSUs, which is why a custom design was called for.

He tells us how he approached improving stability of the current regulation circuit, the PCB design requirements, and planning user interface for such a driver. However, that’s just part of the battle – regulating the current properly is important, but reducing the potential for accidental injuries even more so. Thus, he talks extensively about designing the driver circuit with safety in mind – using various kinds of interlocks, like a latching relay circuit to prevent it from powering up as soon as power is applied.

Continue reading “Laser Driver Design Keeps Safety First”

This Unique Flip-Flop Uses Chemistry And Lasers

One of the first logic circuits most of us learn about is the humble flip-flop. They’re easy enough to build with just a couple of NOR or NAND gates, and even building one up from discrete components isn’t too much of a chore. But building a flip-flop from chemicals and lasers is another thing entirely.

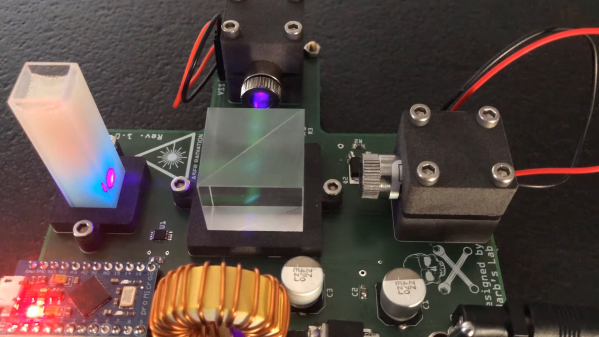
That’s the path [Markus Bindhammer] took for his photochromic molecular switch. We suspect this is less of an attempt at a practical optical logic component and more of a demonstration project, but either way, it’s pretty cool. Photochromism is the property by which molecules reversibly rearrange themselves and change color upon exposure to light, the most common example being glass that darkens automatically in the sun. This principle can be used to create an optical flip-flop, which [Markus] refers to as an “RS” type but we’re pretty sure he means “SR.”

The electronics for this are pretty simple, with two laser modules and their drivers, a power supply, and an Arduino to run everything. The optics are straightforward as well — a beam splitter that directs the beams from each laser onto the target, which is a glass cuvette filled with a clear epoxy resin mixed with a photochromic chemical. [Markus] chose spiropyran as the pigment, which when bathed in UV light undergoes an intramolecular carbon-oxygen bond breakage that turns it into the dark blue pigment merocyanine. Hitting the spot with a red laser or heating the cuvette causes the C-O bond to reform, fading the blue spot.

The video below shows the intensely blue dot spot developing under UV light and rapidly fading thanks to just the ambient temperature. To make the effect last longer, [Markus] cools the target with a spritz from a CO2 cartridge. We imagine other photochromic chemicals could also be employed here, as could some kind of photometric sensor to read the current state of the flip-flop. Even as it is, though, this is an interesting way to put chemistry and optics to work.

Continue reading “This Unique Flip-Flop Uses Chemistry And Lasers”

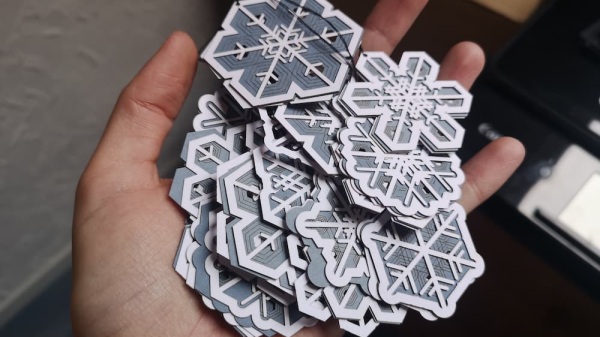
A persons handing holding a pile of generative, laser cut snowflake ornaments

Laser-Cutting A Flurry Of Generative Snowflakes

It’s the holiday season, and what better way to celebrate than to carve out some generative snowflakes on your laser cutter? [Bleeptrack] has developed a web-based tool that creates generative snowflake ornaments which can be exported to SVG files ready-made for laser or vinyl cutting.

True to their namesake, each generated snowflake ornament is (very likely to be) unique, with multiple layers created that can be stacked on top of each other. [Bleeptrack] has showcased a few realizations, using semitransparent paper sandwiched between two top layer cutouts, made out of wood or cardboard.

The snowflakes are a great balance of minimal design while still being beautiful and rich in detail. They can be easily produced on any laser cutter or vinyl cutter that you might have handy. Source code is available on GitHub for those wanting to dive into the details of the web tool. Cutting one of your own would make a perfect addition to a Neodriver ornament or a tiny DOOM playing ornament. Video after the break!

Continue reading “Laser-Cutting A Flurry Of Generative Snowflakes”

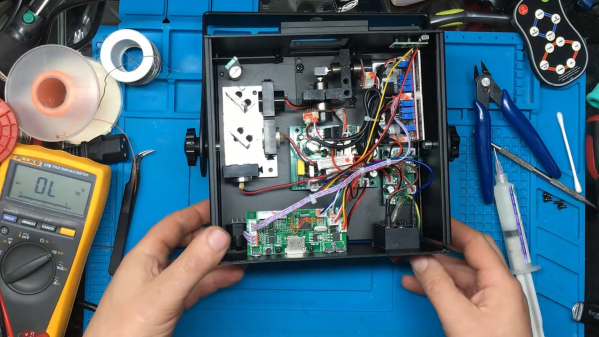
An RGB laser projector opened up on a workbench

Laser Projector Needs Hardware Hack After Software Mod

You probably recognize that dreadful feeling when you reboot a gadget after updating its firmware, only to be greeted by a blank screen and an unresponsive device. This apparently happened to the previous owner of a bricked RGB laser projector that [Buy It Fix It] got his hands on: it briefly flashed its laser on power-up but otherwise remained completely dead.

A thorough inspection of the major components didn’t reveal any physical damage, so the issue had to be in software. [Buy It Fix It] managed to connect his Segger J-link programmer to the STM32 main processor and downloaded the contents of its firmware, only to find the remains of a PDF file which seemed to have been accidentally flashed into the chip’s program space. Fixing the device should then just be a matter of restoring the proper firmware, but [Buy It Fix It] wasn’t able to find a copy of it anywhere.

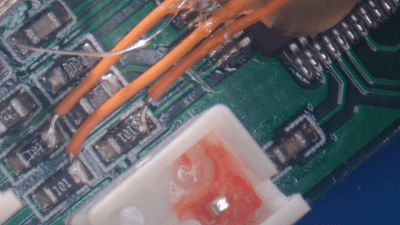
A PCB with a few mod wires on itWhat he did find was Maximus64’s GitHub repository that contained a software mod for a different projector model, as well as its original firmware. Flashing that version didn’t fix [Buy It Fix It]’s projector either, although it did now start to actuate its galvos.

A bit of reverse engineering revealed that the two projectors were very similar from a hardware point of view, but had their laser drivers hooked up to different I/O pins: simply cutting the board traces and soldering some wires to re-route the signals was enough to bring the projector back into a working state.

Having to modify hardware in order to make it fit a piece of software is unfortunate, but sometimes you just have to make do with what you’ve got. If you’ve got no firmware to begin with, then you might even have to write your own from scratch.

Continue reading “Laser Projector Needs Hardware Hack After Software Mod”

Laser Projector Relies On Steppers Rather Than Galvanometers

Laser light shows have always been real crowd-pleasers. There’s just something about the frenetic movement of a single point of intensely bright light making fluid animations that really captures the imagination. Large-scale laser shows require a lot of gear, of course, but that doesn’t mean you can’t get in on the fun yourself using something like this homebrew X-Y laser projector.

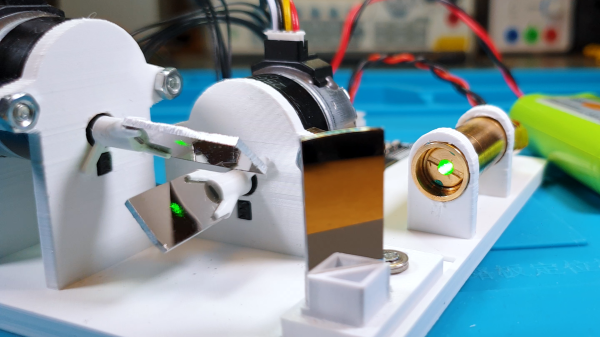
This is actually [Stanley]’s second pass at a stepper-based DIY projector; we featured his previous build back in 2016. This time around, he wanted to move beyond the “module mix-and-match” style of construction, so rather than use an Arduino and stepper shield, he rolled his own controller PCB to hold an ESP32 and a pair of STSPIN220 stepper drivers. The business end of the new version saw improvements, too — given that he was seeing unwanted softening of corners and curving of straight lines in the first projector’s images, he opted for smaller steppers holding smaller mirrors this time around. There’s also a new 3D printed chassis to hold everything, simplifying the build and keeping the two mirrors in better alignment.

The video below has the build details and some nice footage of the projector in action — it’s hard to go wrong with lasers and smoke. The performance seems pretty good, so the improvements seem to have paid off. And for those of you tapping out your “Should have used galvos” comments below, relax; [Stanley] says he’s thinking about ways to make his own galvanometers for the next version.

Continue reading “Laser Projector Relies On Steppers Rather Than Galvanometers”

Testing A Laser Cut Wrench VS A Forged Wrench

It is easy to not think much about common tools like screwdrivers and wrenches. But not for [Torque Test Channel]. The channel does a lot of testing of tools and in the video, below, they test a new wrench that is, oddly enough, laser cut instead of forged like the usual wrench.

You would expect a machined wrench to be weaker than a forged wrench. We were impressed, though, that there is so much difference between wrenches when you start making measurements.

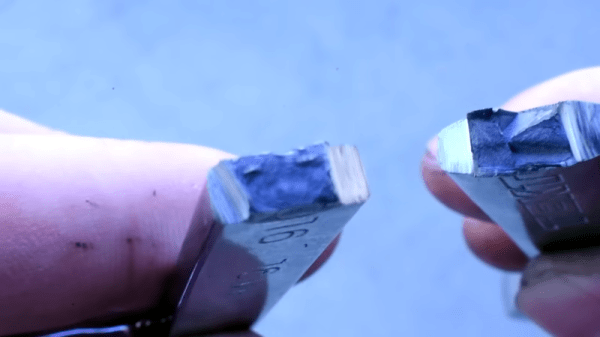
Speaking of measurements, we would like to see more details of the test setups shown both in the video and in some of the video clips included. We did enjoy seeing the examination of the internal grain structure of both wrenches.

Be forewarned. Watching this video is likely going to send you to the computer to buy some new wrenches, especially if you don’t have 30/60 head wrenches.

The real question is why laser cut a wrench? It doesn’t seem like it is actually better than the forged variant. It is more expensive, but the setup costs for forging are higher. Particularly for a tool made in the United States, forging is both expensive and it is difficult to find time on the limited number of large-scale forges left in the country.

Continue reading “Testing A Laser Cut Wrench VS A Forged Wrench”

Collaborative Effort Gets Laser Galvos Talking G-Code

Everyone should know by now that we love to follow up on projects when they make progress. It’s great to be able to celebrate accomplishments and see how a project has changed over time. But it’s especially great to highlight a project that not only progresses, but also gives back a little to the community.

That’s what we’re seeing with [Les Wright]’s continuing work with a second-hand laser engraver. It was only a few weeks ago that we featured his initial experiments with the eBay find, a powerful CO2 laser originally used for industrial marking applications. It originally looked like [Les] was going to have to settle for a nice teardown and harvesting a few parts, but the eleven-year-old tube and the marking head’s galvanometers actually turned out to be working just fine.

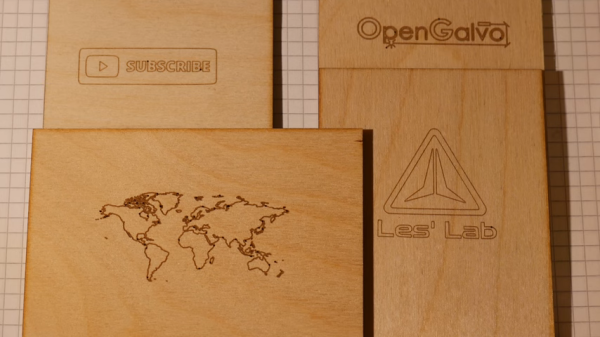
The current work, which is also featured in the video below, mainly concerns those galvos, specifically getting them working with G-code to turn the unit into a bit of an ad hoc laser engraver. Luckily, he stumbled upon the OPAL Open Galvo project on GitHub, which can turn G-code into the XY2-100 protocol used by his laser. While [Les] has nothing but praise for the software side of OPAL, he saw a hardware hole he could fill, and contributed his design for a PCB that hosts the Teensy the code runs on as well as the buffer and line driver needed to run the galvos and laser. The video shows the whole thing in use with simple designs on wood and acrylic, as well as interesting results on glass.

Of course, these were only tests — we’re sure [Les] would address the obvious safety concerns in a more complete engraver. But for now, we’ll just applaud the collaboration shown here and wait for more updates.

Continue reading “Collaborative Effort Gets Laser Galvos Talking G-Code”