How The WS2812 Is Made

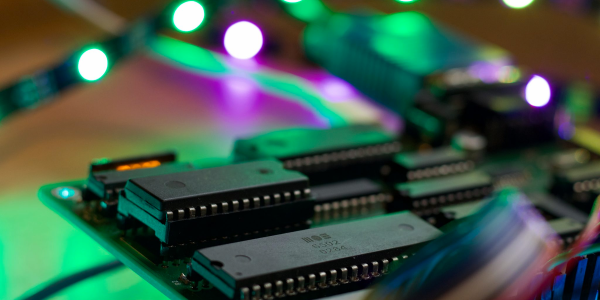
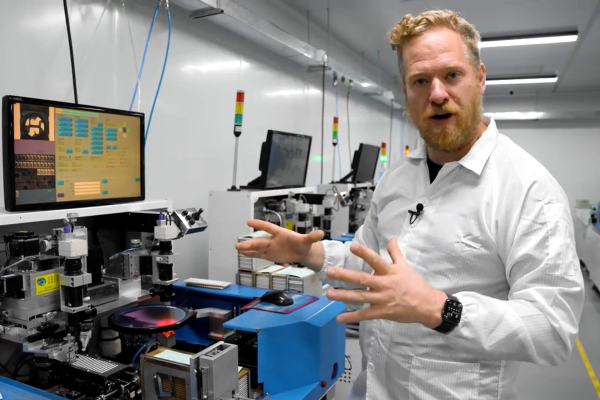
[Scotty Allen] of Strange Parts is no stranger to Chinese factory tours, but this one is now our favorite. He visits the font of all WS2812s, World Semi, and takes a good look at the machines that make two million LEDs per day.

The big deal with the WS2812s, and all of the similar addressable LEDs that have followed them, is that they have a logic chip inside the LED that enables all the magic. And that means die-bonding bare-die ICs into each blinky. Watching all of the machines pick, place, glue, and melt bond wire is pretty awesome. Don’t miss the demo of the tape-and-frame. And would you believe that they test each smart LED before they kick it out the door? There’s a machine that clocks some data in and reads it back out the other side.

Do we take the addressable LED for granted today? Probably. But if you watch this video, maybe you’ll at least know what goes into making one, and the next time you’re blinking all over the place, you’ll spill a little for the epoxy-squirting machine. After all, the WS2812 is the LED that prompted us to ask, three years ago, if we could live without one.
Continue reading “How The WS2812 Is Made”

A NeoPixel Punk Console

NeoPixel Punk Console Drives WS2812s Using 555 Timers

NeoPixels, a type of LED strip with individually addressable pixels, are a firm favorite among creators of intricate light effects. They are popular for their versatility and the ease with which you can daisy-chain them. Although the protocol to drive these little LEDs can be rather tricky to implement due to tight signal timing constraints.

However, [Adrian Studer] proved that driving WS2812-based LED strips like the NeoPixel series doesn’t necessarily require hand-optimized assembly code. In fact, it doesn’t require any code at all. He built the NeoPixel Punk Console, a device that creates a light show without even using a microcontroller. Just a handful of 555 timers and some 74HC series logic work together to produce pulses with approximately correct timings.

Operating the device is as easy as tweaking a few potentiometers, just like its namesake the Atari Punk Console. It’s quite a random process though, and it might be impossible to re-create a pattern that you liked. Also, the LEDs mostly light up in primary colors at full power, though [Adrian] plans to make an improved version that drives the red, green, and blue subpixels separately. But the fact that all of this is implemented by just a bunch of 555 timers makes it a rather impressive hack by any standard.

We’ve seen more than a few ways of driving NeoPixels or similar WS2812-based LED strips, though all of them use a microprocessor of some sort; you can fire up a classic 6502, use SPI and DMA on a PIC32, or just plug in a single ARM Cortex M0+.

Continue reading “NeoPixel Punk Console Drives WS2812s Using 555 Timers”

WS2812s On A 6502

We can still remember when the WS2812 LED first came into our consciousness, way back in the mists of time. The timing diagrams in the datasheet-of-questionable-veracity made it sound quite tricky, with tight timing tolerances and essentially a high-speed two-bit PWM data protocol at 500 kHz. It was a challenge to bit-bang with an ATtiny85 back then, but there’s no way something as old and crusty as an Apple II would be up to snuff, right?

[Anders Nielsen] took up the challenge of getting the venerable 6502 processor to drive Neopixels and won! After all, if the chip is good enough for Bender and the Terminator T-800, it should be able to blink some colored LEDs, right? The secret sauce is shift registers!

Specifically, [Anders] abuses the 74LS165 parallel-in, serial-out shift register for his dirty work. Instead of bit-banging the WS2812’s “long high is a 1, short high is a 0” signal directly, the first few bits of the shift register are hard-wired to VCC and the last few to GND.

The bits in the middle determine if the pulse shifted out is long or short, and they’re set by the 6502, through a 6522 VIA chip, just like the Apple II would have. Clocking the data out of the shift register handles the timing-critical stuff. Very clever!

Video below the break.

Continue reading “WS2812s On A 6502”

Virtual Racers Battle It Out On Portable WS2812 Track

Sure modern video games are impressive, but you certainly don’t need a 4K display or high speed Internet connection to have a good time. For a perfect example, take a look at this unique one-dimensional racing game put together by [mircemk]. This variation of [Gerardo Barbarov Rostan]’s Open LED Race project has been scaled down so it can be transported easily, though at least for now, you’ll still need to plug it into an external power supply.

The game is pretty straightforward. By rapidly pressing their respective buttons, players race their virtual vehicles on a linear “track” made of 60 WS2812 RGB LEDs. In the most basic of terms, the faster they press their button, the faster the red or green illuminated LED that represents their car moves.

But in practice, things are made a bit more interesting with the addition of simulated gravity for the “hills” the racers will encounter. The cars also have a bit of inertia, and will coast along even when you aren’t mashing the button. There are even optional engine sounds, though as with the visual representation of the cars, a certain degree of imagination is required for the desired effect.

The hardware requirements for this game are minimal, and can easily be adapted to what you have in the parts bin. Beyond the strip of WS2812 LEDs, all you really need is a microcontroller and two buttons. Here [mircemk] is using an Arduino Nano, but you could press pretty much any MCU into service. To make this version as portable as possible, the buttons are built right into the PVC sheet enclosure, but putting them in some wired remotes would make for a bit more comfortable gameplay.

We’ve covered several projects that have aimed to turn the humble string of RGB LEDs into an interactive electronic game over the years. As long as you’ve got an open mind, you can find a whole world hidden inside some blinking lights.

Continue reading “Virtual Racers Battle It Out On Portable WS2812 Track”

Cool WS2811 Trick Makes LED Art Installation Smooth

Normally, when a project calls for addressable LEDs, we just throw a strip of WS2812s and an Arduino together, cobble together some code from the examples in the FastLED library, and call it a day. We don’t put much thought into what’s going on under the hood, unless and until we run into an LED project that’s a little more challenging.

Inventor [Leo Fernekes] found himself in such a situation recently, when he pitched in on an LED art installation. The project called for rings of LED bars around the trunks of trees on a private estate. The physical size of the project and the aesthetic requirements created significant challenges, though. One of these was finding a way to control the LED bars, each of which draws about 100 mA and needs to be very smoothly dimmed. [Leo] looked at the WS2811 LED driver, but found that the low drive current and the 8-bit PWM output failed to tick either of those boxes.

[Leo] solved both problems by using two of the three PWM channels on the chip in concert — one to control the current and one to PWM the LED. The circuit he came up with is deceptively simple — just four transistors, a Schottky diode, and a bunch of passives. The other clever bit is the data interface between LED bars, which can be configured as either single-ended or differential. This allows the same interface to be used for the short distance between bars on a tree, and the longer runs between trees.

As usual, [Leo] does a great job of explaining his design and how it works, which we find very instructional. He did something similar when he managed to dim a non-dimmable LED fixture.

Continue reading “Cool WS2811 Trick Makes LED Art Installation Smooth”

Lots Of Blinky! ESP32 Drives 20,000 WS2812 LEDs

20,000 LEDs sounds like an amazing amount of blink. When we start to consider the process of putting together 20,000 of anything, and then controlling them all with a small piece of electronics the size of a postage stamp, we get a little bit dizzy. Continue reading “Lots Of Blinky! ESP32 Drives 20,000 WS2812 LEDs”

How-To: Mapping Server Hits With ESP8266 And WS2812

It has never been easier to build displays for custom data visualization than it is right now. I just finished one for my office — as a security researcher I wanted a physical map that will show me from where on the planet my server is being attacked. But the same fabrication techniques, hardware, and network resources can be put to work for just about any other purpose. If you’re new to hardware, this is an easy to follow guide. If you’re new to server-side code, maybe you’ll find it equally interesting.

I used an ESP8266 module with a small 128×32 pixel OLED display connected via an SSD1306 controller. The map itself doesn’t have to be very accurate, roughly knowing the country would suffice, as it was more a decorative piece than a functional one. It’s a good excuse to put the 5 meter WS2812B LED strip I had on the shelf to use.

The project itself can be roughly divided into 3 parts:

  1. Physical and hardware build
  2. ESP8266 firmware
  3. Server-side code

It’s a relatively simple build that one can do over a weekend. It mashes together LED strips, ESP8266 wifi, OLED displays, server-side code, python, geoip location, scapy, and so on… you know, fun stuff.

Continue reading “How-To: Mapping Server Hits With ESP8266 And WS2812”