Solar Powered Traffic Monitoring

[Marios Christoforou] recently undertook a Computer Engineering degree at the University of Cypress. His final year project involved implementing a solar-powered device to count vehicular traffic, while logging results to the cloud.

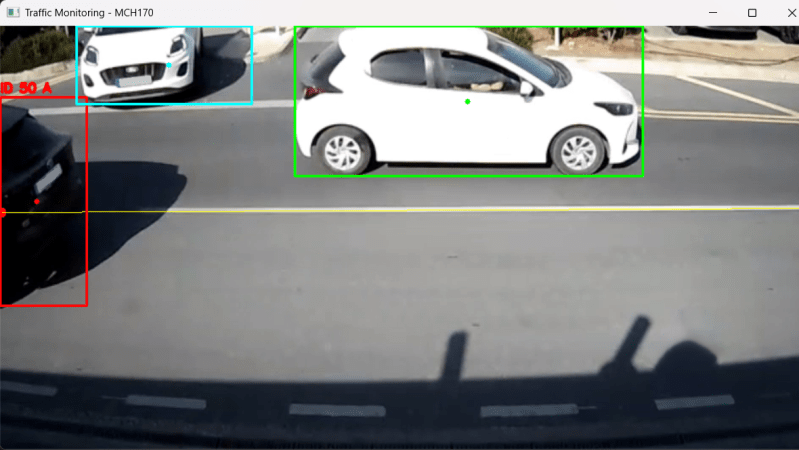
The project is built around a Raspberry Pi 5, specifically the version with 4 GB of RAM. It runs Raspberry Pi OS and is equipped with a basic webcam with 720p video output. The single-board computer runs off a 12 volt lead acid battery, which is charged via a 100 W solar panel hooked up to a basic charger module. Identifying vehicles in traffic is achieved with the YOLOv8 Nano machine vision model, which outputs bounding boxes around cars, trucks, buses, and motorcycles captured in the webcam feed. Software algorithms are used to ensure vehicles are only counted once as they pass through the camera’s field of view.

There’s plenty of detail on how the project was refined to meet initial goals. To make the most of the solar power available, [Marios] optimized the setup with an eye to performance and low power draw. To that end, the Raspberry Pi had Bluetooth, the PCIe slot, audio, and HDMI ports all disabled, while the CPU and GPU were both under-clocked for good measure. Software tweaks were also used, like running headless and dropping unimportant parts of the video frame for more efficiency.

We’ve featured other homebrew traffic monitors before. These days, though, it’s Flock cameras that seem to be making all the headlines in this area.
Reconstructing Device Firmware From SPI Reads

If you wanted to extract the firmware from a mystery device, you might pull the flash chip out of it and toss it into a reader. But if you only had one chance to get it right and couldn’t risk damaging the device in the process, physically removing the chip may seem much less attractive. Reading the chip in-circuit failed — because of course it did — so what does that leave?

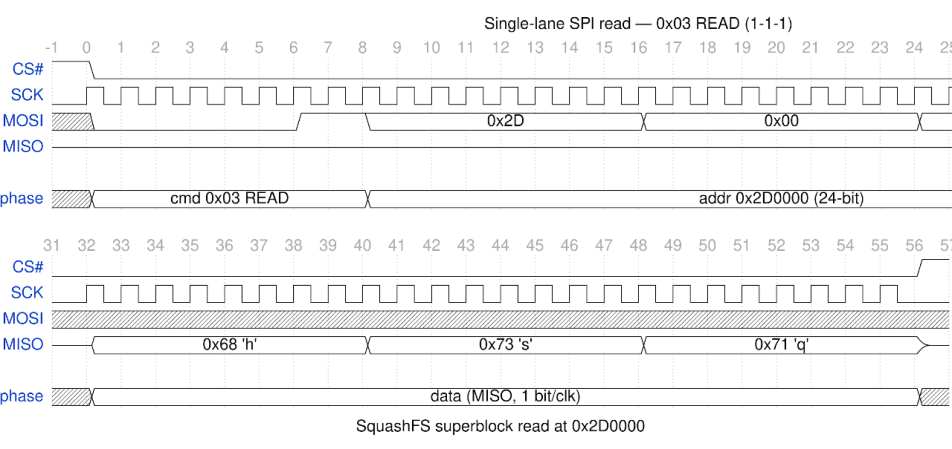
Well, if you follow the example of [Matthew “wrongbaud” Alt], the next tool you reach for might be a logic analyzer. In a recent write-up, [wrongbaud] explains the process of identifying, capturing, and ultimately decoding the SPI read operations used to load the firmware from a common W25Q-series flash chip at boot time. He notes it’s not a perfect solution, as in the end you’ll only be able to sniff out what the CPU actually reads, not necessarily the entire contents of the chip, but it’s a big step in the right direction if you’re reverse engineering something in the dark.

Continue reading “Reconstructing Device Firmware From SPI Reads”

Audio Spectrum Analyzer On An ESP32 Display Board

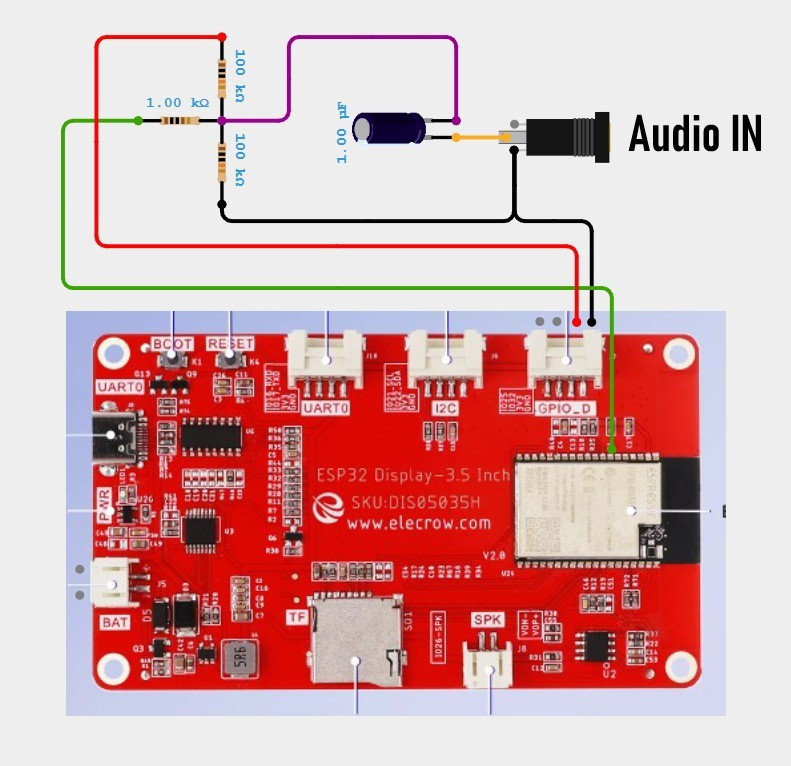
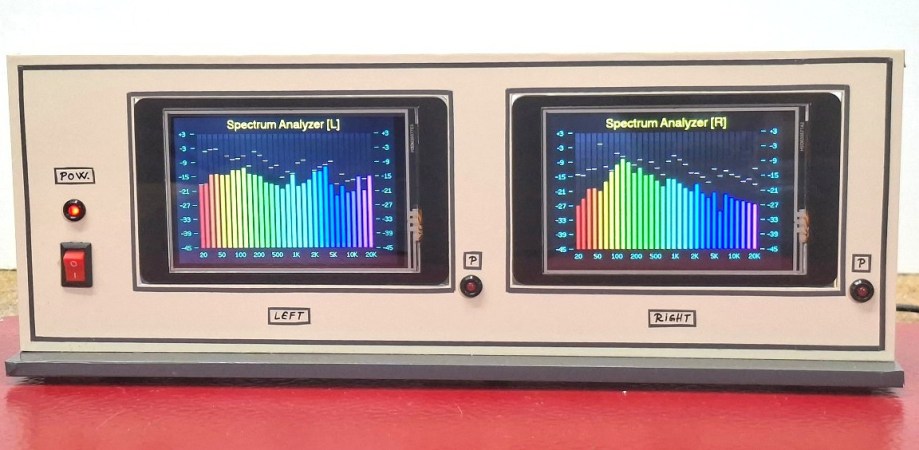
A slick spectrum analyzer used to be the kind of thing that would have been tricky to include in a DIY project, but as [Mirko “mircemk” Pavleski] demonstrates, a modern microcontroller like the ESP32 can handle the task with nothing more than a display panel and a few passives.

This particular example is built around the CrowPanel 3.5, which combines the powerful microcontroller with a 480×320 touch screen LCD. But there’s nothing inherently special about the CrowPanel, and you could get similar results with whatever display you might have kicking around the parts bin — albeit potentially with some code changes to account for the different hardware.

Beyond the microcontroller and the display, all you need to recreate what [mircemk] has done here is a handful of passives to tame the incoming analog audio signal so it can be piped into one of the analog-to-digital converter (ADC) pins on the MCU.

This project is fairly simple, but if you’re looking for something a little more advanced from [mircemk], don’t worry. The more daring home players can try their hand at recreating this high-voltage X-ray machine made from an old TV vacuum tube.

Continue reading “Audio Spectrum Analyzer On An ESP32 Display Board”

A Tiny Toy Synth For Smaller Computers

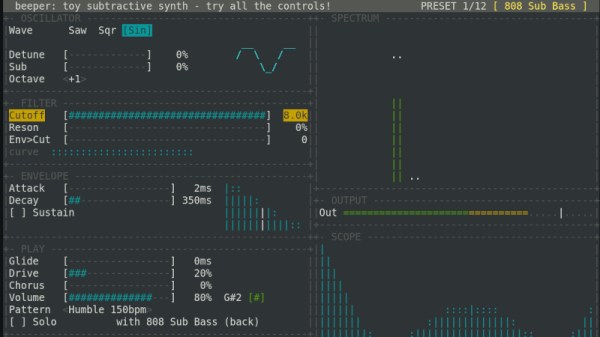
Even for the non-musical among us there is a lot of fun to be had with a simple synthesiser and sequencer, as the different controls can be manipulated to show their effect on the sound. Beeper, from [Valentyn Danylchuk] is just such a synth, and with only built-in loops, it has a focus on the instrument rather than the arrangement. What you get are a simple set of controls, from which you can modify the sound to your liking. We’ve been playing with it here, and it’s surprisingly addictive.

The target for Beeper is ESP32 microcontrollers, with builds for the S3 and P4, but there’s also a web version and one for the Mac. It’s operated using the arrow keys on your keyboard, and  the web one at least isn’t the most responsive piece of software. Below the break you can see (and hear) it on a Tanmatsu ESP32-P4 based handheld computer.

It’s certain that there are more accomplished synthesisers and sequencers to be found, but there’s still a place for one that’s simply a musical toy like this. Sometimes playing with something is more important than achieving something with it.

Continue reading “A Tiny Toy Synth For Smaller Computers”

Modern USB Controllers On Win98 (and Up)

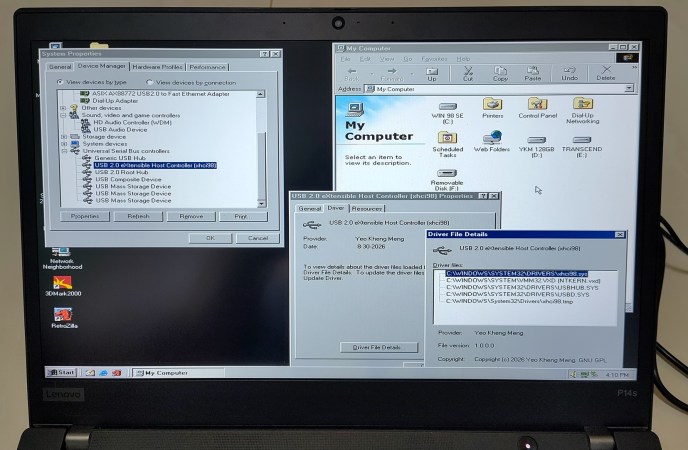
[Yeo Kheng Meng] has a problem: he likes Windows 98, but he also likes his 2020 ThinkPad, which only has an xHCI USB controller– you know, the kind needed for USB 3.0, something that post-dates Windows 98 by a full decade. Drivers? Finding none existed, he decided to do it himself, or at least guide the process of using  LLMs to produce drivers for Windows 98 and up.

Some of you just stopped reading, but can you blame him for making a demonic pact for this project? Driver development isn’t really a one-man show, especially as a part-time hobby project you’re not sure anyone else will ever use. If you do want to use it, you can find the code on GitHub.

It does work, though, he admits it might be buggy. Unlike purely vibe-coded projects, [Meng] intends to address bugs put forth in the repo, at least. If you want to know how he did it, check out the link to [Meng]’s blog– which is human-authored, we can tell– and the videos embedded therein. He demonstrates it working on a 2020 ThinkPad, which should be usable even with Windows 11, and another model from 2016– neither of which have any old-style USB ports. Older laptops might, while any desktop can just use a PCI card with a USB2.0 controller– or you can do like [Meng] did prior to this project, and use the PCI card via adapters. 

[Yeo Kheng Meng] evidently gets as much of a kick out of joining old and new as we do, like running DOS a modern ThinkPad X13, and running Slack on Windows 3.11 For Workgroups on a slightly-less-modern but still 21st Century Thinkpad T400.

Smelting Bog Ore As It Should Be Done

Sometimes along comes a hack with a personal angle, and in a video showing Irish bog ore smelting, we find an appropriate follow up to a Hackaday expedition back in 2019. [Alec Steele] joined Irish Bloomery Iron, for a weekend with a medieval blast furnace.

Our brush with bog ore came in a trip to Hack42 in Arnhem, the Netherlands, where a team of Dutch hackers built a furnace from firebricks in an attempt to do the same thing. The Dutch attempt ended with a lot of mixed slag and very little iron, and looking at how the Irish furnace was constructed we see some clues to their success. Their air injection using a perforated sheet of clay and the air blast injected to form a venturi is particularly interesting,as is the shape of the furnace.

The iron bloom is lifted out through the top of the furnace rather than being tapped as molten iron, and we’re treated to it being worked into a usable bar of iron. Having spent a day with our Dutch friends doing the same work only to have scraps of iron, we’re mightily impressed with the results from the Irish smelters. You can visit their website at www.irishbloomeryiron.com.

A Mini’s Infotainment System And The Joys Of Aftermarket Car Parts

Although [Arkandas] disclaims any interest in being a ‘car guy’, this is somewhat ironic in light of the sheer amount of modding he has performed on a range of cars over the years, a recent misadventure involving a BMW Mini F56’s infotainment system replacement and some light ECU reprogramming included. What happened exactly is covered in a detailed breakdown in a blog post.

The old iDrive infotainment system in the Mini. (Credit: Arkandas)

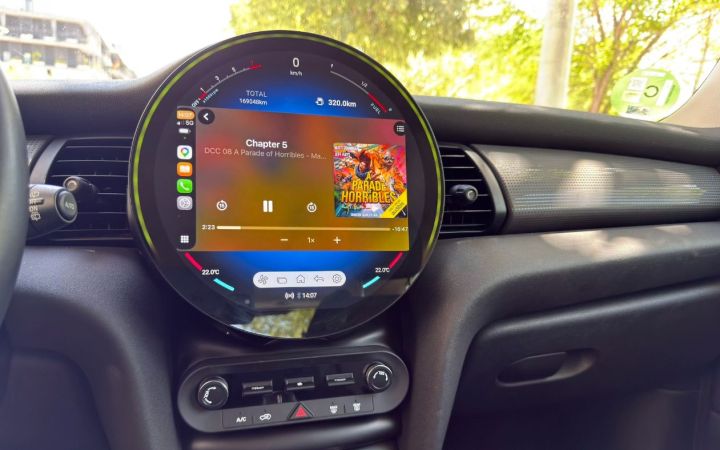
One of the aspects that [Arkandas] disliked about this car was its iDrive infotainment system, itself a stripped-down version of the full-fat infotainment system in ‘real’ BMW cars, with a small screen and awkward UX. The idea was to replace this with a more full-featured modern system.

Since the infotainment system does hook into the car’s CAN buses and other systems it has to be compatible, of course. This took some research before ultimately a fancy €700 aftermarket replacement was ordered from a Chinese seller.

Long story short, the device was mostly compatible aside from a connector wired wrongly and creating a short. This was fixed, but then the loosely fitted display toppled off during a test drive and broke, so a replacement screen was ordered. This screen arrived without requisite factory programming, so [Arkandas] embarked on a long reverse-engineering session.

Before he was able to extract firmware from the broken display and flash it onto the new display he was offered a brand-new replacement for the whole device, which he accepted in return for sending the old unit back. Although this still left him with a range of questions, at least the new infotainment looks pretty spiffy.

The worst part about the whole experience was just how much waiting and agonizing over poor after-sale support was involved, along with all the things that can go wrong and turn a fun afternoon of fitting shiny new parts into a months-long ordeal. Since modern cars are basically just a stack of computers on wheels, this ensures that even ‘not car guys’ will be doing a lot more of such fun car modding.