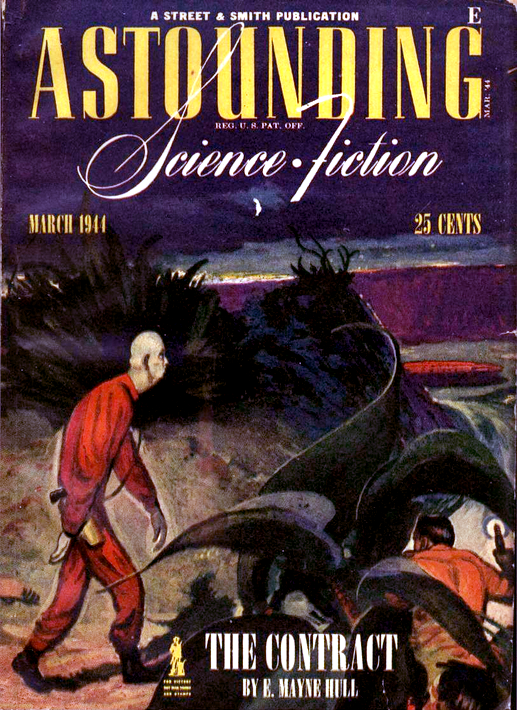
A Peek Inside A 747 Fuel Gauge

It isn’t that often that we civilians get the chance to closely examine the fantastic internals that make up the modern marvels of avionic engineering. Luckily for us, [Glen] got his hands on a 747 fuel gauge and tore it down for our benefit. Not only does he tear it down, but he also builds a controller to display values.

Unlike your typical automotive fuel gauge that reports the distance from the top of the tank to the fuel level, this gauge reports the number of pounds of fuel. The fact that the indicator pictured above can go all the way to 95,000 pounds of fuel hits home the sheer scale of the fuel tanks on a 747 compared to your Volvo. Of course, where this gets interesting is the teardown with the metal sleeve removed. A 400 HZ AC servo motor moves the pointer and counter through the gearing with the help of a feedback potentiometer. The resistance tolerance is only 3%, as there are adjustment knobs on the back. But the linearity spec is only 0.06%, putting this part in a different grade from most pots.

One of the indicators was in worse shape than the others, so [Glen] got to work tapping into the internals of the gauge to drive the motor directly. A custom AC power supply repurposed from another project provided power, and a Raspberry Pi Pico was the PID controller. For [Glen], it isn’t all roses. Unfortunately, a noisy spot around 22,500 prevents accurate placement around there.

The code is up on GitHub, and we love having a gauge on the desk to show whatever value we like. If you are curious about more 747 instruments, this retro control unit might interest you.

Continue reading “A Peek Inside A 747 Fuel Gauge”

Hyundai Is Doomed: Porting The 1993 Classic To A Hyundai Head Unit

In the natural order of the world, porting DOOM to any newly unlocked computing system is an absolute given. This a rule which [greenluigi1] understands all too well, leading to presumably the first Hyundai to be equipped with this all-time classic on its infotainment system. This follows hot on the trail of re-hacking said infotainment system and a gaggle of basic apps being developed for and run on said head unit (being the part of the infotainment system on the front dashboard). Although it is a Linux-based system, this doesn’t mean that you can just recompile DOOM for it, mostly because of the rather proprietary system environment.

To make life easy, [greenluigi1] picked doomgeneric as the version to port. The main selling point of this project is that it only requires the developer to implement five functions to support a new platform, which then ‘just’ left figuring out how to do this on a head unit. Two of these (DG_SleepMs() and DG_GetTicksMS()) could be copied verbatim from the X11/xlib port, but the remaining three required a bit of sleuthing.

Where things go sideways is with keeping the head unit’s Helix window manager happy, and stick to the limited ways a GUI application can be launched, including the way arguments are passed. For the PoC, it was decided to just hardcode these arguments and only register the game with Helix using an .appconf configuration file. When it came to drawing pretty graphics on the screen, this was decidedly easier since the system uses Qt5 and thus offers the usual ways to draw to a QPixmap, which in this case maps to the framebuffer.

After a few playful sessions with the head unit’s watchdog timer, [greenluigi1] found himself staring at a blank screen, despite everything appearing to work. This turned out to be due to the alpha channel value of 0 that was being set by default, along with the need for an explicit refresh of the QPixmap. Up popped DOOM, which left just the implementation of the controls.

In order to start the game, you have to literally buckle up, and the steering wheel plus media control buttons are your inputs, which makes for a creative way to play, and perhaps wear some bald spots onto your tires if you’re not careful. If you’d like to give it a shot on your own ride, you can get the project files on GitHub.

Continue reading “Hyundai Is Doomed: Porting The 1993 Classic To A Hyundai Head Unit”

A wristwatch based on a red PCB with seven-segment LCD screens

The Time Machine Mk. 8 Is A Sleek Smartwatch With Retro Styling

The primary purpose of a wristwatch is to tell the time, which pretty much any watch does perfectly fine. It’s in the aesthetics, as well as features other than time-telling, where a watchmaker can really make their product stand out from the rest. Watchmaker and electronic artist [Eric Min] focused on those two areas when he designed the Time Machine Mk.8, which combines exquisite design with simple, offline smartwatch functionality.

The heart of the watch is a Microchip ATSAMD21G18 low-power 32-bit microcontroller. [Eric] chose it for its high performance, ease of use and large number of integrated peripherals, a real-time clock being one of them. With the basic clock function thus taken care of, he then decided to add several useful sensors: a battery fuel gauge to keep an eye on the 40 mAh rechargeable lithium cell, a three-axis accelerometer to enable motion sensing and an environmental sensor to track temperature, humidity and pressure.

A faux 1980s magazine ad for a red PCB wristwatchThe various functions are operated using four pushbuttons along with a 16-step rotary encoder set in the middle. The overall design of the watch is inspired by Formula 1 steering wheels, as well as various sports cars and media franchises like Neon Genesis Evangelion and Akira. [Eric] considered a few different options for the display but eventually settled on two four-digit seven-segment LCDs, which fit nicely into the retro-futuristic aesthetic of the Mk.8. It’s so retro, in fact, that it almost makes [Eric]’s faux 1980s magazine ad look genuine.

All components neatly fit together on a dual-layer PCB, which is a true work of art in itself. From the lightning bolt on the front to the hidden Frank Sinatra lyrics, it definitely stands out from the crowd of ordinary LCD wristwatches. It’s also quite a step up from [Eric]’s previous watch design, the Time Machine Mk.IV.

Over the years we’ve seen several other examples of how a bare PCB, or even a stack of them, can become a beautiful wristwatch.

Modern Brownie Camera Talks SD And WiFi

If you’re at all into nostalgic cameras, you’ve certainly seen the old Brownie from Kodak. They were everywhere, and feature an iconic look. [JGJMatt] couldn’t help but notice that you could easily find old ones at a good price, but finding and developing No. 117 film these days can be challenging. But thanks to a little 3D printing, you can install an ESP32 camera inside and wind up with a modern but retro-stylish camera. The new old camera will work with a memory card or send data over WiFi.

The Brownie dates back to 1900 and cost, initially, one dollar. Of course, a dollar back then is worth about $35 now, but still not astronomical. After cleaning up and tuning up an old specimen, it was time to fire up the 3D printer.

There are also mods to the camera to let it accept an M12 lens. There are many lenses of that size you can choose from. There are a few other gotchas, like extending the camera cable, but it looks like you could readily reproduce this project if you wanted one of your very own.

We’ve seen old cameras converted before. Or, you can just start from scratch.

Siphoning Energy From Power Lines

The discovery and implementation of alternating current revolutionized the entire world little more than a century ago. Without it, we’d all have inefficient, small neighborhood power plants sending direct current in short, local circuits. Alternating current switches the direction of current many times a second, causing all kinds of magnetic field interactions that result in being able to send electricity extremely long distances without the resistive losses of a DC circuit. The major downside, though, is that AC circuits tend to have charging losses due to this back-and-forth motion, but this lost energy can actually be harvested with something like this custom-built transformer.

[Hyperspace Pilot] hand-wound this ferromagnetic-core transformer using almost two kilometers of 28-gauge magnet wire. The more loops of wire, the more the transformer will be able to couple with magnetic fields generated by the current flowing in other circuits. The other thing that it needs to do is resonate at a specific frequency, which is accomplished by using a small capacitor to tune the circuit to the mains frequency. With the tuning done, holding the circuit near his breaker panel with the dryer and air conditioning running generates around five volts. There’s not much that can be done with this other than hook up a small LED, since the current generated is also fairly low, but it’s an impressive proof of concept.

After some more testing, [Hyperspace Pilot] found that the total power draw of his transformer is only on the order of about 50 microwatts in an ideal setting where the neutral or ground wire wasn’t nearby, so it’s not the most economical way to steal electricity. On the other hand, it could still be useful for detecting current flow in a circuit without having to directly interact with it. And, it turns out that there are better ways of saving on your electricity bill provided you have a smart meter and the right kind of energy-saving appliances anyway.

Continue reading “Siphoning Energy From Power Lines”

A Nintendo 64 controller with a USB adapter

Play N64 Games The Right Way With This Classic Controller Adapter

Game consoles typically support a limited number of input devices, meaning that console games are often completely optimized for the default controller supplied with that platform. Nintendo’s tendency to completely reinvent their controllers pretty much every generation can therefore become a little irritating, especially when they also enable their newer consoles to play games from their back catalog. So when [Robson Couto] found that using the Switch’s Joy-Cons was a bit awkward for playing emulated Nintendo 64 games, he decided to figure out how to connect real N64 controllers to a Nintendo Switch.

While you can buy modern N64-style controllers for the Switch, even straight from Nintendo themselves, [Robson] thought it would be way more interesting to reuse an old controller and implement the translation step from scratch. In the video (embedded below) he takes a deep dive into all the timing details of the N64 controller protocol, which is basically a 1-wire setup, and explains how to use an STM32F411 BlackPill board to read out the controller’s buttons and joystick.

Next, he explores how to map the resulting data to the USB HID protocol used by the Switch. Most of the buttons have a clear one-on-one mapping, but since the “minus”, “capture” and “home” buttons are missing on the N64 controller, he chose to map these to button combinations unlikely to be used during regular gameplay. [Robson] also ran into the common issue of the analog joystick having a poorly-defined maximum range, for which he added a rudimentary auto-calibration feature.

Finally, he designed and 3D-printed a neat enclosure for his system with an N64 controller port on one side and a USB port on the other. By 3D-printing the whole thing he also avoided having to either source the non-standard connector or permanently modify his hardware. The end result of [Robson]’s project is an unobtrusive gadget that connects classic controllers to modern hardware – but of course, the reverse process is very much possible, too. If you want, you can even play N64 games with a mouse and keyboard.

Continue reading “Play N64 Games The Right Way With This Classic Controller Adapter”

2023 Hackaday Prize: The Primordial Soup’s On With This Modified Miller-Urey Experiment

It’s a pretty sure bet that anyone who survived high school biology has heard about the Miller-Urey experiment that supported the hypothesis that the chemistry of life could arise from Earth’s primordial atmosphere. It was literally “lightning in a bottle,” with a mix of gases like methane, ammonia, hydrogen, and water in a closed-loop glass apparatus and a pair of electrodes to provide a spark to simulate lightning lancing across the early prebiotic sky. [Miller] and [Urey] showed that amino acids, the building blocks of protein, could be cooked up under conditions that existed before life began.

Fast forward 70 years, and Miller-Urey is still relevant, perhaps more so as we’ve extended our reach into space and found places with conditions similar to those on early Earth. This modified version of Miller-Urey is a citizen science effort to update the classic experiment to keep up with those observations, plus perhaps just enjoy the fact that it’s possible to whip up the chemistry of life from practically nothing, right in your own garage. Continue reading “2023 Hackaday Prize: The Primordial Soup’s On With This Modified Miller-Urey Experiment”