PVC Pipe Turned Portable Bluetooth Speaker

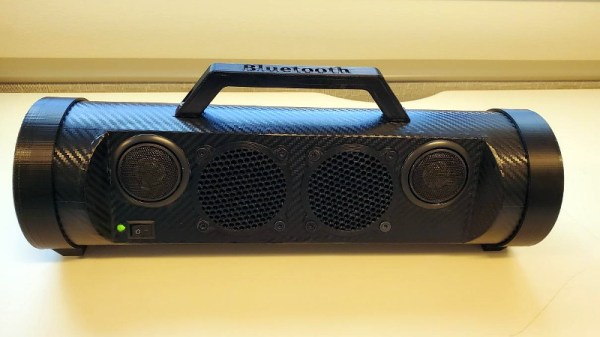
We’ve always felt that sections of PVC pipe from the home improvement store are a criminally underutilized construction material, and it looks like [Troy Proffitt] feels the same way. Rather than trying to entirely 3D print the enclosure for his recently completed portable Bluetooth speaker, he combined printed parts with a piece of four inch pipe from the Home Depot.

While using PVC pipe naturally means your final hardware will have a distinctly cylindrical look, it does provide compelling advantages over trying to print the entire thing. For one, printing an enclosure this large would have taken hours or potentially even days. But by limiting the printed parts to accessories like the face plate, handle, and caps, [Troy] reduced that time considerably. Of course, even if you’re not in a rush, it’s worth mentioning that a PVC pipe will be far stronger than anything your desktop FDM printer is likely to squirt out.

[Troy] provides links for all the hardware he used, such as the speakers, tweeters, and the Bluetooth audio board itself. The system is powered by an 1800 mAh 3S RC-style battery pack that he says lasts for hours, though he also links to a wall adapter that can be used if you don’t mind being tethered. Unfortunately it doesn’t look like he has any internal shots of the build, but given the relatively short parts list, we imagine it’s all fairly straightforward inside.

While this is certainly a respectable looking build considering it started life in the plumbing aisle, we have to admit that we’ve seen some portable Bluetooth speakers with fully 3D printed enclosures in the past that looked absolutely phenomenal. The tradeoff seems pretty clear: reuse existing materials to save time, print them if you don’t mind reinventing the wheel occasionally.

Perfecting A Bluetooth N64 Controller

Love it or hate it, the Nintendo 64 controller doesn’t seem to be going anywhere. Dedicated fans are still looking for ways to use the unique trilobed controller with modern systems, and they won’t be satisfied until they perfectly replicate the original experience. [Shyri Villar] has been working on perfecting a blend of original and modern hardware that looks very promising.

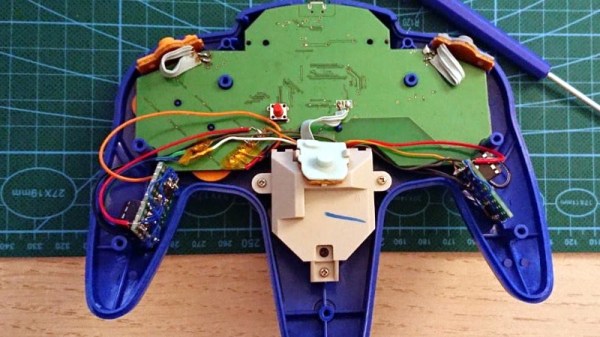
The project started when [Shyri] found that you could take the internals from a modern third party Bluetooth N64 controller made by 8BitDo and put them into the original controller’s case. This would give you the original buttons back, and overall a more authentic weight and feel. Unfortunately, this usually means dumping the original N64 joystick for the 8BitDo’s.

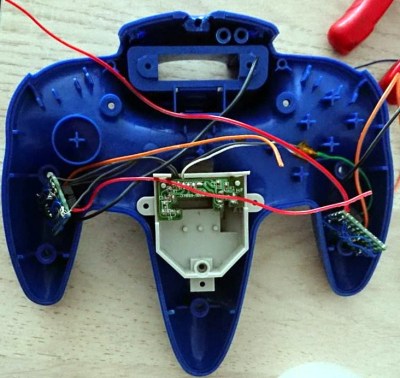
What [Shyri] wanted to do was install the 8BitDo PCB into an original N64 controller, but adapt Nintendo’s joystick to communicate with it. Unfortunately, since the original joystick used optical encoders and the 8BitDo version uses potentiometers, there’s something of a language gap.

To bridge the divide, both the X and Y dimensions of the joystick get their own PIC12F675 microcontroller and X9C103S digital potentiometer. The microcontrollers read the X and Y values from the original joystick’s encoders, and use the digital potentiometers to provide the 8BitDo with the expected analog input. Right now the electronics are held on two scraps of perfboard tucked into the side “wings” of the controller, but hopefully we’ll see a custom PCB in the future.

If you’re more interested in going back in time with your trusty N64 controller, then you might be interested in learning more about how one hacker managed to hook it up to the MSX.

Broken HP-48 Calculator Reborn As Bluetooth Keyboard

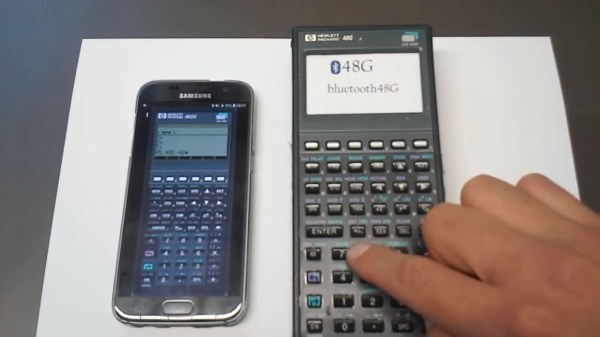
Considering their hardware specification, graphing calculators surely feel like an anachronism in 2019. There are plenty of apps and other software available for that nowadays, and despite all preaching by our teachers, we actually do carry calculators with us every day. On the other hand, never underestimate the power of muscle memory when using physical knobs and buttons instead of touch screen or mouse input. [epostkastl] combined the best of both worlds and turned his broken HP-48 into a Bluetooth LE keyboard to get the real feel with its emulated counterpart.

Initially implemented as USB device, [epostkastl] opted for a wireless version this time, and connected an nRF52 based Adafruit Feather board to the HP-48’s conveniently exposed button matrix pins. For the software emulation side, he uses the Emu48, an open source HP calculator emulator for Windows and Android. The great thing about Emu84 is that it supports fully customizable mappings of regular keyboard events to the emulated buttons, so you can easily map, say, the cosine button to the [C] key. The rest is straight forward: scanning the button matrix detects button presses, maps them to a key event, and sends it as a BLE HID event to the receiving side running Emu84.

As this turns [epostkastl]’s HP-48 essentially into a regular wireless keyboard in a compact package — albeit with a layout that outshines every QWERTY vs Dvorak debate. It can of course also find alternative use cases, for examples as media center remote control, or a shortcut keyboard. After all, we’ve seen the latter one built as stomp boxes and from finger training devices before, so why not a calculator?

Continue reading “Broken HP-48 Calculator Reborn As Bluetooth Keyboard”

Simple Bluetooth Car Audio From A Pi Zero

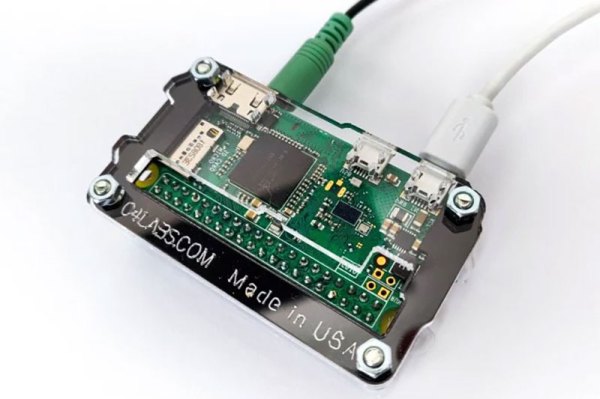
When [Sami Pietikäinen] realized that the Bluetooth built into his car didn’t support audio, he didn’t junk it and buy a Tesla. Instead, he decided to remedy the problem by building a small Bluetooth device that plugged into the Aux socket. To do this, he used a Raspberry Pi Zero with a pHAT DAC (Digital to Audio Converter). That’s perhaps using a sledgehammer to crack a walnut, but sometimes you work with what you have. The interesting part is to be found in what he did next: he used Yocto to optimize the device down to make it as simple and straightforward as possible.

Continue reading “Simple Bluetooth Car Audio From A Pi Zero”

New Bluetooth 5 Channel Hopping Reverse Engineered For Jamming And Hijacking

Bluetooth Low Energy (BLE) 5 has been around since 2016 with the most recent version 5.2 published just this year. There’s not much hardware out there that’s using the new hotness. That didn’t stop [Damien Cauquil] from picking apart BLE 5’s new frequency hopping techniques and updating his BtleJack tool to allow sniffing, jamming and hijacking hardware using the new protocol.

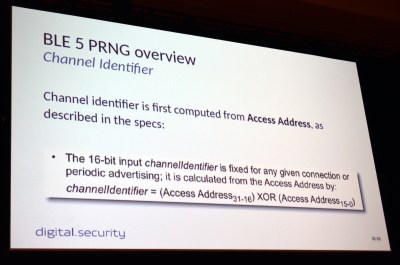
As you can imagine, the BLE standard a complicated beast and just one part of it is the topic here: the PRNG-based frequency hopping scheme that is vastly different from BLE 4.x and earlier. The new standard, called Channel Selection Algorithm (CSA) #2 — uses 65535 possible channels, compared to just 37 channels used by its predecessor. Paired devices agree to follow a randomized list of all possible channels in sequence so that they remain in synchronization between hops. This was put in place to help avoid collisions, making it possible for many more BLE devices to operate in close proximity. This is important to note since it quickly becomes obvious that it’s not a robust security measure by any means.

To begin channel hopping the two devices must first agree on an order in which to hop, ensuring they’ll meet one another after each leap. To do so they both run the same 32-bit seed number through a PRNG algorithm, generating a list that will then be followed exactly in order. But it turns out this is not very difficult to figure out. All that’s needed is the access address whose top 16-bits are publicly available if you’re already sniffing packets, and the bottom 16-bits is the counter that increments the hop address list.

If you want to jam or hijack BLE 5 communication you need to establish which “randomized” channel list is being used, and the value of the counter that serves as an index to this list. To do so, [Damien] sniffs packets on two different channels. These channels will be used over and over again as it loops through the channel list, so calculating how much time occurs between each channel indicates how far apart these channels are on the list.

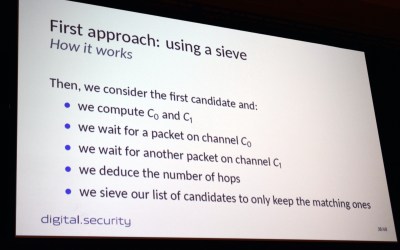
In practice, [Damien] first implemented a sieve (the same concept as the Sieve of Eratosthenes for finding primes) that starts with a list of all possibilities and removes those that don’t contain a matching timing between the two channels. Keep doing this, and eventually, you’ll whittle your list down to one possible channel order.

This certainly worked, but there were timing issues that sometimes meant you could learn the seed but couldn’t then sync with it after the fact. His second approach uses pattern matching. By measuring hops on 11 consecutive channels, he’s able to synchronize with target devices in a minute or less. From there, jamming or hijacking methods come into play. The randomization of this scheme is really marginal. A more robust technique would have used an internal state in both devices to generate the next hopping channel. This would have been much more difficult for an attacker to figure out. From the device perspective, CSA #2 takes very little computation power which is key for power-sipping IoT devices most often using BLE.

As mentioned before, [Damien] had trouble finding any hardware in the wild using the BLE 5 standard. His proof of concept is built on a pair of nRF52840 development boards. Because it needs more testing, the code hasn’t been merged into the main version of BtleJack, but you can still get it right now by heading over to BtleJack repo on GitHub.

The Bluetooth LCD Sniffer You Didn’t Know You Needed

At one time or another, we’ve all suffered through working with a piece of equipment that didn’t feature a way to export its data to another device. Whether it was just too old to offer such niceties, or the manufacturer locked the capability behind some upgrade, the pain of staring at digits ticking over on a glowing LCD display and wishing there was a practical way to scrape what our eyes were seeing is well known to hackers.

That was precisely the inspiration for DoMSnif, the dot matrix LCD sniffer that [Blecky] has been working on. Originally the project started as a way to record the temperature of his BRTRO-420 reflow oven, but realizing that such a device could have widespread appeal to other hardware hackers, he’s rightfully decided to enter it into the 2019 Hackaday Prize. If perfected, it could be an excellent way to bolt data capture capabilities to your older devices.

The first phase of this project was figuring out how to capture and parse the signals going into the device’s KS0108 LCD. Getting the data was certainly easy enough, he just had to hook a logic analyzer up between the display and the main board of the device. Of course, figuring out what it all means is a different story.

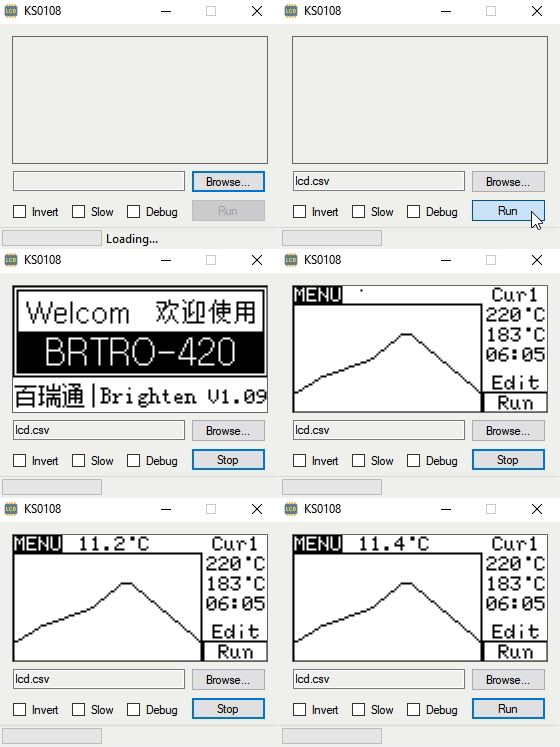
After running the oven for a bit with the analyzer recording, [Blecky] had more than enough data to get started on decoding it. Luckily, the layout of this fairly common 128×64 pixel display is well documented and easy enough to understand. With a little work, he was able to create a tool that would import the captured data and display it on a virtual LCD.

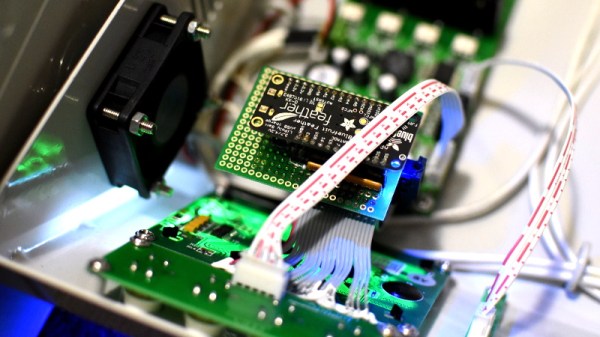
Unfortunately, the Bluetooth part is where things get tricky. Ultimately, [Blecky] wants to ditch the logic analyzer and use a Adafruit Feather nRF52 Bluefruit to capture the signals going to the LCD and pipe them to a waiting device over Bluetooth. But his testing has found that the nRF52’s radio is simply too slow. The display is receiving data every 14us, but it takes the radio at least 50us to send a packet.

[Blecky] is looking at ways around this problem, and we’re confident he’ll crack it. The solution could be in buffering and compressing the data before sending it out, though you’d lose the ability to monitor the display in real-time. Even if he has to abandon the Bluetooth aspect entirely and make the device wired, we still think there would be a market for an easy to use hardware and software solution for scraping LCD data.

Popstick Fan Car Is A Fun Bluetooth Build

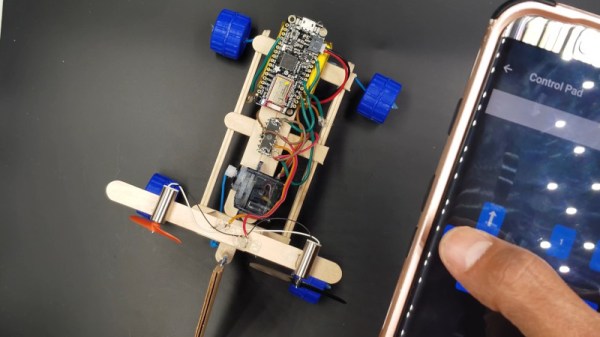
Archer fans already know, but for the rest of the world it bears saying – boats are fine, but fan boats are better. It’s much the same with land vehicles, too. [tinkeringtech] felt the same way, and built a Bluetooth-controlled fan car to scoot around the floor. (YouTube, embedded below.)

Construction starts with a series of popsticks glued together to create a chassis. Twist ties are then used to act as axles for bottle cap wheels, while steering is handled by a cardboard rudder controlled by a servo. Propulsion is via a pair of pager-sized motors fitted with fans. An Adafruit Bluefruit Feather M0 runs the show, receiving commands over Bluetooth and driving the motors through an H-bridge chip in the center of the vehicle.

It’s a fun craft-style build that would be a great project for kids interested in electronics and making. It teaches basic electronics, as well as serving as a good introduction into the world of microcontrollers. It’s one of the smaller radio-controlled builds we’ve seen, but you can always go full-scale if that takes your fancy.

Continue reading “Popstick Fan Car Is A Fun Bluetooth Build”