Simple Breadboard SDR For Shortwave

One of the best ways to learn about radios is to build your own, even in the age of cheap SDR dongles. [Aniss Oulhaci] demonstrates this with a simple HF SDR receiver built on a breadboard.

The receiver takes the form of a simplified Tayloe detector. An RF preamp circuit amplifies the signal from a shortwave antenna and feeds it into a 74HC4066D analog switch, which acts as a switching mixer. It mixes the input signal with the local oscillator’s I and Q signals to produce the intermediate frequency signals. The local oscillator consists of a SI5351 clock generator with a 74HC74D flip-flop to generate the I and Q pair. The signals pass through a low pass filter stage and get amplified by an LM358 op amp, resulting in the IQ signal pair being fed to a computer’s stereo sound card.

An Arduino is used to control the SI5351 clock generator, which in turn is controlled by the same program created for the SDR Shield. With the audio signal fed to HDSDR, [Aniss] was able to pick up a shortwave radio broadcaster.

While this is by no means a high-performance receiver, building an SDR on a breadboard is still a great weekend project, with plenty of potential for further experimentation.

Continue reading “Simple Breadboard SDR For Shortwave”

Buy The Right To Build A Nakagin Tower Anywhere

We’re guessing that among Hackaday’s readership are plenty of futurists, and while the past might be the wrong direction in which to look when considering futurism, we wouldn’t blame any of them for hankering for the days when futurism was mainstream.

Perhaps one of the most globally iconic buildings of that era could have been found in Tokyo, in the form of the Nakagin Capsule Tower, Kisho Kurokawa’s 1972 Metabolist apartment block. This pioneering structure, in which individual apartments were conceived as plug-in units that could be moved or changed at will, never achieved its potential and was dismantled, looking more post-apocalyptic than futuristic in early 2022, but it could live on in both digital form and reconstructed elsewhere as the rights to its design are being auctioned.

Unfortunately there appears to be some NFT mumbo-jumbo associated with the sale, but what’s up for auction is a complete CAD model along with the rights to build either real or virtual copies of the building. It’s unlikely that any Hackaday readers will pony up for their own Metabolist skyscraper, but the interest lies not only in the love of a future that never quite happened, but in the engineering behind the structure. Where this is being written as in many other places there is simultaneously a chronic housing shortage and a housing system wedded to the outdated building techniques of a previous century, so the thought of updated equivalents of the Nakagin Tower offering the chance of modular interchangeable housing in an era perhaps more suited to it than the 1970s is an intriguing one. Now that we’re living in the future, perhaps it’s time to give futurism another chance.

Regular readers will have spotted this isn’t the first time we’ve brought you a taste of futuristic living.

Header: Svetlov Artem, CC0.

Objective Hotend Performance Measurement Is Hard

Evaluating the performance of 3D printers and component upgrades is a more difficult than it may seem at first glance, and subjective observations can lead to incorrect conclusions. To objectively determine the maximum flow rates of different FDM 3D printer hotends, [MirageC] is developing a robust testing standard backed by more than just visual observations.

Defining the max flow rate threshold is not straightforward. A common method is to run a test print while slightly increasing the flow rate with each layer, and visually making a judgment on the last acceptable layer. It would be easy to miss errors, or unconsciously be inconsistent with observations over time. [MirageC] wanted to back up observations with measurements. To do this, he is measuring the true feed rate of the filament with an encoder wheel, and the backpressure of the filament on the extruder using a load cell. A Bowden tube helps to isolate the extruder from the vibration of the moving printhead.

After much testing, [MirageC] determined that the numerical threshold would be a specific deviation percentage between the desired and actual flow rate. At temperatures above 230°C, [MirageC] found that the last visually acceptable layer was consistently around 5.75% flow rate deviation for one specific PLA filament. It does not mean that 5.75% will be the magic number for all filaments and nozzle size, but it does provide a measurable parameter to back up visual observations.

In a world of questionable product reviews this dedication to objectivity is a breath of fresh air. If you are looking to upgrade your 3D printer’s hotend [MirageC]’s tests would be a good source of information.

Continue reading “Objective Hotend Performance Measurement Is Hard”

A tennis racket and a tennis ball with a spinning motor inside

A Self-Spinning Tennis Ball To Surprise Your Opponent

In many ball sports like golf, football and tennis, controlling the ball’s spin is an important skill. Expert players can make golf balls curve around obstacles, launch footballs towards goal posts from impossible angles, or confuse their opponents by making a tennis ball bounce in a completely unexpected direction.

[Luis Marx], by his own admission, is not an expert tennis player at all, so when he found himself humiliated on the court by his roommate he set about finding a different way to win. In other words, to cheat. The basic idea was to make a tennis ball that would start spinning at the push of a button, rather than by skillful wielding of a racket: a spinning ball that flies through the air will follow a curved trajectory, so if you can make a ball spin at will, you can change its direction in mid-air.

Making a ball spin by itself is not as hard as it may sound. All you need is an electric motor that’s small enough to fit inside, along with a power source and some way to turn it on. When the motor inside the ball starts to spin, Newton’s third law ensures that the outside will spin in the opposite direction. [Luis] found a suitable DC motor and mounted it on a small custom-designed PCB along with an ESP8266 controller and powered it with a tiny lithium battery. A pushbutton mounted on his tennis racket operates the wireless interface to turn the motor on and off.

Although getting this setup to work wasn’t as easy as [Luis] had hoped, turning it into a ball that’s good enough to play tennis with was not straightforward either. [Luis] decided to 3D-print the outer shell using flexible filament in order to create something that would have the same amount of bounce as an ordinary rubber tennis ball. It took several rounds of trial and error with various types of filament to end up with something that worked, but the final result, as you can see in the video (in German, embedded below), was quite impressive.

Tests on the tennis court showed that [Luis] could now easily beat his roommate, although this was mostly due to the erratic bouncing caused by the ball’s spin rather than any aerodynamic effects. Still, the magic tennis ball achieved its objective and even survived several games without breaking. If you’re looking for a more brute-force approach to cheating at tennis, this 180 mph tennis ball trebuchet might come in handy.

Continue reading “A Self-Spinning Tennis Ball To Surprise Your Opponent”

Multispectral Imaging System Built With Raspberry Pi

Multispectral imaging can be a useful tool, revealing all manner of secrets hidden to the human eye. [elad orbach] built a rig to perform such imaging using the humble Raspberry Pi.

The project is built inside a dark box which keeps outside light from polluting the results. A camera is mounted at the top to image specimens installed below, which the Pi uses to take photos under various lighting conditions. The build relies on a wide variety of colored LEDs for clean, accurate light output for accurate imaging purposes. The LEDs are all installed on a large aluminium heatsink, and can be turned on and off via the Raspberry Pi to capture images with various different illumination settings. A sheath is placed around the camera to ensure only light reflected from the specimen reaches the camera, cutting out bleed from the LEDs themselves.

Multispectral imaging is particularly useful when imaging botanical material. Taking photos under different lights can reveal diseases, nutrient deficiencies, and other abnormalities affecting plants. We’ve even seen it used to investigate paintings, too. Video after the break.

Continue reading “Multispectral Imaging System Built With Raspberry Pi”

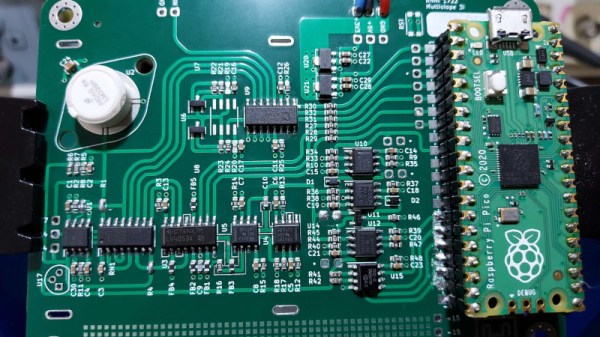
Pi Pico Gives Its Life For Overclocking

How fast can a Raspberry Pi Pico go? Well, apparently the answer is 1 GHz if you freeze it and give it over twice the voltage it normally gets. Oh, one catch. After a few minutes, the chip will fry itself.

That’s the results reported by [David] who took a Peltier cooler and a pretty serious over-voltage. The dhrystone scores went from around 200 to over 1100. Of course, there’s that pesky early death to worry about, so you probably won’t want to try this at home.

Even before the chip bites the dust, there are other problems to address. For example, once you get much over 250 MHz, the Pico’s SPI flash can’t keep up, so all the software you want to run has to be put in RAM first. You’ll also want to do some poking at the system clock parameters.

Honestly, we enjoy overclocking PCs or just about anything else. The good news is if you fry a Pico, it won’t make a sizable dent in your wallet. It is also a fun way to learn a bit more about the internals of the processor. According to [David], the cooler took the part to -40 C. We wonder how it would fare in a bath of LN2?

Of course, you can push a regular Pi, too. If you really need a 1 GHz overclocked microcontroller, maybe check out the Teensy.

Tech In Plain Sight: Rain-Sensing Wipers

While it is definitely a first-world problem that you don’t want to manually turn on your windshield wipers when it starts raining, it is also one of those things that probably sounds easier to solve than it really is. After all, you can ask a four-year-old if it is raining and expect a reasonable answer. But how do you ask that question of a computer? Especially a tiny cheap computer that is operating pretty much on its own.

You might want to stop here and try to think of how you’d do it. Measure the conductivity of the glass? Maybe water on the glass affects its dielectric constant and you could measure the resulting capacitance? Modern cars don’t do either. The problem is complicated because you need a solution that works with the glass and isn’t prone to false positives due to dirt or debris.

Continue reading “Tech In Plain Sight: Rain-Sensing Wipers”