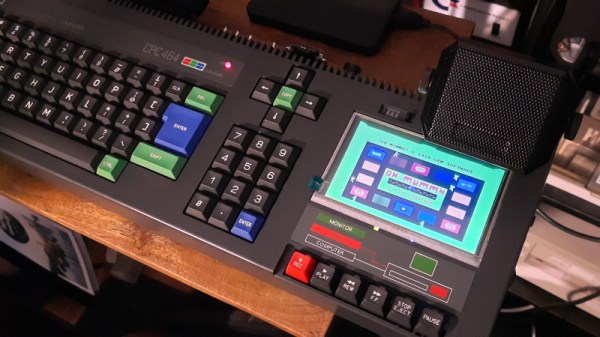
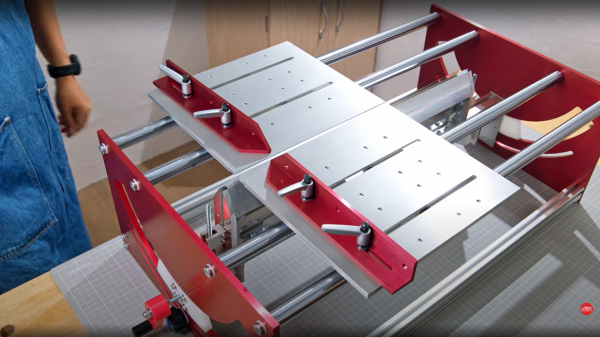
Of all the players in the home computer world in the 1980s, Alan Sugar’s Amstrad was a step ahead in ease of use over its competitors. The Amstrad CPC series of computers came with their own monitors that also had a built-in power supply, and featured built-in data recorders or disk drives as standard. Despite having a line of business computers and an eventual move into PC territory that included portable machines, Amstrad never produced a CPC which wasn’t anchored to the desktop. [Michael Wessel] has taken that challenge on himself with a CPC464 that had a broken cassette recorder, and come up with a creditable take on a portable computer that never was.
Starting with an ethos of not modifying the CPC case more than necessary, the defective tape drive has gone to be replaced with an HDMI TFT screen and a video converter board. In went a 512K RAM expansion, an SD card disk expansion, and a stereo amplifier. A small power supply board also takes power for the unit via USB-C, such that it can operate from a power bank.
The result is a fully functional and hugely expanded CPC that’s as much cyberdeck as it is retrocomputer, and given that if we remember correctly that these machines were CP/M capable it could be of greater use than simply gaming. [Michael] hasn’t entered his creation into our ongoing Cyberdeck Contest, but we think it would make a strong contender.
This isn’t the first Amstrac CPC we’ve shown you, here’s a very different take on a modernized machine.


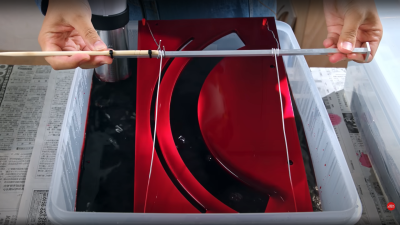 which might be a bit tricky to track down if you were so inclined to reproduce the build. It appears (well if you believe the auto-translation by Google Lens, anyway) to be a spare blade for a commercial guide saw available in Japan at least.