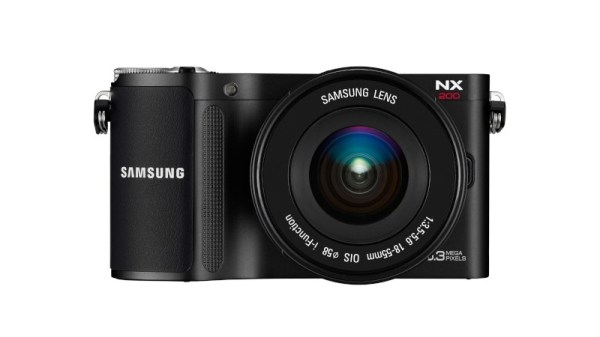
Hackaday Links Column Banner

Hackaday Links: July 10, 2022

We always like to call out a commercial success stemming from projects that got their start on Hackaday.io, and so we’re proud to announce the release of MAKE: Calculus by Joan Horvath and Rich Cameron, a book that takes a decidedly different approach to teaching calculus than traditional courses. Geared to makers and hackers, who generally tend to have a visual style of learning, the book makes heavy use of 3D-printed models to illustrate the relationships between functions. The project started five years ago as a 2017 Hackaday Prize entry, and resulted in a talk at the 2019 Supercon. Their book is now available for preorder, and might be a great way to reacquaint themselves with calc, or perhaps even to learn it for the first time. Continue reading “Hackaday Links: July 10, 2022”

A VCR with NICAM support.

Remembering NICAM: Deep-Dive Into A Broadcasting Legacy

Although for many the introduction of color television would have seemed to be the pinnacle of analog broadcast television, the 1970s saw the development of stereo audio systems to go with TV broadcasts, including the all-digital NICAM. With NICAM broadcasts having ceased for about a decade now, the studio equipment for encoding and modulating NICAM can now be picked up for cheap. This led [Matthew Millman] to not only buy a stack of Philips NICAM studio gear, but also tear them down and set up a fully working NICAM encoding/decoding system with an Arcam Delta 150 as receiver and Philips PM5687 encoder.

Philips PM5687 with lid off.

Finally, the Philips PM5688 test receiver is analyzed. This is the component that studios would have used to ensure that the NICAM encoding and modulating systems were working properly. Although public NICAM broadcasts started in the late 1980s, the system was originally developed to enable point to point transfers of audio data within a transmission system. This was made very easy due to the digital nature of the system, and made enabling it for public broadcasts relatively straightforward once receivers became affordable enough.

Of note is that NICAM was only ever used in Europe and some Asian-Pacific countries, with others using the German Zweikanalton. This was a purely analog (two FM channels) system, and the US opted to use its MTS system, that was quite similar to the German system in terms of transmitting multiple FM channels alongside the TV signal. With digital TV gradually overtaking analog TV transmissions, the future of NICAM, MTS and others was sealed, leaving us with just these time capsules we can build up using old studio equipment.

When Combat Robot Wheels Need To Be Nice And Cheap (But Mostly Cheap)

It started with [CHORL] making a promise to himself regarding constructing a new combat robot: no spending of money on the new robot.

That rule was violated (but only a little) by making his robot’s wheels out of EVA kneeling pads. EVA (Ethylene-Vinyl Acetate) is a closed-cell foam that makes for durable yoga mats, kneeling pads, and products of a similar nature. [CHORL] found a way to turn them into light but serviceable wheels for his robot: the Susquehanna Boxcar.

Nested hole saws create concentric holes. Perfect for wheels.

Here’s how the wheels were made: [CHORL] began with two hole saws. Nesting a smaller hole saw into a larger one by putting both on the same arbor created a saw with two holes, both of which were centered with respect to one another. The only problem was that this hole saw was not actually deep enough to cut completely through the thick foam. Luckily, cutting roughly halfway through on one side, then flipping the sheet over and cutting through from the other side was a good workaround. That took care of turning the thick foam sheet into round wheels.

A 3D-printed part served as a wheel hub as well as gear for the drivetrain. We want to call attention to the clever method of reinforcing the connection between the parts. [CHORL] didn’t want to just glue the geared hub directly to the surface of the foam wheel, because he suspected it might separate under stress. To address this, he designed six slots into the hub, cut matching slots into the foam wheel, and inserted six spline-like reinforcements in the form of some ABS strips he had on hand. Gluing it all together with E-6000 and leaving it to cure overnight under a weight resulted in a geared wheel assembly that [CHORL] judged to be about as round and rigid as a wheel should be, so the robot had a solution for nice light wheels that were, above all, cheap!

Lots of robots need wheels, and unsurprisingly, DIY solutions are common projects. [CHORL]’s approach here looks pretty scalable, as long as one can cut some accurate holes.

Interested in knowing more about the robot these wheels are destined for? [CHORL]’s still working on the Susquehanna Boxcar, but it’s almost done, and you can read a bit more about it (and see a few more pictures) here.

Masking Tape Pen Plotter Gets An Upgrade

[Mr Innovative] decided to make his version of a small pen plotter (video after the break) to make labels on masking tape. The result is an impressive compact machine that is remotely controlled using your smartphone. The plotter is constructed using several different techniques, a piece of plywood as the base, a 3D printed bracket for the motors and pen carriage, and a routed acrylic plate that holds the lead screw and linear rail assembly. The whole thing is controlled by an Arduino Nano mounted on a custom motor driver carrier board.

The inspiration for this build came from a project by [michimartini] aka [Molten Cheese Bear] that we covered a few months ago. [Mr Innovative] went for belt vs direct drive and no local screen. It also appears to plot a little bit faster, but that might be due to differences in the ink pens used. An Android app called TextToCNC converts label text into G-Code, and the Grbl Controller app sends those commands to the plotter.

We like continued iterations of open source projects and look forward to seeing what the next generations look like. Thanks to [keithfromcanada] for submitting this tip.

Continue reading “Masking Tape Pen Plotter Gets An Upgrade”

Vapor Trails And Fan Make For Fantastic Photos In DIY Wind Tunnel

Every wanted a mini wind tunnel to check the aerodynamics of scale model cars, drones, or other small objects? Then check out [dannyesp]’s mostly-3D-printed DIY wind tunnel (video, embedded below). Don’t forget to also browse the additional photos in this Reddit thread.

A junk parts project doesn’t have to look like a hack job.

There’s not much for plans available, since as [dannyesp] admits, this device was very much the product of trial-and-error and junk bin parts. The video and photos are more than enough for any enterprising hacker to work with.

The core of the device is a large fan made from a junked drone motor. This fan is located at the rear of the tunnel. A small anemometer is placed at the front, where some 3D-printed baffles also work to smooth out turbulent incoming air.

The foggy trails of vapor come from a hacked-up vape pen. Vapor gets piped through some tubing to the front of the tunnel. There, the vapor trails are drawn towards the low-pressure area at the rear, traveling over and around the object on the way. [dannyesp] also mentions that the platform holding the object is mounted on a rail, which incorporates some kind of pressure sensor in an attempt to quantify wind drag.

We want to take a moment to appreciate just how clean this “junk parts” project looks — even though it is made from things like broken photo frames. All of this comes down to thoughtful assembly. A hack doesn’t have to look like a hack job, after all. We also love the little control box that, instead of having a separate power indicator, lights up like a little nightlight when it has power.

Hacking vaporizers is a fantastic way to create a small, portable fog machine. These can create fantastic costume effects like this smoking Ghost Rider skull. They are a great way to turn an off-the-shelf consumer item into something that cost quite a bit more just a few years back.

Continue reading “Vapor Trails And Fan Make For Fantastic Photos In DIY Wind Tunnel”

Carver M-400 Amplifier Repair Keeps The 1980’s Alive

Carver is a famous name in audio equipment although they have been known to use odd names for things. For example, the 1980’s vintage M-400 magnetic field power amplifier that [JohnAudioTech] is repairing (see the two videos below). That sounds like something off a bad Star Trek remake, but, apparently, we weren’t alone in thinking that, judging by this 1982 review of the unit from a UK magazine.

Still, it is an interesting high-power amplifier and we love seeing gear of this age torn apart. The beast is rated at 201 watts — you have to wonder if the extra watt is another marketing ploy.

There were actually two units and they looked pretty good for four-decade-old boxes. One sounded pretty good outside of some noticeable buzzing. The other had something shorted inside. If you enjoy watching repair videos, you’ll appreciate this two-parter.

We have to admit — and it may be a personal bias — there is something more pleasing about seeing a PCB populated with a bunch of interesting-looking through-hole components. Modern boards with a sea of surface mount parts tend to look a little bland, aesthetically speaking. Of course, when it comes time to make our own boards, we are happy to use SMD and forego all that hole drilling!

We like watching computer repair videos, in particular. Or sometimes, something really exotic.

Continue reading “Carver M-400 Amplifier Repair Keeps The 1980’s Alive”

GCore: Make Portable Devices With Less Frustration

[Dan Julio]’s gCore (short for Gadget Core) is aimed at making GUI-based portable and rechargeable gadgets much easier to develop. gCore is the result of [Dan]’s own need for a less tiresome way to develop such hardware.

A touchscreen is great, but high-quality power control and charging features are what really make a portable device sing.

[Dan] found that he seemed to always be hacking a lot of extra circuitry into development boards just to get decent power management and charge control. To solve this, he designed his own common hardware platform for portable gadgets and the gCore was born.

While the color touchscreen is an eye-catching and useful addition, the real star of his design is the power management and charging features. Unlike most development hardware, the gCore intelligently shares load power with charging power. Power on and power off are also all under software control.

Sound intriguing? That’s not all the gCore has to offer, and you can learn more from the project page at hackaday.io (which has a more in-depth discussion of the design decisions and concept.) There are also some additional photos and details on [Dan]’s website.

[Dan] is no stranger to developing hardware. The tcam-mini thermal imager (and much more) is his work, and we have no doubt the gCore’s design and features are informed directly by [Dan]’s actual, practical development needs.