An array of open-source clocks that play Pac-Man (or Mrs. Pac-Man).

ESP32 Pac-Man Clock Keeps Track Of How Long You Watch It

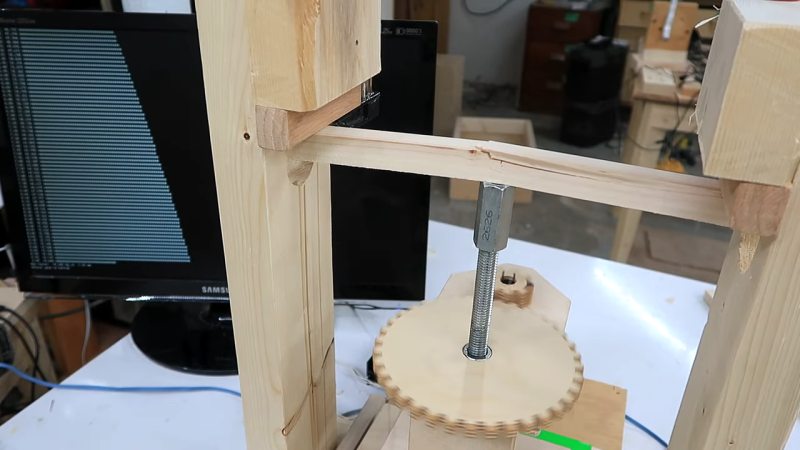
There are so many elements that make a good clock worth looking at for much longer than necessary. Not only is this clock quite cool to behold, it plays Pac-Man around the time! Yes, of course you can interact with the Pac-Man — touching the edges of the screen will make him go left, right, up, or down accordingly. You can also change to Ms. Pac-Man and make all the animations go normal speed, fast, or crazy-fast.

[TechKiwiGadgets] built a Pac-Man clock a few years ago that was well-received, but not cheap or easy to mimic. Since then, they have ported the code to the ESP32 and made a new version that has fewer and friendlier components. Not only that, they have great instructions for building the ESP32 shield on protoboard and also offer the shield as an open-source fab-able PCB. Still too much work? The complete kit version is available over on Tindie. Be sure to check it out in crazy speed mode action after the break.

Although this isn’t the first Pac-Man clock we’ve seen, it devotes equal attention to the time and the game, whereas this one is more about the game itself.

Continue reading “ESP32 Pac-Man Clock Keeps Track Of How Long You Watch It”

Retrotechtacular: Office Equipment From The 1940s

If you can’t imagine writing a letter on a typewriter and putting it in a mailbox, then you take computers for granted. But that’s just the tip of the iceberg. More niche applications begat niche machines, and a number of them are on display in this film that the Computer History Archives Project released last month. Aside from the File-o-matic Desk, the Addressograph, or the Sound Scriber, there a number of other devices that give us a peek into a bygone era.

One machine that’s still around, although in a much computerized form, is the stenograph. Not so popular these days is the convenient stenograph carrier, allowing a patient’s statement to be recorded bedside in the hospital immediately after a car accident. Wire recorders were all the rage in 1947, as were floppy disks (for audio, not data). Both media were used to time-shift dictation. Typing champions like Stella Pajunas could transcribe your letters and memos at 140 WPM using an electric typewriter, outpacing dot matrix printers but a snail’s pace compared to a laser jet.

Continue reading “Retrotechtacular: Office Equipment From The 1940s”

Metal 3D printed Benchy

Ender 3 Meets MIG Welder To Make A Metal Benchy — Kind Of

When you can buy a 3D printer at Aldi, you pretty much know that 3D printing has been reduced to practice. At least for the plastic version of 3D printing; metal printing is another thing entirely. It’s easy to squeeze out a little molten plastic in a controlled fashion, but things get a little more — energetic — when you try to do the same with metal.

At least that’s what [Lucas] has been experiencing with his attempts to build a metal 3D printer over on his Cranktown City YouTube channel. Granted, he set himself up for a challenge from the get-go by seeking to stick a MIG welder onto an Ender 3, a platform that in no way was ready for the abuse it was about to endure. Part 1 of the video series below shows the first attempt, which ended badly for both the printer and for the prints.

But that first prototype, melted parts notwithstanding, gave [Lucas] enough to go on for the improvements of version 2, including a better build plate, heat shielding for the printer’s tender bits, and a legit MIG welder wire feeder. [Lucas] also built current control in, with a clever non-destructive interface to the welder controls. These improvements were enough to attempt a Benchy print, which started out pretty decent but got a bit droopy toward the end.

As imperfect as it is, the Benchy is a vast improvement over the formless blobs from version 1, and the printer holds quite a bit of promise for the future. One thing you can’t accuse [Lucas] of is giving up on a project too easily; after all, he built a laser cutter from scratch, including the laser tube.

Continue reading “Ender 3 Meets MIG Welder To Make A Metal Benchy — Kind Of”

DIY High Flow 3D Printing Nozzle

Sometimes advances happen when someone realizes that a common sense approach isn’t the optimal one. Take radio. Success in radio requires bigger antennas and more power, right? But cell phones exist because someone realized you could cram more people on a frequency if you use less power and smaller antennas to limit the range of each base station. With FDM 3D printing, smaller nozzles were all the rage for a while because they offer the possibility of finer detail. However, these days if you want fine detail you should be using resin-based printers and larger nozzles offer faster print times and stronger parts. The Volcano hotend started this trend but there are other options now. [Stefan] over at CNC Kitchen decided to make his own high flow nozzle and he claims it is better than other options.

Don’t get too carried away with the DIY part. As you can see in the video below, he starts with a standard nozzle, so it is really a nozzle conversion or hack. The problem with high flow isn’t the hole in the nozzle. It is melting the plastic fast enough. The faster the plastic moves through the nozzle, the less time there is for it to melt.

Continue reading “DIY High Flow 3D Printing Nozzle”

A PDP 11 By Any Other Name: Heathkit H11 Teardown And Repair

[Lee Adamson] is no stranger to classic computers. He recently picked up a Heathkit H11A which, as you might remember, is actually a PDP-11 from DEC. Well, technically, it is an LSI-11 but still. Like a proper LSI-11, the computer uses the DEC QBus. Unlike a lot of computers of its day, the H11 didn’t have a lot of switches and lights, but it did have an amazing software library for its day.

[Lee] takes us through a tour of all the different cards inside the thing. It is amazing when you think of today’s laptop motherboards that pack way more into a much smaller space. He also had to fix the power supply.

Continue reading “A PDP 11 By Any Other Name: Heathkit H11 Teardown And Repair”

wifi scanner

Visualizing WiFi With A Converted 3D Printer

We all know we live in a soup of electromagnetic radiation, everything from AM radio broadcasts to cosmic rays. Some of it is useful, some is a nuisance, but all of it is invisible. We know it’s there, but we have no idea what the fields look like. Unless you put something like this 3D WiFi field strength visualizer to work, of course.

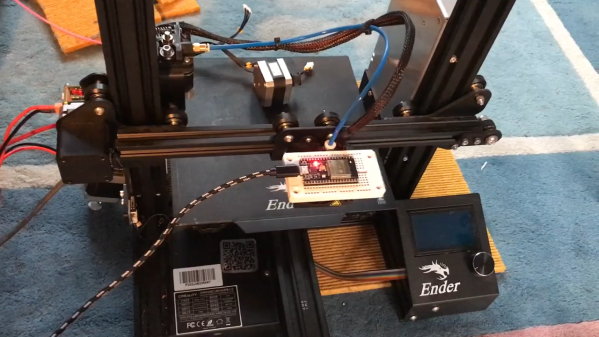
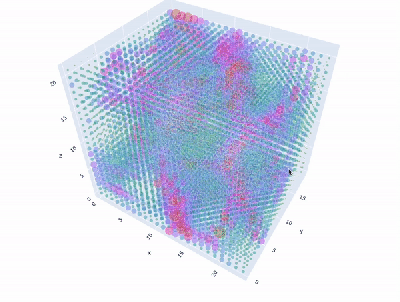
Granted, based as it is on the gantry of an old 3D printer, [Neumi]’s WiFi scanner has a somewhat limited work envelope. A NodeMCU ESP32 module rides where the printer’s extruder normally resides, and scans through a series of points one centimeter apart. A received signal strength indicator (RSSI) reading is taken from the NodeMCU’s WiFi at each point, and the position and RSSI data for each point are saved to a CSV file. A couple of Python programs then digest the raw data to produce both 2D and 3D scans. The 3D scans are the most revealing — you can actually see a 12.5-cm spacing of signal strength, which corresponds to the wavelength of 2.4-GHz WiFi. The video below shows the data capture process and some of the visualizations.

While it’s still pretty cool at this scale, we’d love to see this scaled up. [Neumi] has already done a large-scale 3D visualization project, using ultrasound rather than radio waves, so he’s had some experience in this area. But perhaps a cable bot or something similar would work for a room-sized experiment. A nice touch would be using an SDR dongle to collect signal strength data, too — it would allow you to look at different parts of the spectrum.

Continue reading “Visualizing WiFi With A Converted 3D Printer”

wood strength tester

Shop-Built Rig Measures Strength Of Wood Accurately

Wood is an incredibly versatile material, but like everything else, it has its limits. Build a chair from weak wood and the worst that can happen is probably not that bad. But if you build machine tools from wood, the stakes for using the wrong wood can be a bit higher.

That’s the thinking behind the wood strength testing setup [Matthias Wandel] came up with. Previously, he had a somewhat jury-rigged test setup with a hydraulic bottle jack to apply force to the test piece and a bathroom scale to make measurements. That setup was suboptimal, so version two used a jackscrew to apply the force, but the bathroom scale still left the measurements open to interpretation. Version three, the topic of the video below, went with strain gauges and an A/D converter connected to a Raspberry Pi to automate data collection. The jackscrew was also integrated into the test setup with a stepper motor and, of course, [Matthias]’ famous wooden gears.

While the test rig is pretty simple in design, there’s a lot of subtlety to the calibration to make sure that it’s measuring the test material itself and not just compliance within the mechanism. It’s just another in a long line of data-gathering exercises that [Matthias] seems to groove on, like his recent woodshop electrical explorations.

Continue reading “Shop-Built Rig Measures Strength Of Wood Accurately”