Pan And Tilt To A New 3D Printed Business Model

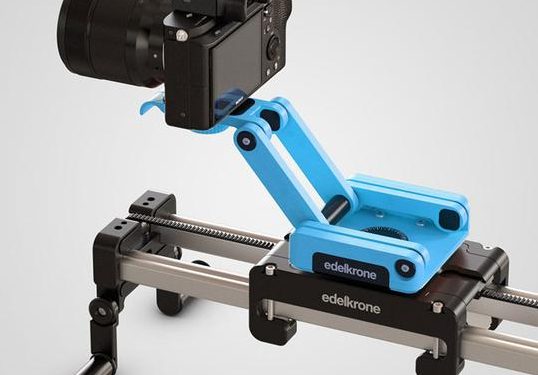
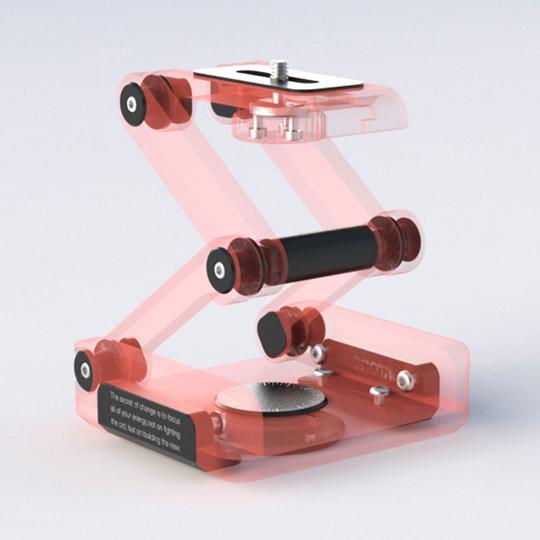
When shooting video, an easy way to get buttery smooth panning and tracking is to use a mechanical device like a rail to literally slide the camera side to side. These range from what is essentially a skateboard to incredible programmable multi-axis industrial robots, a wide variety of which have been visible in the backgrounds of Youtuber’s sets for years. But even the “low end” devices can run hundreds of dollars (all that anodized aluminum doesn’t come cheap!). Edelkrone has been building lust worthy professional (read, pricey) motion setups for a decade. But in the last year they’ve started something pretty unusual; lowering prices with their Ortak series of 3D printed equipment. But this time, you do the printing.

In the FlexTILT Head 3D, everything in red is printed at home

Since the RepRap we’ve been excited about the future of democratized at home manufacturing, but to a large extent that dream hasn’t materialized. Printers are much more useful now than in the early days but you can’t buy a new mug from Starbucks and print it at home. But maybe that’s changing with Edelkrone’s offering.

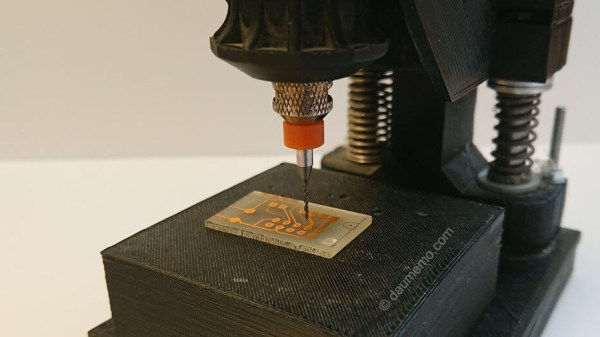
When you buy an Ortak product you get one thing: all the fasteners and hardware. So the final product is more durable and appears more finished than what would pop out of your Prusa unaided. What about the rest of the device? That’s free. Seriously. Edelkrone freely provides STLs (including print setting recommendations) with detailed step-by-step assembly instructions and videos (sample after the break). Nice hack to avoid piracy, isn’t it?

Why choose the do-it-at-home style product? A significant price reduction of course! The Ortak line currently includes two products, the FlexTILT head you see above, and a skateboard-style slide called the SKATER 3D. Both of these were sold fully finished before making it to the DIY scene. The FlexTILT Head 2 comes in at $149 when you buy it whole. And when the PocketSKATER 2 was for sale, it included a FlexTILT Head and came to $249. Now? Each hardware kit is just $29.

So is this it? Have we hit the artisanal DIY micro-manufactured utopian dream? Not yet, but maybe we’re a little closer. Edelkrone is a real company which is really selling these as products, right there on their website along with everything else. They refer to it as “co-manufacturing” which we think is a clever name, and talk about expanding the program to include electronics. We can’t wait to see how the experiment goes!

Continue reading “Pan And Tilt To A New 3D Printed Business Model”

Print A Drill Press For Your Printed Circuit Boards

If you make printed circuit boards the old fashioned way by etching them yourself, you may need to drill a lot of holes; even surface-mount converts still need header pins on occasion. But, drilling these holes by hand often leads to broken drill bits, which always seems to happen with one un-drilled hole and no spare bits left. [Daumemo] came up with a solution: a 3D printed drill press for a Dremel or similar rotary tool.

While you can buy commercial presses designed to fit these tools, there’s a certain satisfaction to building your own, and if you have a well-stocked parts bin you might even finish it before a mail-ordered version could arrive. Certainly you could do it at lower cost. The design is straightforward, and uses printed parts augmented with “reprap vitamins” (i.e. the non-printable, typically metal, components). If you’ve ever built — or repaired — a 3D printer, you may have these pieces already: a couple of LM8UU bearings, some 8 mm steel rod, and a pair of springs seem like the most esoteric parts required, although even these could probably be substituted without much trouble.

Only a few pieces need to be printed: a base is outfitted with a removable table for holding the workpiece, while a lever actuates the frame holding the tool. [Daumemo] chose to print the design in ABS, but found that it flexes a little too much, occasionally requiring some care during use — a stiffer filament such as PLA might yield better results. Overall, though, this seems like a great project for that 3D printer you haven’t used in a while.

Be sure to check out the video of the press in action, after the break.

Continue reading “Print A Drill Press For Your Printed Circuit Boards”

Hackaday Celebrates 15 Years And Oh How The Hardware Has Changed

Today marks exactly 15 years since Hackaday began featuring one Hack a Day, and we’ve haven’t missed a day since. Over 5,477 days we’ve published 34,057 articles, and the Hackaday community has logged 903,114 comments. It’s an amazing body of work from our writers and editors, a humbling level of involvement from our readers, and an absolutely incredible contribution to open hardware by the project creators who have shared details of their work and given us all something to talk about and to strive for.

What began as a blog is now a global virtual hackerspace. That first 105-word article has grown far beyond project features to include spectacular long-form original content. From our community of readers has grown Hackaday.io, launched in 2014 you’ll now find over 30,000 projects published by 350,000 members. The same year the Hackaday Prize was founded as a global engineering initiative seeking to promote open hardware, offering big prizes for big ideas (and the willingness to share them). Our virtual connections were also given the chance to come alive through the Hackaday Superconference, Hackaday Belgrade, numerous Hackaday Unconferences, and meetups all over the world.

All of this melts together into a huge support structure for anyone who wants to float an interesting idea with a proof of concept where “why” is the wrong question. Together we challenge the limits of what things are meant to do, and collectively we filter through the best ideas and hold them high as building blocks for the next iteration. The Hackaday community is the common link in the collective brain, a validation point for perpetuating great ideas of old, and cataloging the ones of new.

Perhaps the most impressive thing about the last 15 years of Hackaday is how much the technological landscape has changed. Hackaday is still around because all of us have actively changed along with it — always looking for that cutting edge where the clever misuse of something becomes the base for the next transformative change. So we thought we’d take a look back 15 years in tech. Let’s dig into a time when there were no modules for electronics, you couldn’t just whip up a plastic part in an afternoon, designing your own silicon was unheard of, and your parts distributor was the horde of broken electronics in your back room.

Continue reading “Hackaday Celebrates 15 Years And Oh How The Hardware Has Changed”

Hackaday Podcast 024: Mashing Smartphone Buttons, Sound Blastering, Trash Printing, And A Ludicrous Loom

Hackaday Editors Elliot Williams and Mike Szczys wade through the fun hacks of the week. Looks like Google got caught ripping off song lyrics (how they got caught is the hack) and electric cars are getting artificially noisier. We look at 3D Printing directly from used plastic, and building a loom with many hundreds of 3D printed parts. The Sound Blaster 1.0 lives again thanks to some (well-explained) reverse engineered circuitry. Your smartphone is about to get a lot more buttons that work without any extra electronics, and we’ll finish things up with brass etching and downloadable nuclear reactor plans.

Take a look at the links below if you want to follow along, and as always tell us what you think about this episode in the comments!

Take a look at the links below if you want to follow along, and as always, tell us what you think about this episode in the comments!

Direct download (60 MB or so.)

Continue reading “Hackaday Podcast 024: Mashing Smartphone Buttons, Sound Blastering, Trash Printing, And A Ludicrous Loom”

This British 3D Printing Meetup Is On The Rise

Most people who are serious about designing, building, or improving 3D printers see the Midwest Reprap Festival as the place where the latest and greatest is on show for all to see. But if you live on the other side of the world as I do, chances are slim that you’ll be able to attend.

I live in the UK, and there haven’t traditionally been any events quite like MRRF, but that may be changing. The 3D Meetup UK in Birmingham is a community-organised event bringing together the 3D printing maker and hacker community for a couple of days of talks, demonstrations, and tours. I went along this year to see what was going on, and to take the temperature of the British side of this community.

Continue reading “This British 3D Printing Meetup Is On The Rise”

The Two-Dimensional Stepper Motor

Over on hackaday.io and deep in the Hackaday Prize, a lot of cool people are playing around with the possibilities of putting coils in printed circuit boards. On the face of it, it makes sense: drawing spirals on a PCB gets you an electromagnet. This allows you to do all sorts of crazy things. You can make miniature model maglev trains using the track as a motor. Someone built a wearable Tesla coil.

The latest build to show off the possibilities of motors etched on PCBs is [bobricius]’ micro manipulator. It’s a 100 mm square board capable of moving a small magnet around the surface. The point? Well, if you have to ask that question you’re really never going to get the point.

The design of this stepper motor is simply two coils of wire, with the X axis of the grid placed on the top copper layer of the PCB and the Y axis on the bottom copper layer. There are four poles to each of these coils, and they plug right into a standard stepper driver, so to control this board all you need is a basic Arduino and a motor shield. Or a RepRap board, take your pick, you probably have something sitting around in a junk drawer.

In the test of this board, the stepper motor can move small rare earth magnets around quickly and with high repeatability. As for what use this PCB stepper motor has, if you have to ask that question, you’ll never know. Also, because it looks cool.

Continue reading “The Two-Dimensional Stepper Motor”

This Atomic Pi Eats Other Pis For Lunch

The world is full of single board computers that want a slice of the Raspberry Pi action. Most of them are terrible. But fools and their money, yadda yadda, and there’s a new sucker born every minute. The latest contender to the Raspberry Pi is the Atomic Pi. It’s an x86-based single board computer that costs $35, shipped to your door. Is it worth it? Is it even in the same market as a Raspberry Pi? Or is it just a small budget computer without a box? I have no idea.

With that said, the Atomic Pi comes with an Intel Atom x5-Z8350 with Intel HD Graphics (Cherry Trail). There is 2 GB of DDR3L-16000, 16 GB of eMMC, and an SD slot for storage. Connectivity is a full HDMI port (primary audio out), USB 3.0 and 2.0 ports, a Mediatec RT5572 used for WiFi, a Qualcomm CSR8510 for Bluetooth 4.0, a “Legitimate licensed BIOS”, and a real-time clock. Overall, you’re looking at a top-of-the-line tablet computer from four years ago. One that would run Windows.

To use all the features of the Atomic Pi, you will need to buy a $15 breakout board to supply power to the board, and use a large industrial power supply, the kind you would normally find bolted to a RepRap or a homemade CNC machine. You will need to supply both 5 V and 12 V to the board if you would like to use the Class D audio amplifier, but if you only want to use audio over HDMI, supplying only 5 V will do. If you want to boot this board, it looks like you’ll need to bring a USB/TTL cable to make everything work. This may be a tough sell to a crowd with zero experience booting a bare Linux system. That said, it runs Nintendo 64 emulators well, which is the only reason people buy Raspberry Pis anyway.

Is the Atomic Pi the single board computer you need? I don’t know. But we’ve got an Atomic Pi on order, and we’re ready to go with a full review when it show up.