When you think of “car rim” you probably think stamped steel or machined alloy with a sturdy drum to withstand the arduous life of the road, not something 3D printed out of ABS. That would be crazy, right? Not to [Jón Schone] from Proper Printing, who’s recently released an update about his long-term quest to outfit his older sedan with extruded rims.
There were a few initial attempts that didn’t go as well as hoped. The main issue was layer separation as the air pressure would stretch the piece out, forming bubbles. He increased the thickness to the absolute maximum he could. A quick 3D scan of the brake caliper gave him a precise model to make sure he didn’t go too far. He also couldn’t make the rim any bigger to fit a bigger wheel to clear the caliper, as he was already maxing out his impressive 420 mm build volume from his modified Creality printer.
A helpful commenter had suggested using a threaded rod going all the way through the print as a sort of rebar. After initially discounting the idea as the thickness of the rim gets really thin to accommodate the caliper, [Jón] realized that he could bend the rods and attach the two halves that way. Armed with a paper diagram, he cut and bent the rods, inserting them into the new prints. It’s an impressive amount of filament, 2.7 kg of ABS just for one-half of the rim.
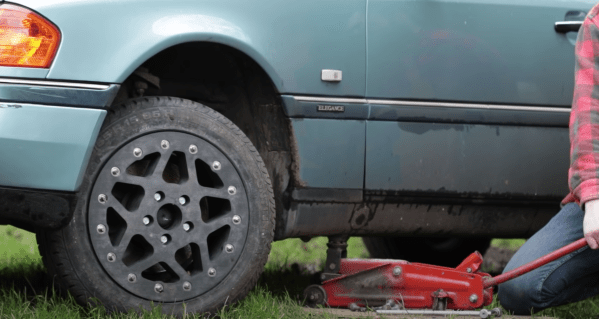
It didn’t explode while they inflated the tire and it didn’t explode while they did their best to abuse it in the small alley they had selected for testing. The car was technically no longer road legal, so we appreciate their caution in testing in other locations. In a triumphant but anti-climatic ending, the rim held up to all the abuse they threw at it.
We’ve been following this project for several months now, and are happy to see [Jón] finally bring this one across the finish line. It sounds like there’s still some testing to be done, but on the whole, we’d call the experiment a resounding success.
Continue reading “The 3D Printed Car Tire Rim Finally Hits The Road, Sorta”