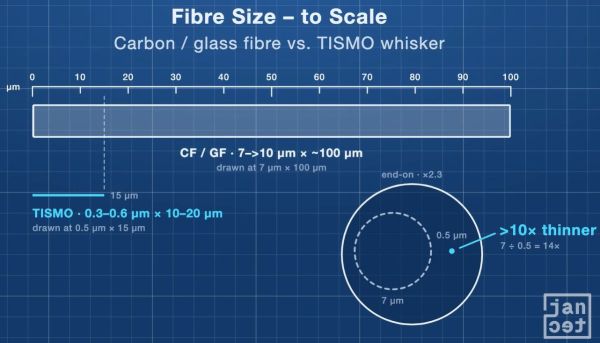
Testing TISMO Whisker-Reinforced Poticon STD1 PA Filament

Although at first glance potassium-titanite (TISMO) whiskers don’t seem to be much of a change from chopped glass- and carbon fiber in FDM filaments, they’re really quite different. They’re not only much smaller, they’re also less abrasive, and work with 0.2 mm nozzles. Although basically just found in industrial filaments right now, [JanTec Engineering] put a spool to the test to see what these whiskers bring to the party.

While at an event in Japan, [JanTec] got handed a spool of Poticon STD1 NTL34M PA filament, presumably the common PA6, AKA Nylon. In their messaging the company calls it LEXTER, a bio-based polyamide.
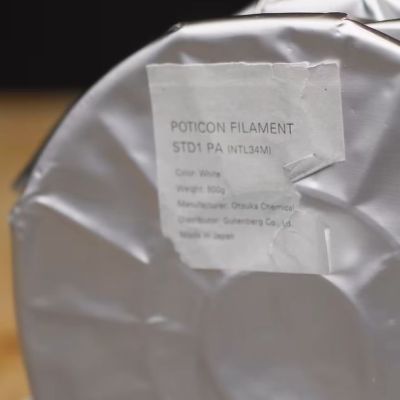
This was subsequently put to the test after returning home, with the recommended print settings and the newly constructed testing machine, called the Atlas 2000. This is an open source testing machine that could be handy if you have about $500 lying around and an urgent need to test the tensile, compression and bending properties of materials.

The filament under test is 20% TISMO by weight, with it scoring well in the tensile strength test, while being about as brittle as the datasheet suggests. Such reinforced polymers are generally known for being stiff and brittle, so this is little surprise. Perhaps the biggest advantage of this filament is that you can print finer details with it using an 0.2 mm nozzle, making it an interesting engineering filament in that respect.

Also touched upon in the video are the potential health risks of this filament, with these whiskers being definitely easy to inhale. This also is reminiscent of the potential carcinogenic risks of chopped carbon fiber, where fragments of these already small fibers can pose similar risks as asbestos.

As for the constant brittleness in these purported reinforced filaments, this would seem to be due to poor adhesion between the fiber (or whisker) and the thermoplastic. Unlike with thermoset polymers where there’s an active interface between the fiber and the polymer that creates a strong molecular bond, there’s generally a void between thermosets and additives like fibers due to the lack of any chemical activity while cooling.

Continue reading “Testing TISMO Whisker-Reinforced Poticon STD1 PA Filament” →
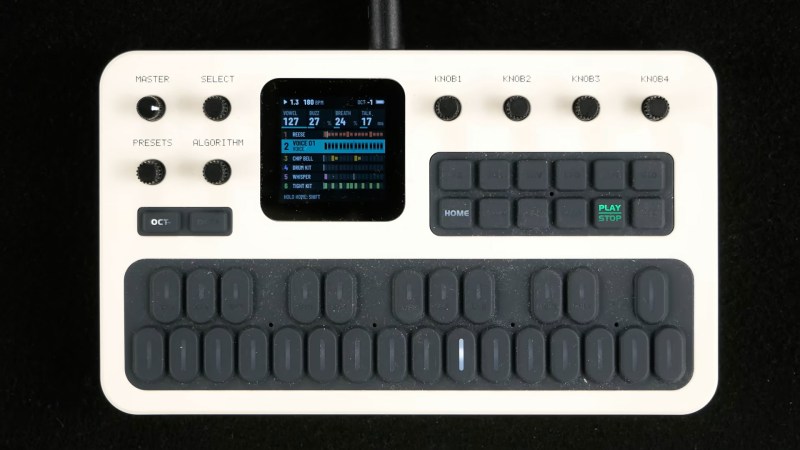
The FM-1: Open Source Hacked Open, Vibe Coding, And Farting Synthesizers

The M-Vave FM-1 was a pretty unremarkable little synthesizer “toy” until the open-source synth hackers took it over. Now, it’s a sweet platform for exploration, the incredible work done by the community has encouraged the manufacturer to release an open SDK, and it has recently taken the global synth nerd community by storm. (It has sadly also gotten about a 50% markup in the last month due to this popularity.)

It’s the perfect storm of inexpensive hardware, vibe-coded software, and easy-to-use tooling that enables synthesizer firmware-hacking for the mainstream. It is also the fashionable box of the moment in a nerdy niche of the synthesizer world at the moment and it’s something that we’re going to see in non-synthesizer contexts as well, so buckle up.

Continue reading “The FM-1: Open Source Hacked Open, Vibe Coding, And Farting Synthesizers” →

Making An Affordable Two-Axis Solar Tracker

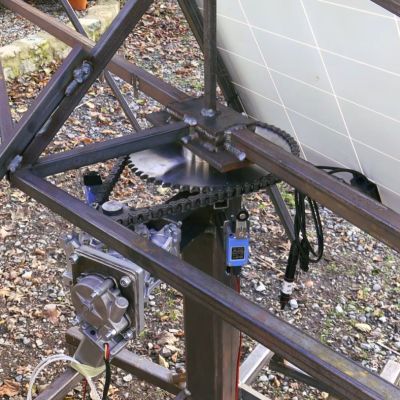
Setting up a photovoltaic panel is simple, but you lose a lot of potential power if you merely bolt said panel into place. With a tracker the panel will instead follow the sun, potentially even adjusting the angle of the panel to optimize how much of the sun’s rays hit it during the day. The two-axis tracker that [Greenhill Forge] built is an example of how to make a tracker using just a steel frame and simple electronics.

As noted in the video, commercial solar trackers tend to use slewing bearings, which support heavy, slow-turning structures like a PV panel array. These are however rather expensive, so instead he opted to use a trailer axle hub as the budget version. The array’s structure including a drive sprocket is built up on top of this axle in such a way that it easily removed for maintenance, mostly using welded steel to create a stable base for the PV panels.

This also contains the second axis, with two bearings to pivot around. The azimuth axis is driven with a large geared electric motor, while the second axis is driven by a linear motor containing a worm gear. This should keep position very well, even in case of power loss or a stiff breeze.

Following this there is the electronics part, which includes a wind sensor in addition to a simple quad photoresistor based light sensor. A couple of limit switches ensure that the system should never move past the point where worrying grinding and shearing noises begin.

With assembly complete, the solar tracker is equipped with a single large panel and compared to a stationary identical panel and charge controller. This shows that the tracker nets one an additional 30-50% of energy in the two scenarios compared over the course of two days of testing. Although you have to subtract the power needed to run the system and the two motors, it does make a convincing argument for maximizing the output of these panels with some fairly basic parts.

Continue reading “Making An Affordable Two-Axis Solar Tracker” →

The $50 Per Hour Search Engine

Imagine doing a Google search and getting a bill for $50 an hour — or even $300 an hour. Even worse, that’s $50 for every hour you were even connected. Typing a query, reading output, or even grabbing a soda ran the clock. Want to print something? That might cost extra, too. If you aren’t careful, a simple research project could really add up.

That was the world of DIALOG, one of the earliest commercial online information retrieval services. Long before Google, AltaVista, or even the World Wide Web, DIALOG allowed people to search enormous collections of technical papers, patents, news, and other information from a computer terminal. It wasn’t cheap, and it wasn’t particularly easy to use. But for researchers who needed information, it was revolutionary.

Continue reading “The $50 Per Hour Search Engine” →

OSS Rigol

Newer Rigol Scopes Get A Custom Linux Firmware

Electronics test equipment is a topic near and dear to many Hackaday readers. The average reader of this article is most likely within 50 feet of a multimeter, and it wouldn’t be much of a surprise to find they own multiple oscilloscopes. [dekajoule] has been working on a new firmware for the DHO series of Rigol oscilloscopes, the OOS (Open Operating System).

The DHO series of Rigol oscilloscopes was released in 2022. This series followed the very popular 1000Z series, which we’ve featured before in hacks that unlock built-in capabilities from budget oscilloscopes. The OOS project that [dekajoule] has been working on is similar, but maybe even more exciting, as it gives you even greater control over the scope. OOS runs on the built-in SD card that comes with the DHO scopes, and better still it can run alongside the existing OS, allowing you to swap back to the original OS if you decide to. There are a few different ways to install OOS, ranging from opening up the scope and cloning the SD card to using ADB over the network.

This project is still relatively new and as such it’s only been tested on a couple of models, but if the community support for the 1000Z series scopes is any indication, there are likely no shortage of users who would be interested in getting a little more out of their scope. For those on the fence, check out the long list of features that OOS brings to the table that aren’t part of the stock OS.

A 3D Printed Pixel Clock, With A Twist

The availability of cheap addressable RGB LED strips has been a huge boon for hardware hackers, as it makes many projects far more accessible. This usually requires a lot of snipping, followed by the monotony of connecting up a bunch of fiddly jumper wires, but that’s still generally preferable to having to solder all of the LEDs individually.

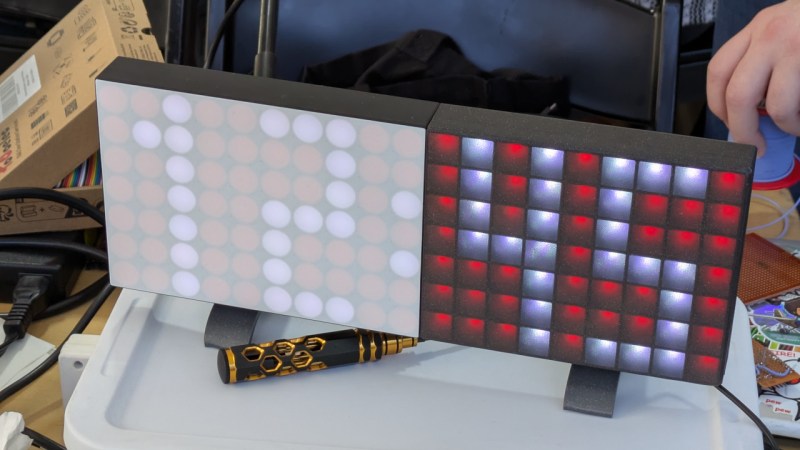
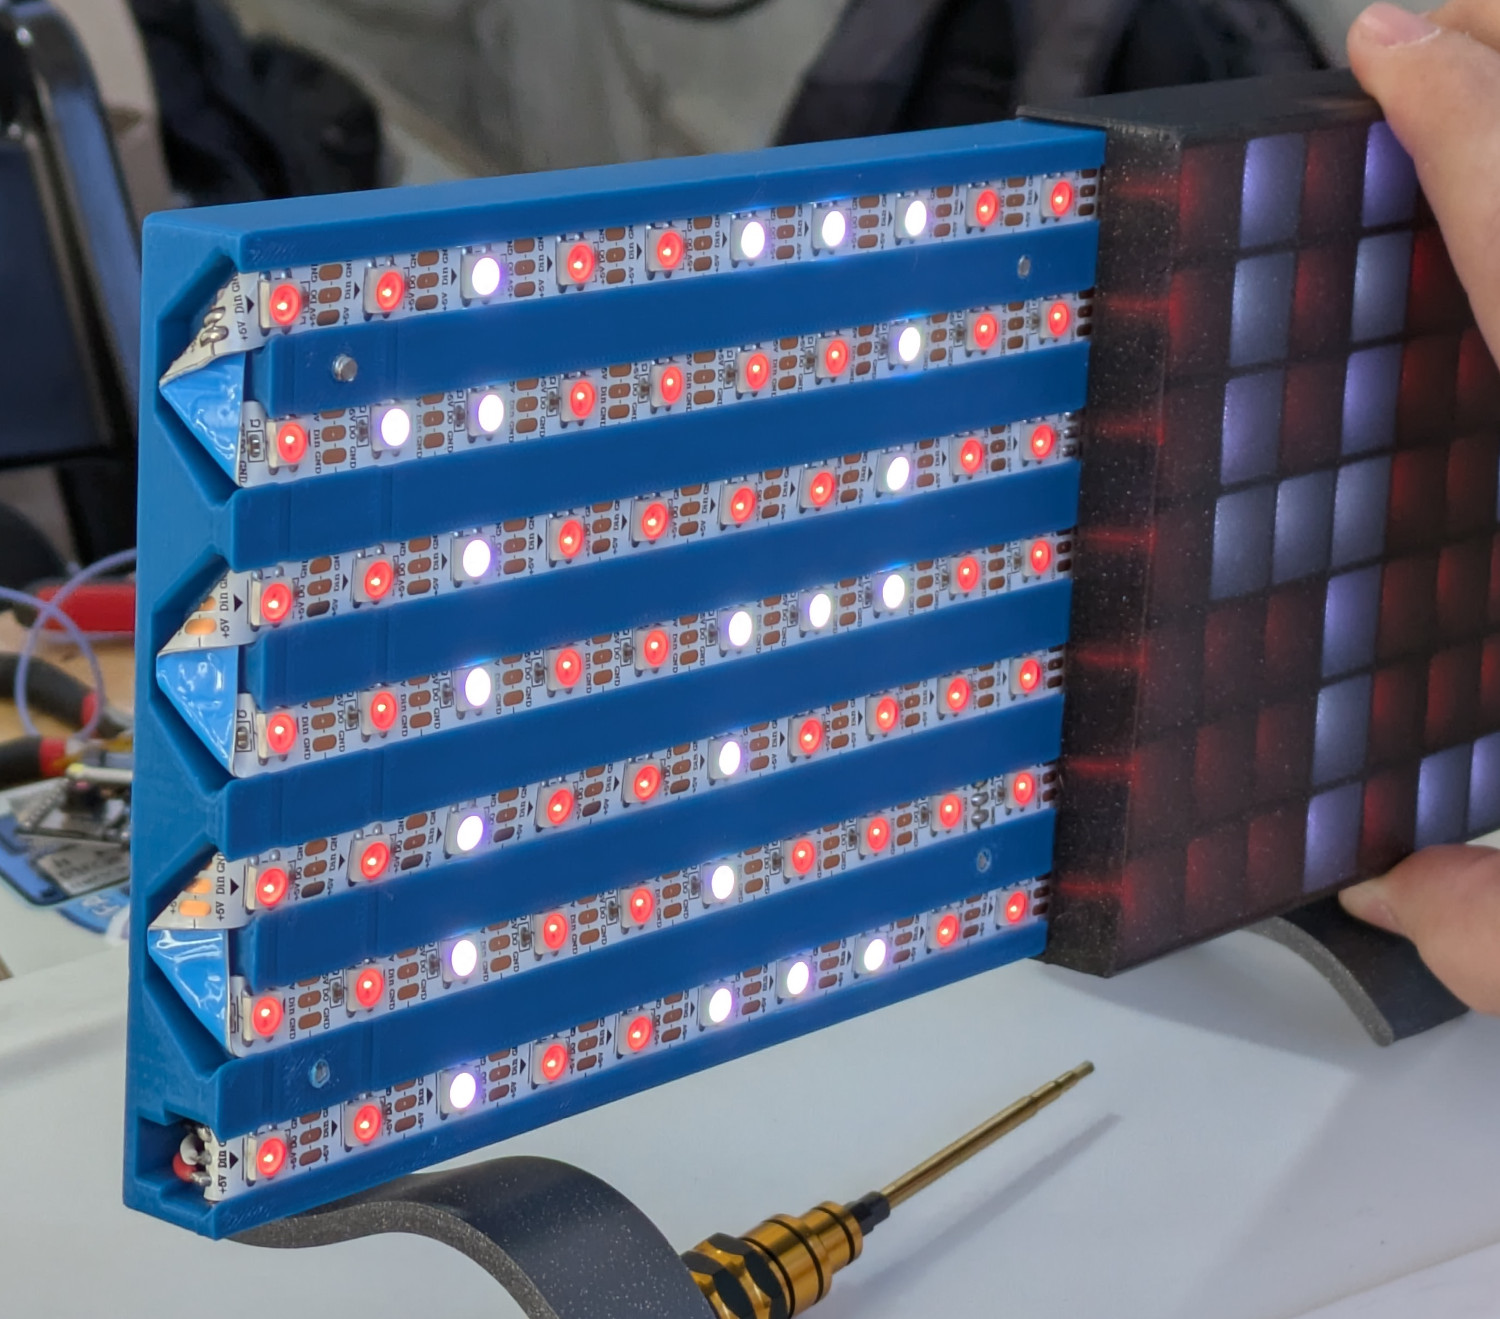
But what if you didn’t even have to do that? That was the goal of the brilliantly designed PixelClock by [Dom Dominici] — by carefully weaving a continuous 2.5 meter strip of WS2812B LEDs through its 3D printed structure, you can create a 7×19 display without any tedious manual work. Technically you do “waste” a few LEDs in the process since they’ll be on the inside of the folded strip, but that’s literally and figuratively a small price to pay for the added convenience offered by this approach.

We saw this one in person during Hackaday Supercon, and [Dom] tells us the whole idea was to make it as accessible as possible for new players. While we know there’s plenty of readers who actually enjoy the process of stripping and soldering wires, that’s not necessarily true for the average person. Of course the builder still needs to connect the end of the LED strip to the ESP32 WROOM development board that controls it, but that’s still a lot less intimating of a prospect for somebody that doesn’t breathe solder smoke on the regular.

The PixelClock is configured via a web interface running on the ESP32, so there’s nothing you need to install on your phone or computer to get it working. You can even install the firmware via WebSerial, making the build process that much friendlier.

One of the things we liked the most about the design is the printed diffuser — it might look like paper or some kind of opaque acrylic, but in actuality it’s just a couple layers of plastic. You can easily swap filament during the print to come up with different color variations, and for those that are comfortable in CAD, creating custom “pixels” is as easy as changing the shape of the individual LED compartments. Even in the bright Pasadena sunlight, the effect was impressive.

If you don’t mind cobbling together LED strips, this concept can be applied at a much larger scale.

The Fastest Paddleboard In The World

The world is full of linguistic boundaries that seem obvious during regular communication but can break down upon closer inspection. Is a pizza an open-faced sandwich? Is an ebike a motor vehicle? Are palms actually trees? Is a certain number of grains of sand a heap? Without diving too much into the world of philosophy, we might all at least agree that strapping 12 kW of motors to a paddleboard might turn it into another type of vehicle entirely, likely without the word “paddle” in its name. But either way, this is likely the fastest craft of its kind in the world.

Many other types of vessel of this type use off-the-shelf motor kits with shrouds, exposed bolts, and other drag-maximizing features. [rctestflight] has a lot of experience building custom watercraft without these downsides and figured he could put together something a little more hydrodynamic. His paddleboard incorporates two masts from a previous hydrofoil build, as well as two six kilowatt electric motors positioned at the end of each one. With some batteries in a waterproof case and a remote control to command them, the paddleboard quickly gets up on plane provided the rider is in the appropriate forward position.

For anyone familiar with [rctestflight]’s builds, you’ll know this isn’t just someone who slaps a motor onto a piece of fiberglass and tosses it into a lake. A lot of work went into this build, including some propellers that were developed during a long series of tests to find ideal propeller shapes for various applications. With all of the tuning done it travels across the surface of the water in excess of 40 kph, much faster than any other “paddle” board we’ve seen before.

Continue reading “The Fastest Paddleboard In The World” →